- Lightroom Presets
- Mobile Presets
-
Photoshop
-
Learn
-
Support
-
Install
- Best Sellers
- Blog

Have you ever found yourself in a situation where achieving perfect focus seems elusive?
Whether you're a product photographer meticulously capturing jewelry or a landscape photographer trying to incorporate foreground elements into your shots, encountering focus challenges is not uncommon.
If you've faced this issue, don't worry – the solution lies in focus stacking, a post-processing technique that allows you to extend the depth of field, a parameter often limited during the initial capture. Depth of field defines the region in an image that appears sharp and in focus, influenced by factors such as aperture settings, focal length, and subject-to-camera distance.

Focus stacking is an ideal technique to employ when the goal is to capture intricate and extensive details, as it helps overcome the limitations of a camera's depth of field, ensuring that all elements of the subject are sharp and well-detailed.
Here are a few examples of when to consider using focus stacking:
Macro photography, which involves capturing minute details of small subjects, frequently encounters challenges with depth of field. Due to the inherently shallow depth of field in macro shots, it's often impossible to keep the entire subject in sharp focus in a single shot.
This is where focus stacking shines, as it allows you to capture multiple shots of the same subject, each with a different focus point, and then blend these images together during post-processing. The final result is an image that showcases the entire subject in crisp, clear focus.

Conversely, focus stacking is equally valuable in wide-angle scenarios like landscape photography. When capturing vast landscapes with both foreground and distant elements, achieving an adequate depth of field can be tricky. The typical techniques used to maximize depth of field, such as narrowing the aperture, may not suffice and can introduce unwanted diffraction.
In such cases, focus stacking again proves its worth by enabling you to capture a series of shots with different focus points throughout the scene. This comprehensive approach ensures that the nearby foreground features and the distant elements are captured in sharp focus, resulting in stunning, well-balanced landscape photos.

Focus stacking is not a complex technique, but it is a process that requires careful consideration right from the initial photoshoot. And planning is critical to its success. Additionally, the post-processing involves steps in both Lightroom and Photoshop.
No need to worry, though. Here's a detailed step-by-step guide that will seamlessly lead you through the entire process.

If you plan on doing focus stacking, it's essential to start by capturing a series of images. These images must be taken from precisely the same perspective and maintain consistent framing and lighting conditions. To achieve this level of precision, follow these steps:
1. Tripod and Manual Mode: Secure your camera on a sturdy tripod and switch it to manual mode. This setting ensures that no unintentional alterations occur between shots.
2. Exposure Setup: Now you're ready to take the photos. Begin by determining the appropriate exposure settings for your scene.
3. Focus Bracketing (If Available): Some cameras feature a focus bracketing option. If your camera offers this functionality, activate it. Configure the number of shots required and specify the incremental shift in focus between each shot. Once these settings are in place, simply press the shutter button, and your camera will automatically handle the rest.
4. Manual Focus (No Focus Bracketing): For cameras WITHOUT FOCUS BRACKETING, you can do it manually. Simply set your camera to manual focus. Then, focus on the point closest to the camera and capture an image. Next, carefully adjust the focus ring to move the focal point slightly further away and take another shot. Repeat this process until you have covered the entire range, from the closest to the farthest point in your composition.
5. Determining Number and Spacing: The number of images you capture and the distance between each focal point depends on the depth of field you wish to achieve and how much of your image you want to be in focus. Remember that the depth of field is influenced by factors like aperture setting, lens choice, and subject-to-camera distance.
These initial steps during the photo shoot will lay the foundation for the rest of the focus-stacking process.

With your set of images ready, it's time to move on to post-processing, starting in Lightroom. Here's how to proceed:
1. Import Your Image Set: Begin by importing the collection of images you intend to stack into Lightroom. It's crucial to keep them organized within the same folder or collection for efficient management.

2. Optional Editing: If you wish to make any enhancements or adjustments, you can tackle them at this stage. For instance, you can fix the white balance or straighten the horizon.
Make sure you do the same edits for all the images in your set. Luckily, Lightroom makes this process very efficient with batch editing. After editing the first image to your satisfaction, select all the photos in your set by clicking on the first image and then holding the Shift key while clicking on the last image. Once they are all selected, press the Sync button in the lower-right section of the Develop Module.

Alternatively, navigate to the menu and select Edit>Select All. Then, click on the Sync button. Check the boxes corresponding to all the edits you made in the window that pops up. This ensures that all the images in your set receive an identical editing treatment.

3. Layering in Photoshop: With all the images in your set selected, go to the menu and choose Photo>Edit In>Open as Layers in Photoshop. As the name suggests, this action will open all the selected photos in a single Photoshop document.
Each image from your set will occupy a separate layer, with the topmost layer representing the first photo captured and the bottom layer corresponding to the final image in the sequence. Note that this process CAN take a while, depending on the number of images being stacked and the file size of each photo.

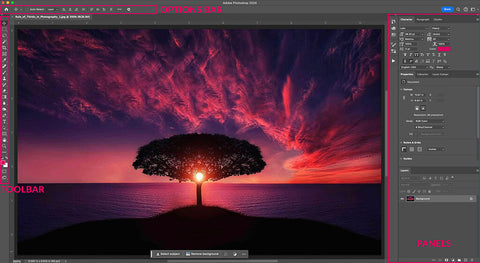
The final part of the process takes place in Photoshop. Once Photoshop is open, you will see a single tab displaying the name of one of the images in your set. Don't worry, though; all your images will be there. To access them, open the Layers Panel.
1. Enable the Layers Panel: To activate the Layers Panel, navigate to the menu and click on Windows>Layers, or press the F7 key (shortcut) on your keyboard.

2. Select All Layers: Select all the layers in your document. To do this, click on the topmost layer, then hold down the Shift key and click on the last layer.
3. Align Layers: Once all the layers are selected, navigate to the menu and choose Edit>Auto Align Layers. This action opens a dialog box. The default selection should be "Auto," which is the first option. Ensure that this is selected and click OK. A window with a progress bar will appear as Photoshop aligns your images.

4. Auto Blend Layers: Once the alignment process is complete, keep all the layers selected, and go to the menu Edit>Auto Blend Layers. In the dialog box that opens, choose "Stack" as the blending method. I like to keep the "Seamless Tones and Colors" and "Content Aware Fill Transparent Areas" enabled for best results. However, you can uncheck these options if you prefer not to use them. Click OK to proceed.

5. Review and Refine: After Photoshop completes the blending process, you will be presented with an entirely focused image. Importantly, this process is non-destructive, meaning you can access the Layers panel to see that each individual image is still present. The difference is that each layer now has a mask that reveals only the portion of each photo that's in focus.
To ensure the blend is flawless, zoom in and carefully inspect the image for errors. If there are, you can fix them using Photoshop's Heal and Clone tools working on the merged layer. Alternatively, you can revisit each individual layer and refine the mask to ensure perfect focus.

6. Save or Flatten: At this stage, you can choose to save the file with layers IF you anticipate making future adjustments. Otherwise, you can flatten the image before saving it to save space on your hard drive.
7. Further Edits: If desired, you can continue making edits within Photoshop. Otherwise, you can open this final image in Lightroom for further adjustments or to apply presets.
Focus stacking is not just a technique; it's a game-changer for photographers seeking to capture the world in unprecedented detail.
While it may demand careful planning, precise execution, and post-processing finesse, the rewards are undeniable. With focus stacking, you can move beyond the limitations of conventional photography, revealing intricate details and sweeping vistas with breathtaking clarity.
Remember that mastery comes with practice as you embark on your focus-stacking journey. The more you explore and practice this technique, the easier it will get. So, don't be deterred by initial challenges; embrace them as stepping stones toward creating images that truly stand out!
Do you have any questions or comments about Focus Stacking? Leave us a comment below - we would love to hear from you! And PLEASE SHARE our tutorial using the social sharing buttons (we really appreciate it)!


Comments