- Lightroom Presets
- Best Sellers
- Mobile Presets
-
Photoshop
-
Learn
-
Support
-
Install
- Blog

Did you recently purchase an amazing collection of Photoshop overlays from Pretty Actions that you want to start using using them? Well you have come to the right place because we are going to go over how to install the overlays so you can start using them right away!
Very Important Note: Overlays are image files themselves and work by placing over an image you are already editing to create a particular effect - like adding a beautiful sky, bubbles, fairy wings and more. Because overlays are images files, they are not actually installed in Photoshop - and just need to be stored on your computer in a place you can easily recall when you want to use them.
1. Find and move your overlay download - after downloading your new overlay collection, you will want to save the download folder on your computer so you can find it and use it when needed. Usually you can find this download folder in your Recent Downloads area on your computer (you may need to unzip this folder to open). Once you find your overlay folder, right click on it and select "Move" or "Copy" and move it to a place on your computer that you can easily find later.

2. Open the image that you want to use in Photoshop. This will be the image that you want to apply the overlay to.
3. Navigate to your top menu bar and select: File>Place. Your overlay will automatically appear as a separate layer in your Layers Panel and it will be "placed" on top of your image.
4. Adjust and move the overlay around the image or make it larger or smaller if needed.
5. Press "Enter" to lock your overlay in place.
6. Change the Blending Mode in your Layers Panel to "Screen" by clicking on the Blending Mode drop down menu.

7. Adjust the layer opacity to further refine your overlay application.
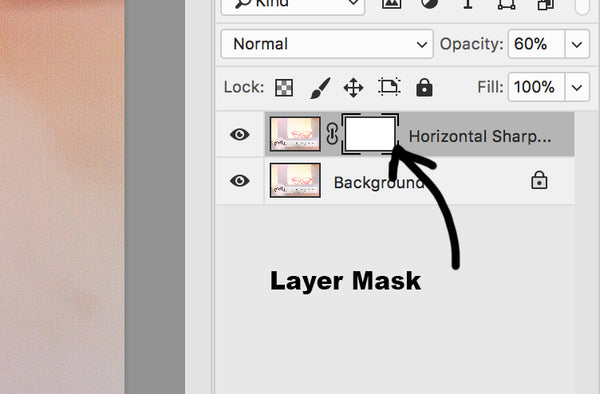
8. You can also selectively erase or clean up parts of the overlay on your image where you may not want the overlay to show through by using your Layer Mask. To do this, make sure your Layer Mask is selected in the Layers Panel. Then select your Paintbrush Tool in the Tools Panel and make sure black is the foreground color. Now Paint anywhere on your image where you wish for the overlay to be erased.

You may want to change the color of your overlay once its applied for a custom look (especially if its a graphic overlay or even fairy wings). Learn how to color overlays in Photoshop here.
Thanks for stopping by to find out how to install and use your Photoshop Overlays. We love creating and bringing you amazing new Photoshop Overlays, it's kind of our thing!