- Lightroom Presets
- Best Sellers
- Mobile Presets
-
Photoshop
-
Learn
-
Support
-
Install
- Blog
By Anna Gay on | No Comments

In order to achieve sharp focus on your images, you can set the focusing mode on your lens to manual focus. Manual focus is not ideal for ALL situations, but if you have a subject that is relatively still, you can use this mode to achieve tack sharp focus.
Here are a few example scenarios where manual focus can work to your advantage, and why it can be so effective. First, though, let’s look at how to set your lens to manual focus:
Your lens setting for Auto or Manual is on the lens itself, not within the interface of your DSLR.
The image below is a Nikon lens, with “M” denoting Manual and "M/A" denoting Autofocus. On a Canon lens, the letters are "MF" for Manual Focus and "AF" for Autofocus (or sometimes just "M" or "A" respectively.
Make sure your lens is set to Manual focus.
The component in the image below labeled “Focusing Ring” is just that – a ring on the outside of your lens which turns clockwise and counterclockwise to focus.
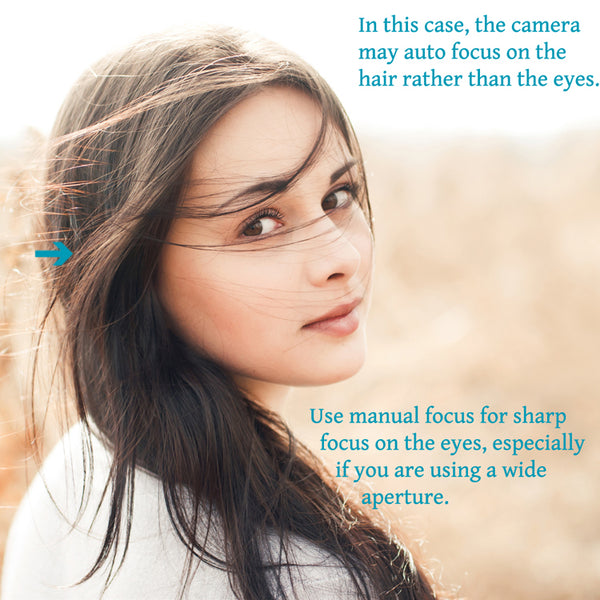
Have you ever photographed someone at f/1.8, and while the image looked sharp on your LCD screen, once you opened the image on your computer, your subject’s eyes were slightly out of focus but their nose was perfectly sharp?
This is a classic autofocus issue that happened to all of us at one time or another.
The reason why this happens is simple: your lens and camera are focusing on what is CLOSEST to the lens itself. Naturally, your subject’s nose, chin and forehead will be ever-so-slightly closer to the lens than their eyes – we’re talking millimeters here, but it is still enough to throw off the focus in your image.
Using manual focus is the best way to prevent this from happening and ensure that your focus is exactly where you want it. This is especially true if you are using a wide aperture.

Manual focus is absolutely perfect for macro photography. Since macro photography tends to be still life, you will have plenty of time to compose your shot and get your focus just right.

Landscape photography is another great opportunity to play with manual focus, and if you are using a tripod, even better. Using a tripod ensures that your focus will stay locked in place when you press the shutter.

Manual focus can feel a bit tricky and time-consuming at first. But I guarantee that with just a little bit of patience and practice, you will be hooked on the razor-sharp results.
When you first start, try finding subjects that move very little, and as you get more comfortable with manual focus, you will be more able to photograph subjects on the move.
Do you have any questions or comments about Using Manual Focus for Sharper Images? Leave us a comment below - we would LOVE to hear from you! And PLEASE SHARE this post using the social sharing buttons (We really appreciate it)!


Anna Gay is a portrait photographer based in Athens, GA and the author of the dPS ebook The Art of Self-Portraiture. She also designs actions and textures for Photoshop. When she is not shooting or writing, she enjoys spending time with her husband, and their two cats, Elphie and Fat Cat.

Comments