- Lightroom Presets
- Best Sellers
- Mobile Presets
-
Photoshop
-
Learn
-
Support
-
Install
- Blog

In today's post, I will show you how to combine everything you have learned so far to help achieve better photos!
Remember that the perfect amount of light has to hit your sensor to get an ideal exposure.
Using Aperture, Shutter Speed, and ISO (together referred to as the Exposure Triangle), you control how much light hits your camera's sensor. We talked about these in our last three posts, so hopefully, this is not new terminology for you (if they are, go back and read the previous tutorials).

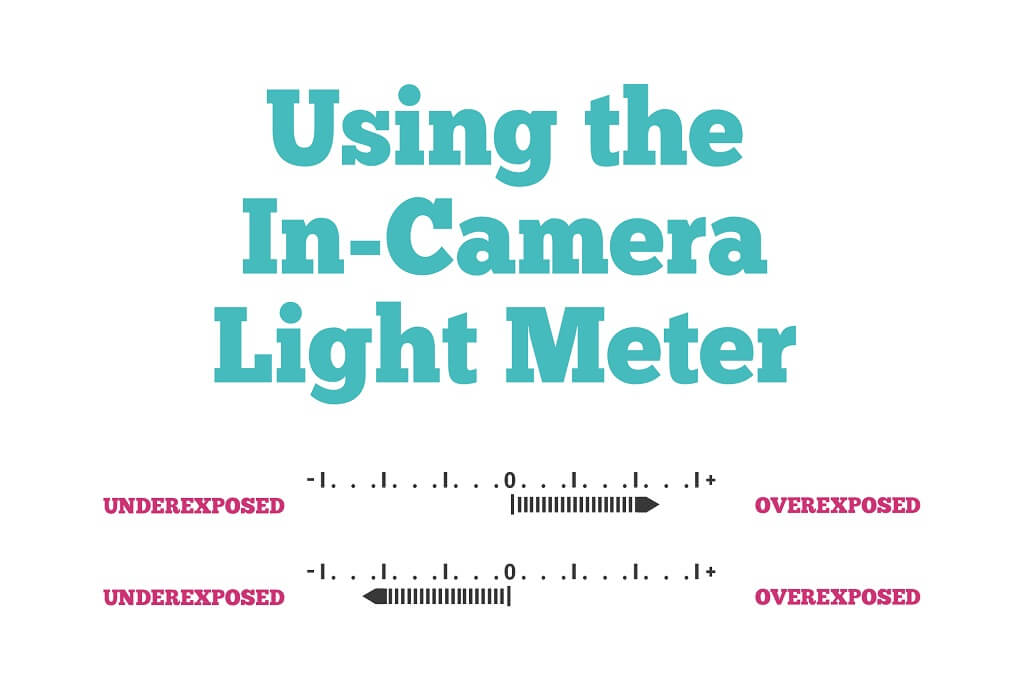
Make sure you use your in-camera light meter to help get an ideal exposure. Your light meter will look something like what's shown in the photo below and will tell you if your aperture, shutter speed, or ISO is out of balance.
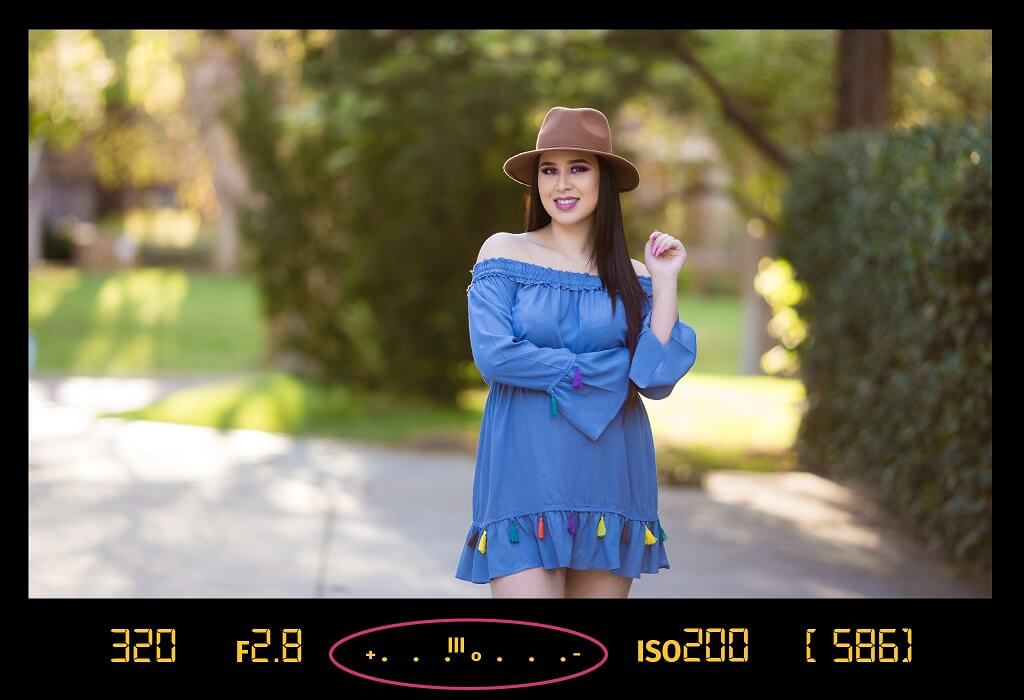
To get good exposure, the goal will be to get your light meter BALANCED IN THE CENTER.
Let’s say you are outside taking photos of your children and want the background nicely blurred (shallow depth of field), so you open your aperture to f/3.5.
The last time you took pictures, your shutter speed was set at 1/60th of a second. As you look at the light meter in your camera's viewfinder, several lines are moving toward the plus sign. This should tell you that you have too much light coming into the camera.
To keep this in balance, you must decrease the time your shutter stays open. So turn and increase the shutter speed until the light meter becomes more balanced. In this case, the shutter speed is now 1/500th of a second, and everything is balanced for your shot.
You could have also taken your photo with an aperture of f/10 and a shutter speed of 1/60 since it would have been an equivalent exposure. You would have had the same nicely exposed image. However, the photo you would end up with would be much different - primarily, the background would not have been as blurred as you may have wanted.

Don't miss the rest of our series to help you Master Manual Mode. If you missed any of these posts, you can read/review them anytime by clicking these links!
Day 1. Why Shoot in Manual Mode
Day 2. How to Use Your Camera's Light Meter
Day 3. Aperture for Beginners
Day 4. Shutter Speed for Beginners
Day 5. ISO for Beginners
Day 7. Practicing Your Way to Manual Mode Perfection
Bonus: free downloadable Mastering Manual Cheat Sheet for use on the go!


Comments