- Lightroom Presets
- Best Sellers
- Mobile Presets
-
Photoshop
-
Learn
-
Support
-
Install
- Blog

Yesterday we talked about how your camera's Aperture works. Today, we will focus on the second of the three essential elements that make up the all-important exposure triangle: Shutter Speed - a crucial setting to understand and use properly if you want to take great photos.

Shutter speed is another way to let light into the camera and is a little more straightforward than aperture. The shutter is what makes the “clicking sound” when you press the button to take a picture. Think of it like a little curtain in your camera body that opens to let light in and then closes to stop the camera from recording more light.
The speed at which the shutter opens and closes determines how much light the camera records. Shutter speed is measured in seconds and is typically shown as 1/30, 1/60, 1/125, 1/250, 1/500, etc. For example, a shutter speed of 1/500 will open and close the shutter in one five hundredths of a second.
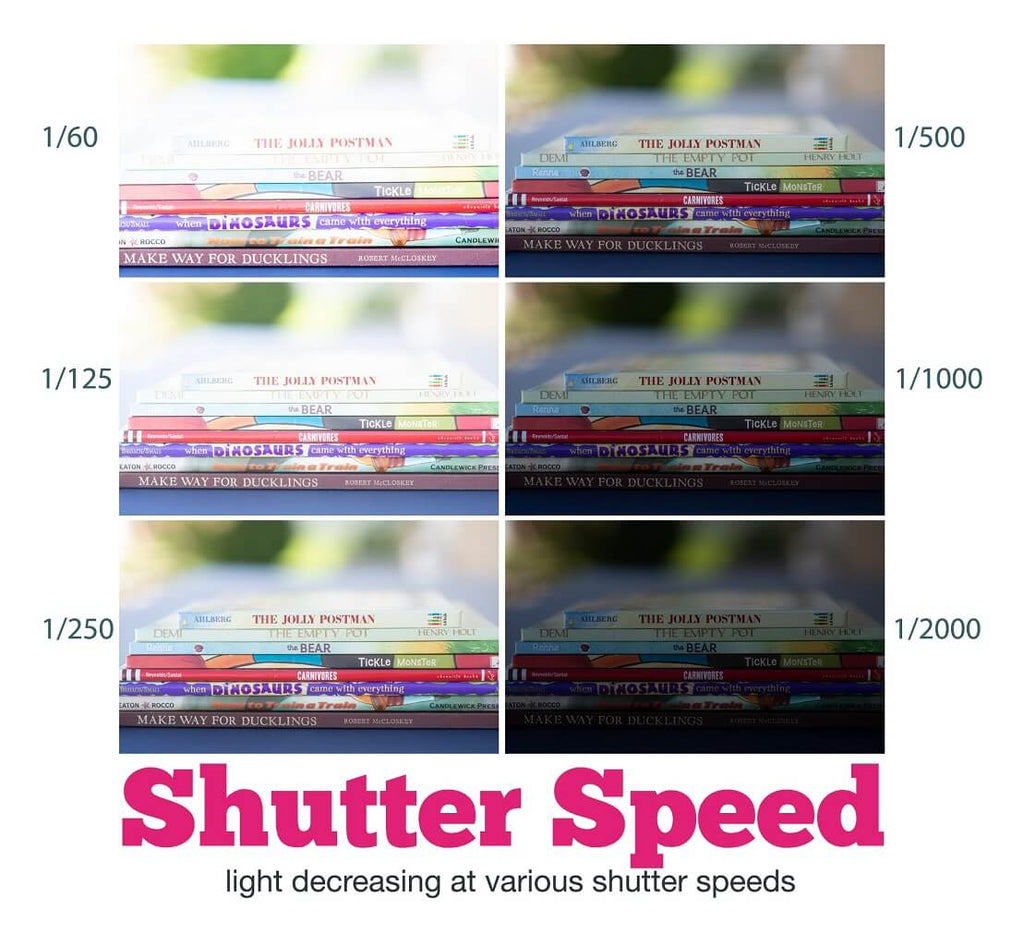
As you can see in the following example, I photographed the same subject six different times while ONLY adjusting my shutter speed setting for each photo.
Notice the slower shutter speeds, here starting at 1/125, allow for more light to enter the camera than the faster shutter speeds.
The fastest shutter speed demonstrated in the example below is 1/4000, which allows very little light to enter, resulting in a very dark exposure.
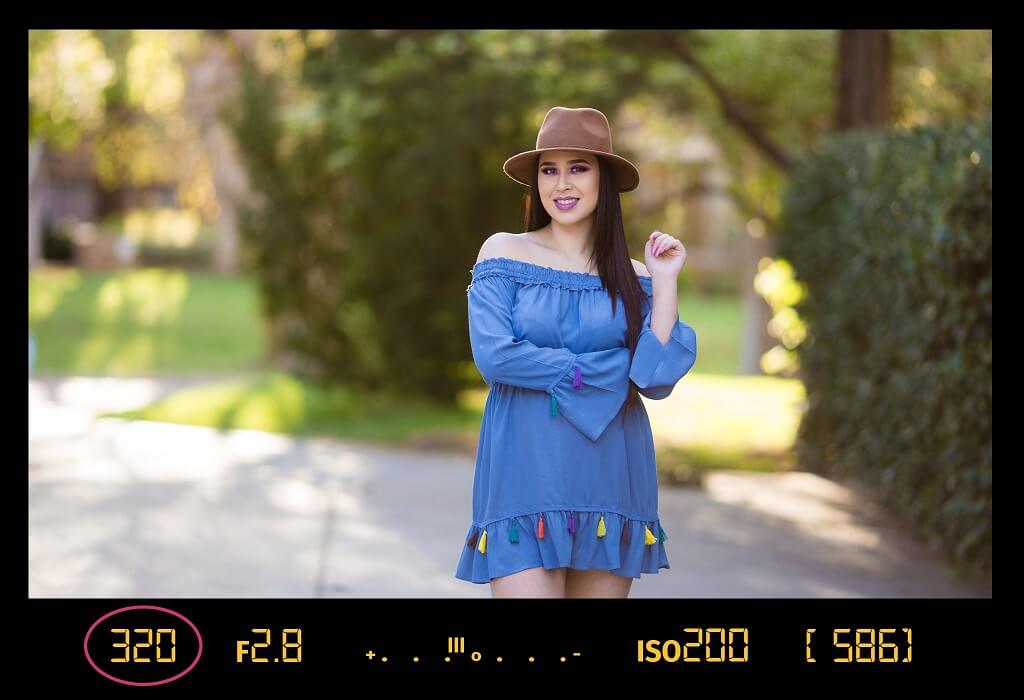
Tip: It is helpful to know that cameras often abbreviate these numbers in the viewfinder. For example, your camera may show 1/100th of a second by just displaying 100 in the viewfinder.
Shutter speed is also used to control the amount of motion in a photograph:
The infographic below is an excellent reference to help you remember which shutter speeds allow more or less light into the camera, which shutter speeds can cause blur or are suitable for freezing action, and which shutter speeds need a tripod or can be shot while hand-holding your camera.
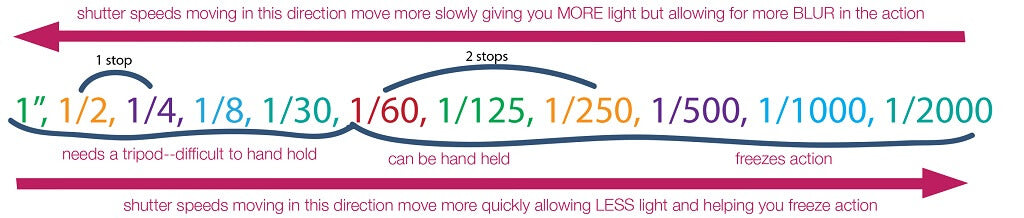
You can determine the best shutter speed to use based on the subject you are shooting and the available light.
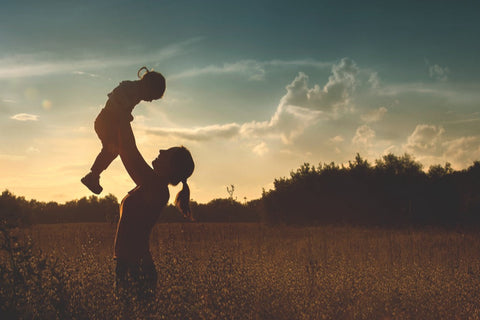
For example, when photographing children, I try not to go below 1/125 or 1/250. And when I'm trying to capture a person in mid-air, I will use a very fast shutter speed of at least 1/1000.
Hand-holding a camera while shooting at slow shutter speeds WILL usually cause blur. So when photographing hand-held, I try not to let my shutter speed fall below my focal length number. For example:
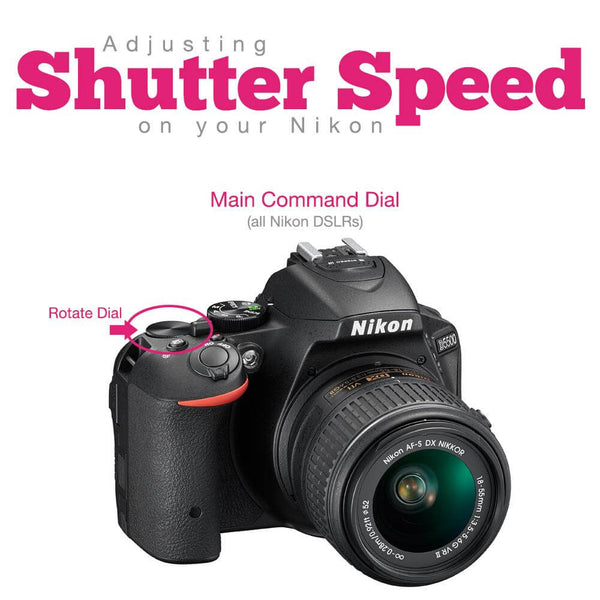
To set your shutter speed on a Nikon Camera, first, make sure your camera is in manual mode. Next, depress the shutter release button until the meter is activated, and then, using your thumb, rotate the Main Command Dial.
To set your shutter speed on a Canon Camera, first, make sure your camera is in manual mode. Next, depress the shutter release button until the meter is activated, and then using your index finger, turn the main dial on the top of the camera.

In this first example, let's say you are photographing your child outdoors. They are running around playing, and you will ONLY have a split second to get the shot.
To ensure a sharp image, you will need to set your shutter speed at 1/500 or higher. All of your other camera settings should be adjusted around this one.

In the next example, let's say you are photographing a carnival ride at your local fair and want to capture its movement by allowing the ride's beautiful lights to be blurred in your image.
In this case, you will need to choose a SLOW shutter speed (around 1/30 or even slower - around 1 second). Then set up a tripod to keep the shot still and allow the slow shutter speed to blur the lights and motion.

Don't miss the rest of our series to help you Master Manual Mode. If you missed any of these posts, you can read/review them anytime by clicking these links!
Day 1. Why Shoot in Manual Mode
Day 2. How to Use Your Camera's Light Meter
Day 3. Aperture for Beginners
Day 5. ISO for Beginners
Day 6. Perfect Exposure: Putting it All Together
Day 7. Practicing Your Way to Manual Mode Perfection
Bonus: free downloadable Mastering Manual Cheat Sheet for use on the go!


Comments