- Lightroom Presets
- Best Sellers
- Mobile Presets
-
Photoshop
-
Learn
-
Support
-
Install
- Blog

There are many methods to create a composite photograph. Some tutorials are much more in-depth and require expert Photoshop skills. This is not one of those tutorials.
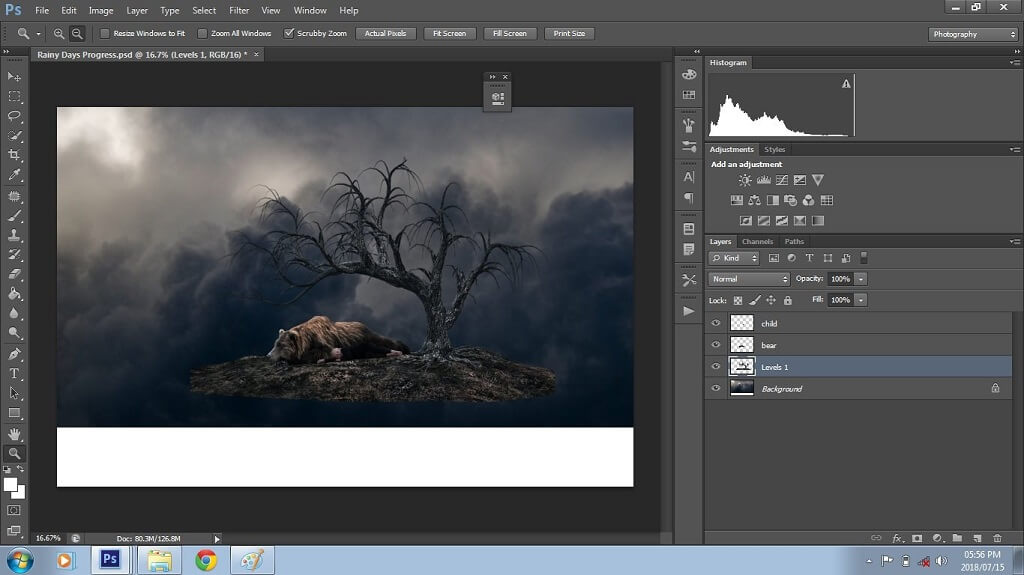
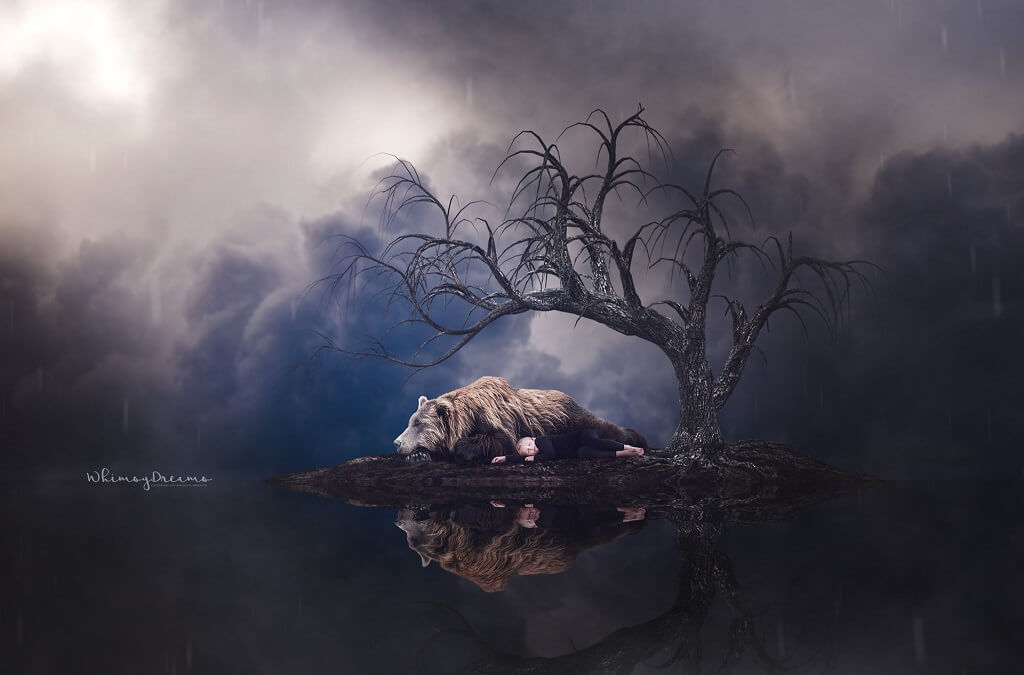
In this Photoshop Composite tutorial, I will be sharing the few easy steps I used to create this magical and surreal composite I called “Rainy Days,” illustrated below:

As a Fine Art Photographer based in Johannesburg, South Africa, I delight in utilizing the inherent charm of my surroundings. All my sessions take place on location, drawing inspiration from the captivating outdoors. My passion for conjuring whimsical dreamscapes is a direct result of a profound love for the natural world.
I specialize in child and pet portraits and am greatly inspired by all my subjects. I attempt to bring my imagination to life, illustrating something extraordinary and emotive, portraying childhood innocence. When working with imaginative children, I use my creativity and skills to create composites to bring their imaginings to life too.
My fascination with composite photography was sparked primarily by its creative possibilities. However, my initial embrace of this technique was also driven by a desire to overcome challenges I encountered as a natural light photographer, including unfavorable weather conditions and uninspiring locations.

A composite photograph merges multiple distinct images or stock photos into a unified composition. Compositing is becoming an increasingly popular way to create both natural and fantastical visuals; your only creative limitation is your imagination.
You can use your own photos or stock images purchased online or a combination - there is no right or wrong way to do a composite. To me, Photoshop composites are Art, and Art is subjective!

However, there is a downside to composite photography. Composites generally require much more work at the computer than an ordinary portrait and can be time-consuming. So, when clients request composite photographs, you should charge them a higher price for all your extra work.
If your intention is not to market or sell composites, I encourage you to use this technique personally and enjoy the digital creative experience.
As mentioned before, “your only limitation is your imagination.” Composites can be extremely fun and emotionally rewarding; they allow you to bring your imagination to life. I want to encourage you with these words “If you can imagine it, you can create it.”

When creating a new composite, I typically follow a set of initial preparatory steps. These steps are aimed at enhancing the composite creation process. I will be sharing each of these steps with you in detail:

Seek out inspiration and engage in creative brainstorming. Put your ideas on paper with some initial sketches. Aim for the extraordinary because the realm of possibilities for composites knows no bounds.
A notable instance of my own inspiration for this "Rainy Days" composite came from a quote on Pinterest. The quote said, “I’ll stand with you in the pouring rain, even though I know I could be dry, that’s what happens when you love someone, your happiness just doesn’t mean as much without theirs – JmStorm.”
Here's where the fun truly begins. The images you need can come from photos you have already taken. However, your photography skills need not limit your imagination.
I suggest exploring stock images if you don't have the photos you need to create your composite. An extensive array of stock photos are accessible online, available for purchase or free download from many quality stock image websites and photographers across the globe.
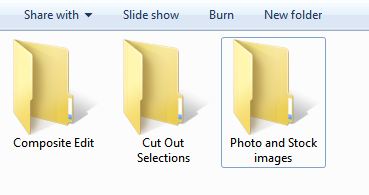
In preparation for a new composite, I recommend creating a separate folder where the photo and stock images will be stored. In other words, create a folder with the name of your composite and then create subfolders, as shown below. This process provides quick and easy access to your photo and stock image selections.
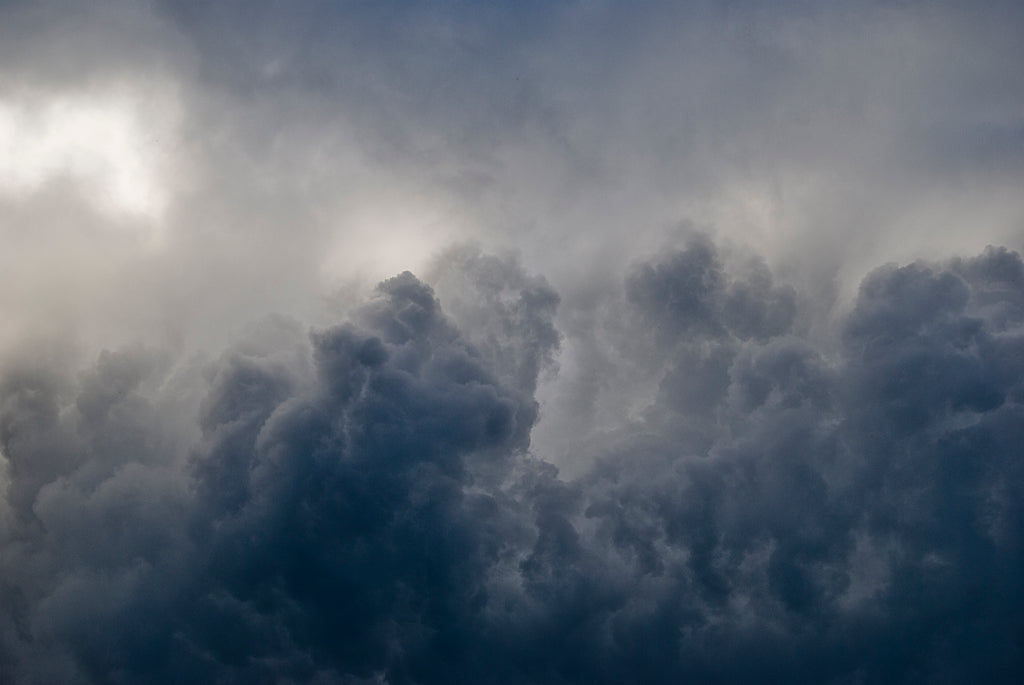
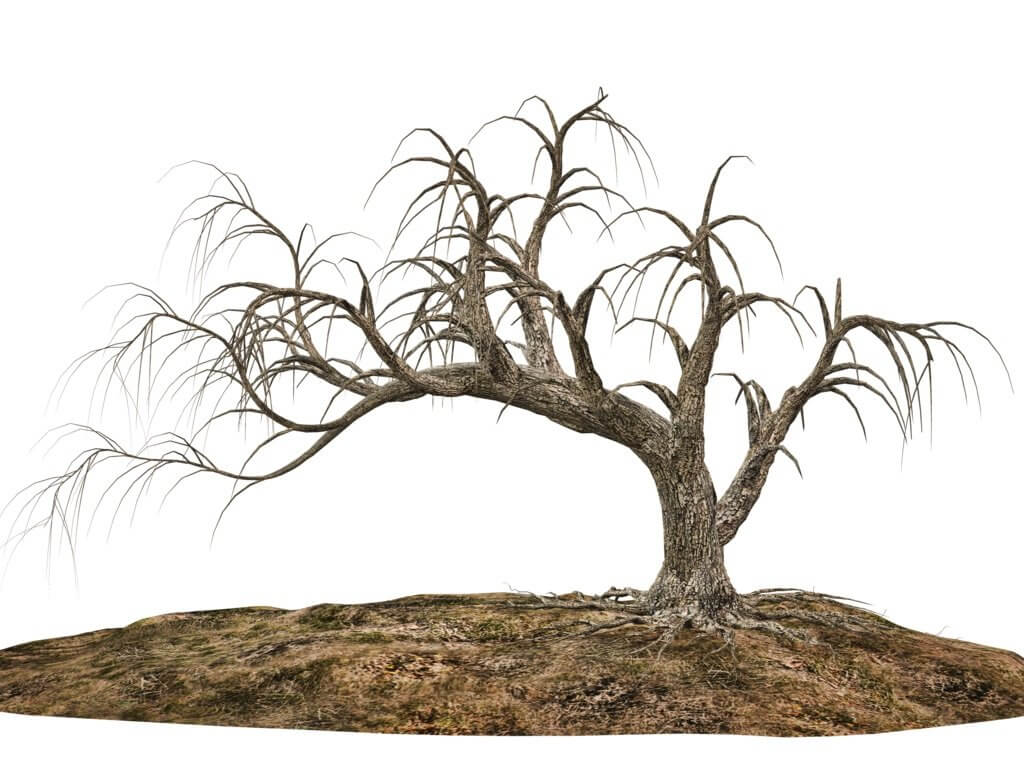
The stock images I selected for my composite were a bear, dark gloomy clouds, and a leafless tree, as shown below:

I often incorporate models into my composites. Once you decide on your concept and assemble the necessary images for your final composite, you can proceed to dress and pose your model to fit within your artistic vision.
I enjoy utilizing my own model photographs to add a personal touch and capture the magic of childhood in my composites. Nevertheless, the realm of compositing offers vast possibilities, and it is not a prerequisite to have your own model. Even without a dedicated model, you can artfully combine various elements to create your own unique brand of enchantment.
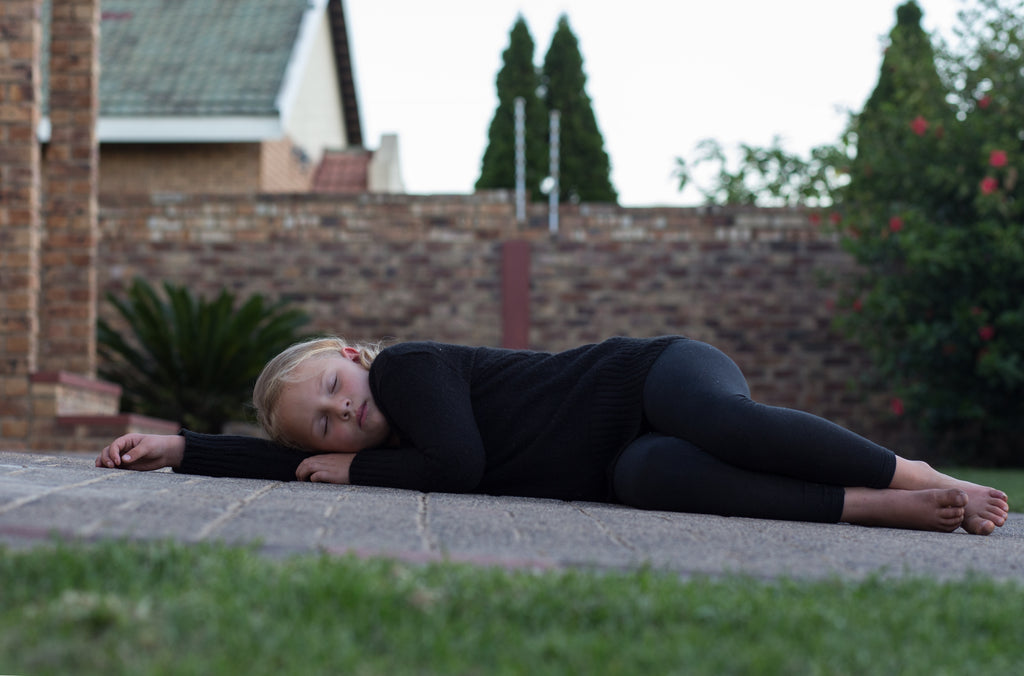
For this composite, I posed my subject in a sleeping position.
Once you have your concept, images (stock/photos/backgrounds), and subject in place, you should proceed with removing the subject from the background in Photoshop (sometimes called "subject extraction" or "background removal") or color and exposure adjustments for each image.
I usually start with subject extraction.
This process is only required if you have images where you need to remove any background elements. Some stock images available for purchase come in the form of PNG files that feature already removed backgrounds.
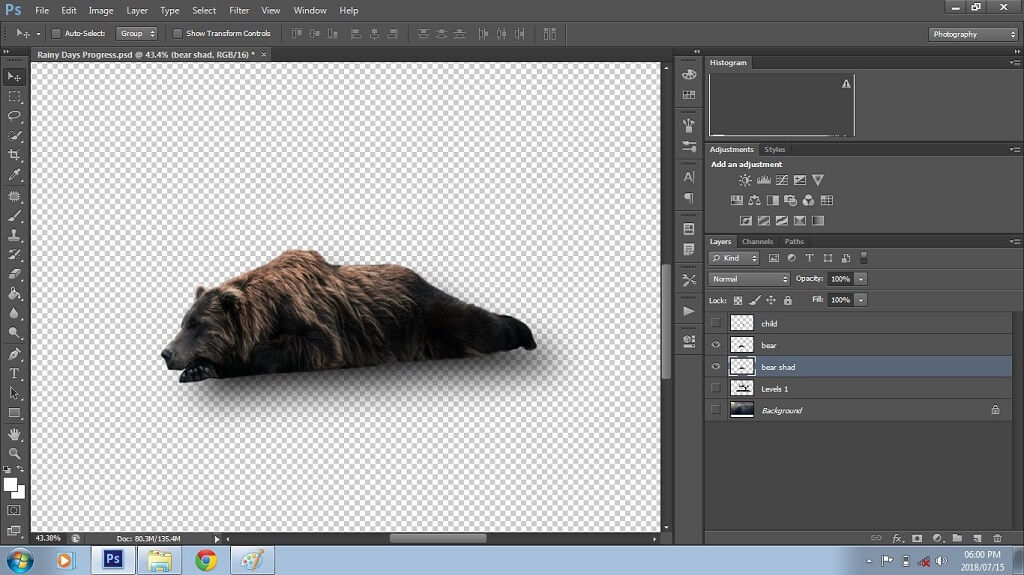
In the case of my “Rainy Days” example composite, both the bear and child required that I remove them from their backgrounds. The tree and sky were both ready-made PNG files. Both these files only required exposure, saturation, and color balance tweaks.
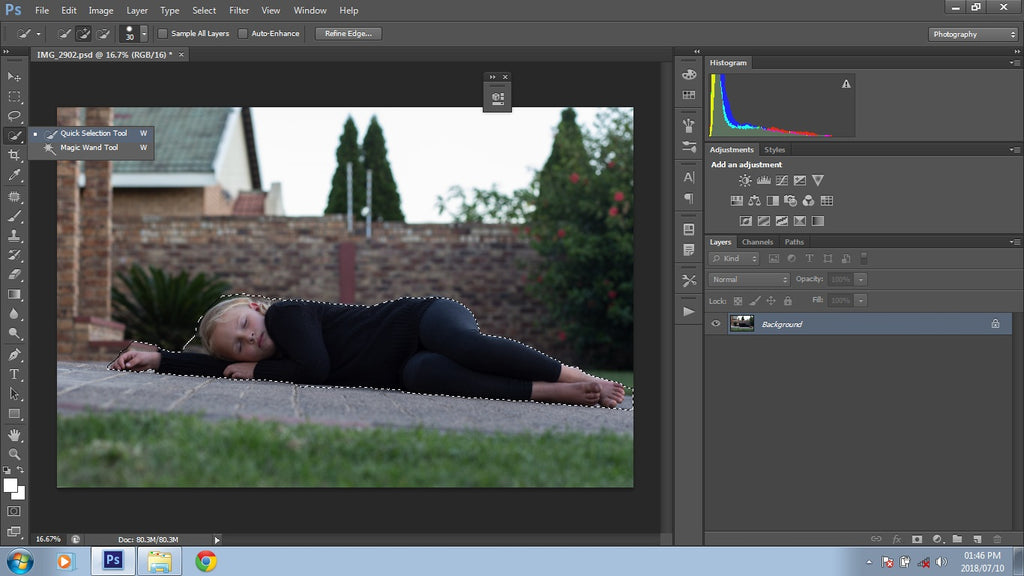
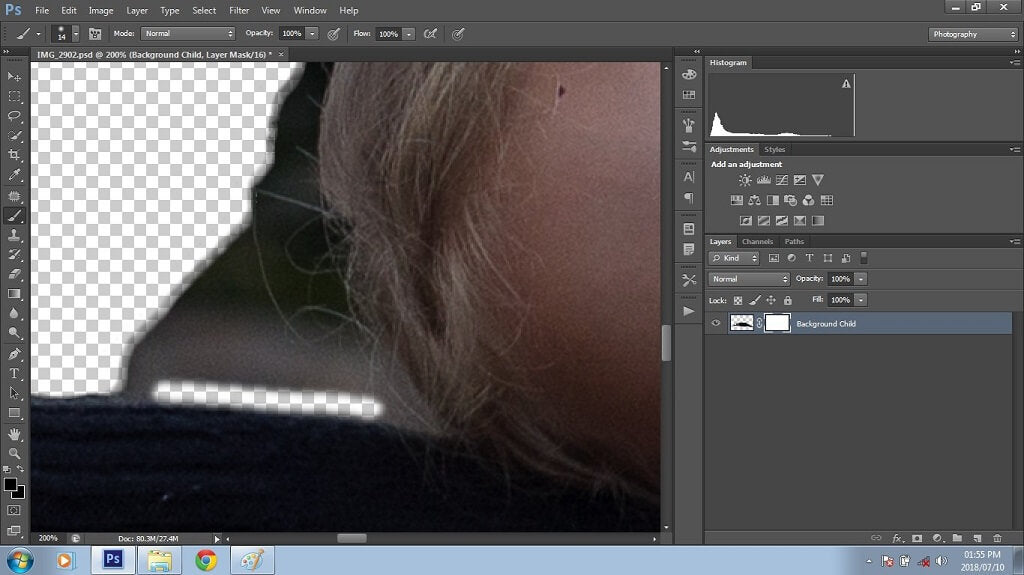
In Photoshop, I opened the sleeping child image, chose the Quick Selection Tool, and selected only the child, as illustrated below. This is the only component of the image I needed for the composite.
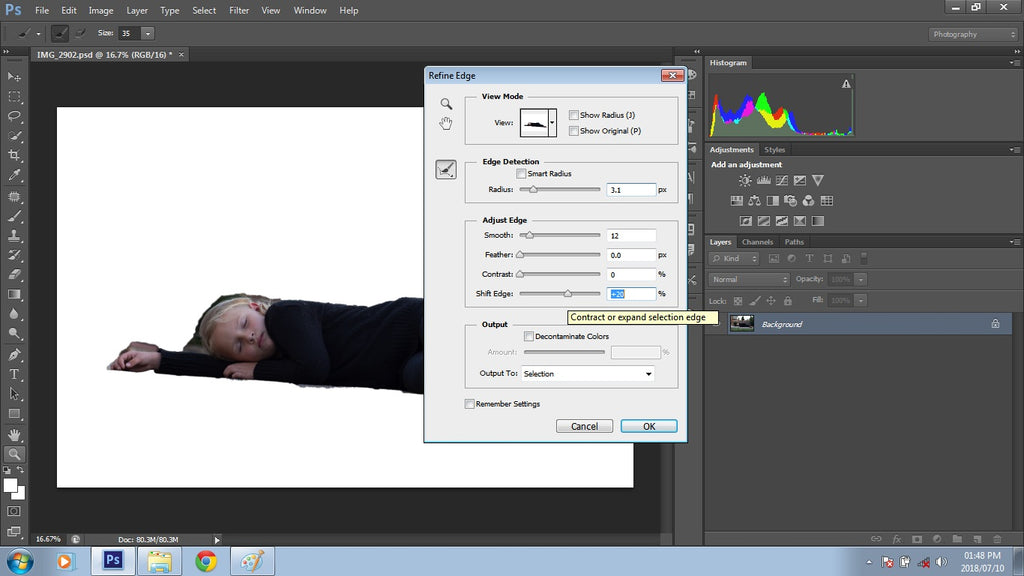
Once I was satisfied with my initial selection, I decided I wanted to refine it even more:

The options that open up will allow you to refine your selection and make it as accurate as possible. Your selection will rarely be 100% perfect, and that is okay. My selections in this panel usually look similar to the settings shown below:
As you can see, my selection has included pieces of the background—nothing to be concerned about this early on in the process.
Once I made my adjustments, I hit okay. Now my subject has been selected. I then right-click again and select “Layer via Cut.”
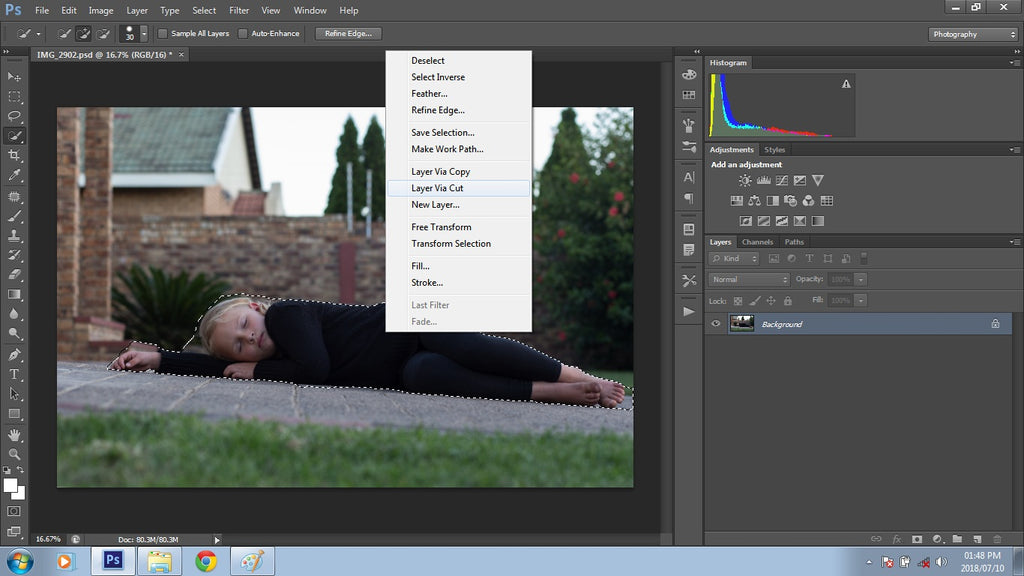
By selecting this option, you will cut out your selection from the background, and it will become a new layer on top of your background layer. Usually, I delete the original background layer as I no longer need it. Because the selection has been copied to a new layer, you can work on your selection separately.
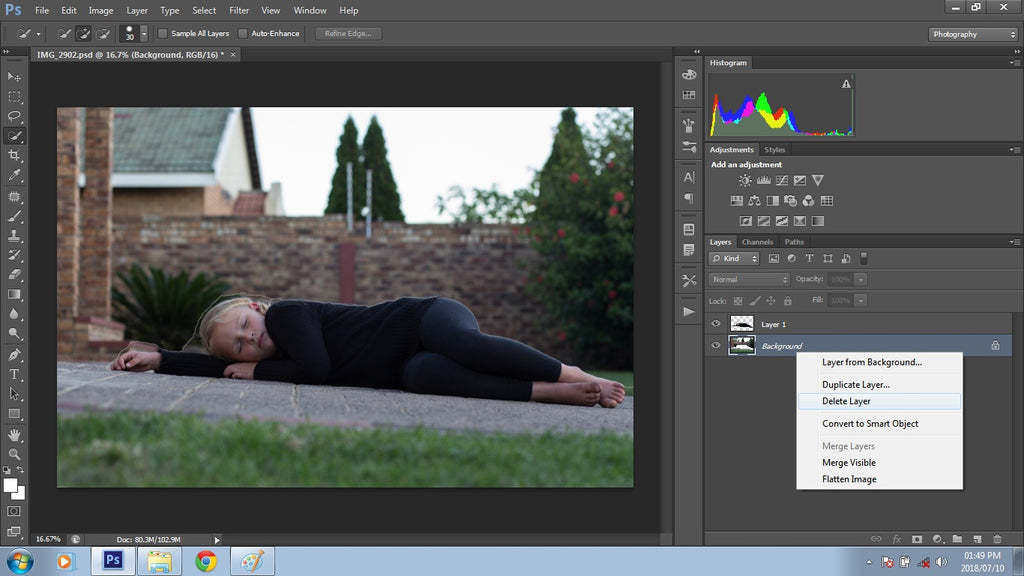
Now that I have the selection on its own layer, I rename it accordingly so I can keep track of which layer is which
Next, I like to clean up my selection even more. To do this, I add a mask to the layer by clicking on the Vector Mask tool at the bottom of the Layers Panel in the Layers window (shown below):
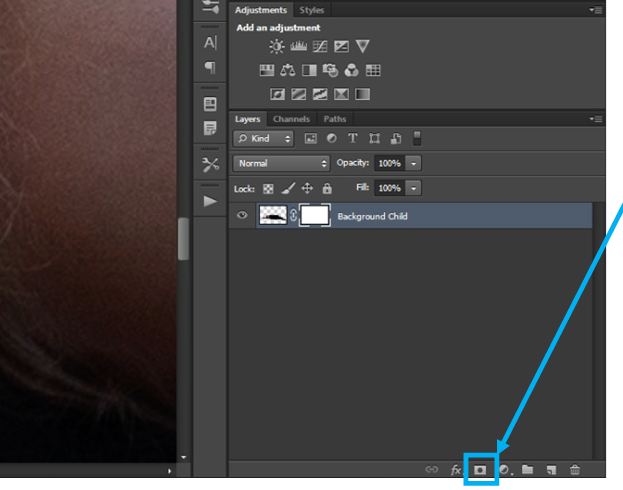
Then, I select the brush tool and ensure the foreground is black, as I will mask off the excess selection. Using the brush tool and a fair amount of accuracy, I zoom in and gently remove all the excess edges by clicking and dragging, as shown below.
If I make a mistake and accidentally mask off something I want back in my image, I can fix it by changing the foreground color to white and painting over that area. Remember: Black will CONCEAL areas you don't want to see, and white will REVEAL areas you want to see.
Once all the extra edges are masked off, I save the image as a PSD and PNG file, ready to be used later in the composite.
When you merge pictures that are not related, there may be various exposures for both stock images and photos, which require adjustments. After selecting and saving my cut-out images in their respective folders, I then focus on the background image for my composite.
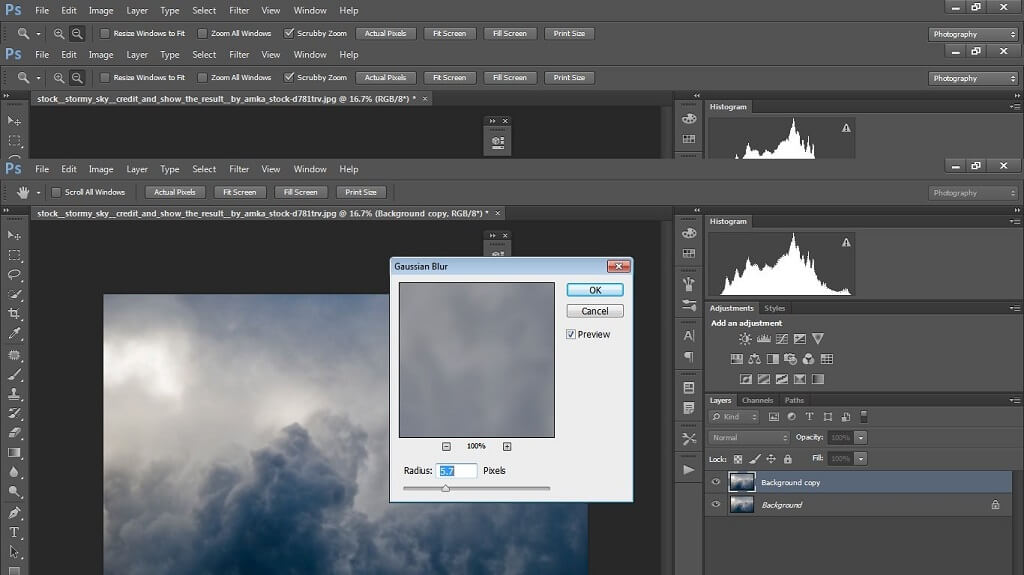
The primary background for my composite is a moody cloud stock image. The vision for my “Rainy Days” composite revolves around a dark, watery, gloomy, and emotionally charged ambiance. Because the clouds are only in my background, I didn’t need them to be very detailed. In fact, I wanted them to be slightly blurred, contributing to the desired effect.
Using Gaussian blur in Photoshop is a great way to control the level of detail you want to include in your background. To do this, first, I open the image in Photoshop, then duplicate my layer using Cmd/Ctrl + J (keyboard shortcut). Next, go to Filter>Blur>Gaussian Blur and apply some blur to the image copy. For this image, I set it at 5.7.
For this particular composite background, not much blur was required. However, it did require more adjustments to fit in with my vision for the composite.
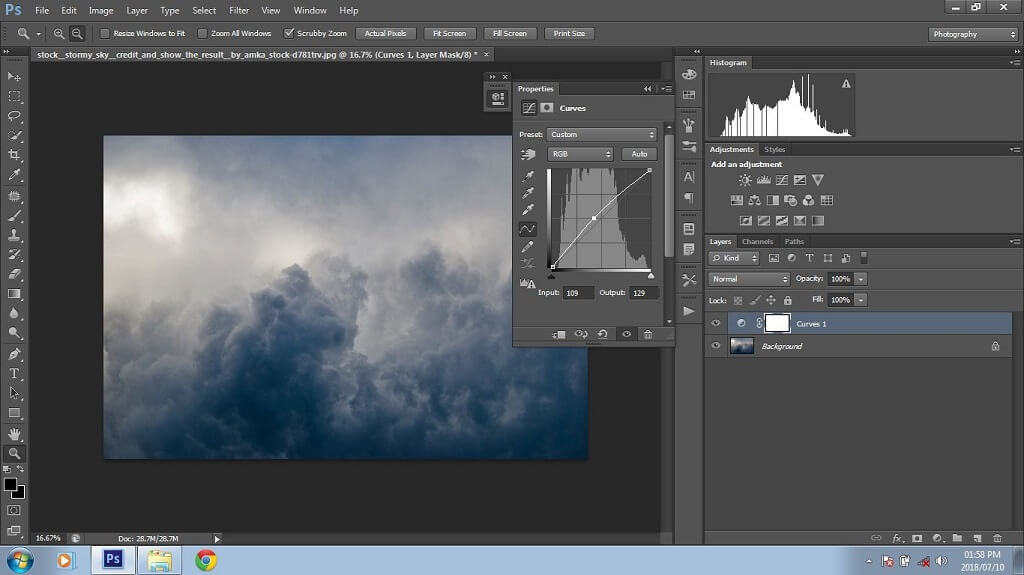
Once I was happy with the outcome, I merged the layers and duplicated the background again. As for adjustments, I usually play around with curves for a lighter or darker feel; this constantly changes throughout my composite edit. I always start with brightening to see what I am dealing with. Once done, I merge the layers again.
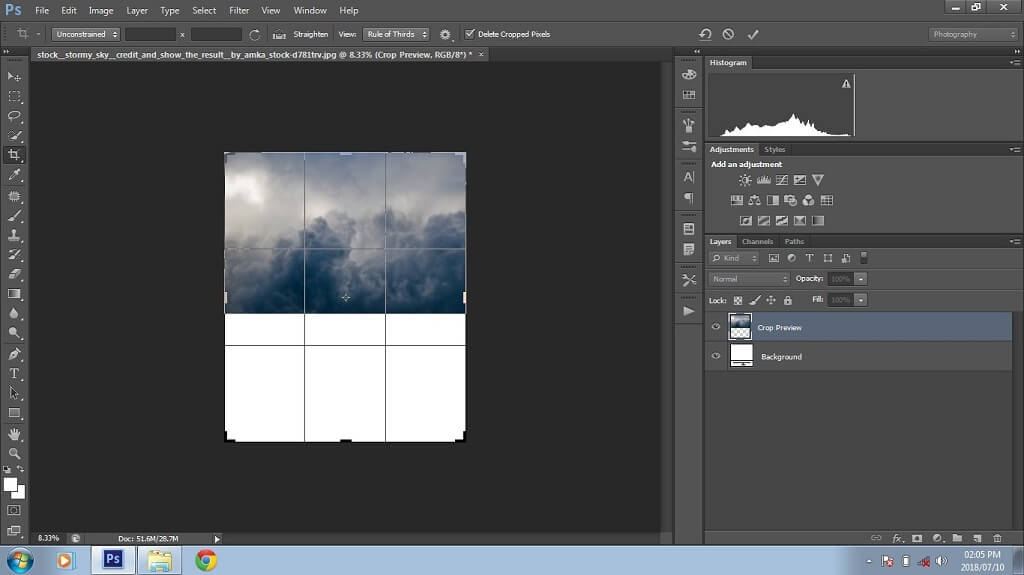
Now that the background is blurred and adjusted to my liking, the next step will be to prepare it for the flood (water) plug-in. First, I need to extend my image. You can use several methods in Photoshop to do this; I usually use the crop tool, which is quick and efficient.
I didn’t want to lose any part of the clouds, so I selected my crop tool and only extended the bottom a bit; it did, however, create a white crop extension, but that will eventually disappear when I use the flood plug-in. You can ignore this step if you do not use a water plug-in on your composite.
All of my stock images are now prepared and ready to use, the subject extractions are complete and saved, minor adjustments have been made, and the background has been prepared for the flood (water) plug-in.
Initially, when combining the images in Photoshop for Step 7 (below), the result will look scrambled and confusing. Don't be alarmed - the process of putting images together is a lot of fun!
In this step, I combine my cut-out images with the background in a rough composite, just like a puzzle. This step is probably the most exciting because you will start seeing your vision come to life!
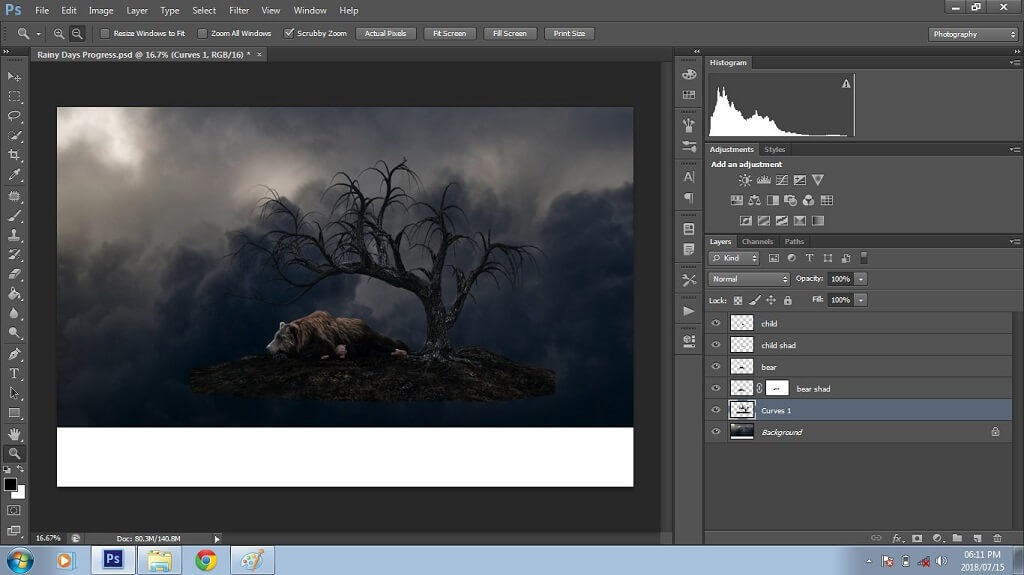
The sky image, which was blurred and extended for the flood (water plug-in), will be the background image in Photoshop. I then place all the cut-out images as layers on top of the background, so I can move them around and adjust them as needed.
The tree image was selected as the platform for the bear and child to sleep on. I placed the images in a centralized manner on the background. This was done to avoid as much negative space as possible. Once all the images are in position, I need to make a few tweaks and adjustments to finalize my composite.
This can be tricky and is entirely dependent on the images you are working with. Usually, my first step after placing all the images together is to see where the light is positioned. For example, in my composite, the light comes from the top left corner. And now that I know the direction of the light, I can start adding some appropriately placed shadows to the image.
There are a few methods for creating shadows. You can use the dodge tool, curves, or levels to achieve shadows. Because composites are pretty time-consuming, I generally use what I believe to be the quickest possible method to create shadows.
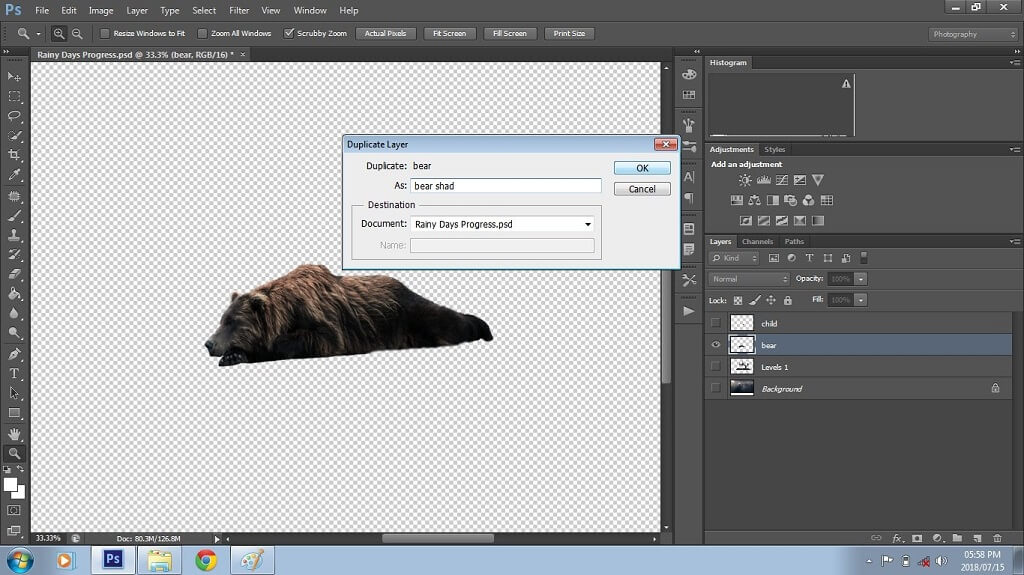
In this composite, I want to create a shadow for the bear and sleeping child. I have all the layers stacked on top of the Background layer, so starting with the bear, I hide all my layers EXCEPT for the bear. Then, I highlight the bear layer, duplicate it by pressing Cmd/Ctrl + J and rename the new layer "Bear Shadow."
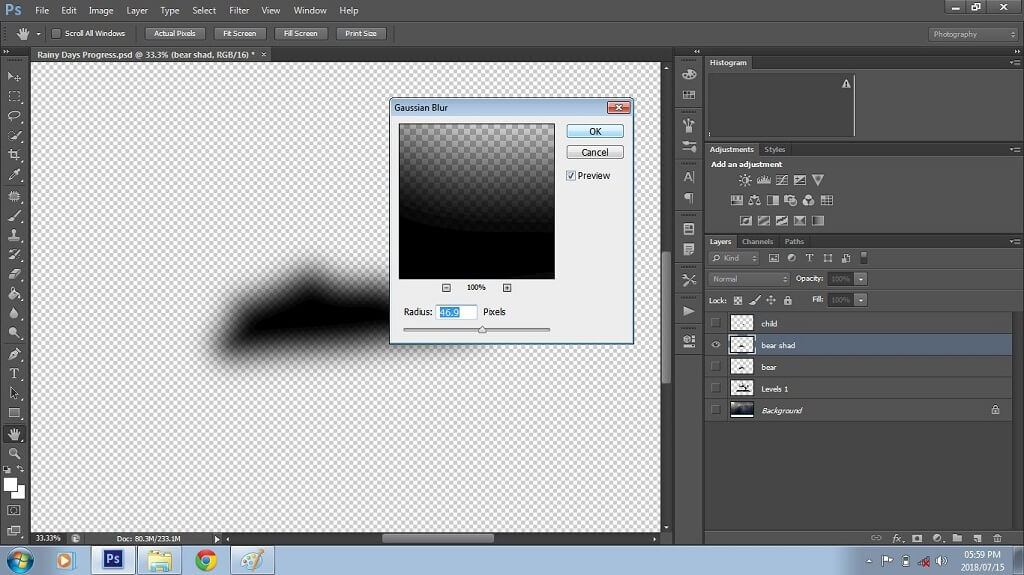
This will be the start of the shadow for my bear layer. I hide the original bear layer to reduce confusion in my layers panel. I then go to Levels>New Adjustment Layer>Levels to create a levels adjustment layer. I pull the left slider entirely to the right in the open dialog box to darken the image. The bear is now in a silhouette form. Then I select my levels layer and the second bear layer and merge them by right-clicking on one of the layers and choosing Merge Layers.
To complete the shadow layer, I select Filter>Blur>Gaussian Blur and adjust it to taste. I used 46.9 for this image. Once I have applied the change, I merge the bear shadow layer and the new Gaussian blur layer using the same method described above.
And there it is - my shadow layer is created!
I then unhide the original bear layer and move it on top of the shadow layer - placing the shadow layer behind the bear layer. Once I am satisfied with the shadow layer, I select it and move it around until I find the best and most natural-looking area for placement.
Next, I repeat the steps described above to create and position a shadow layer for the child.
Once the shadow layers are completed for the bear and child, I unhide the tree layer and background to ensure the shadow placement is as accurate as possible.
Then, I add a layer mask to each shadow layer and brush off any excess shadows. I also adjust the opacity of the shadow layer for a more realistic effect.
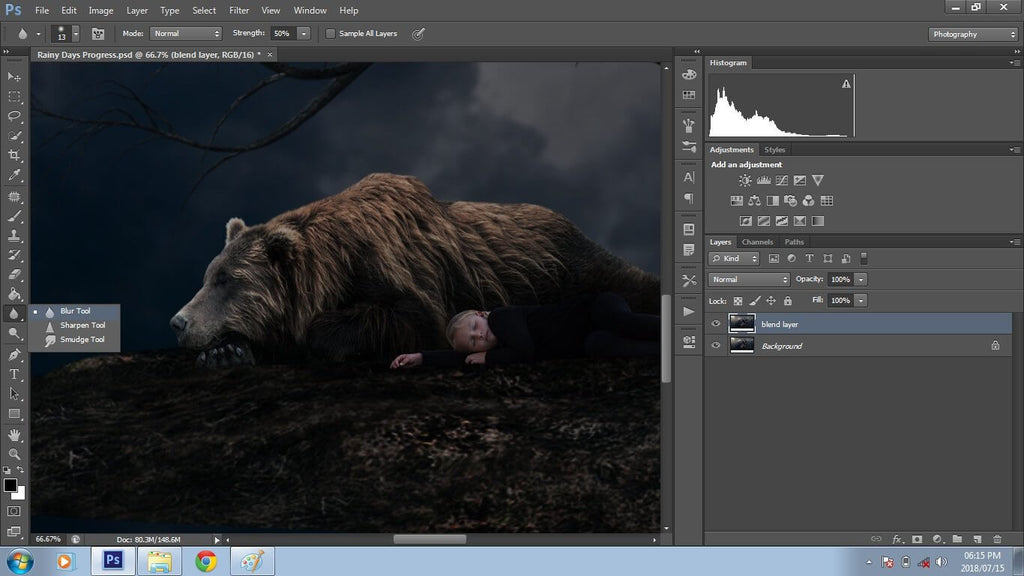
For a more realistic out-of-focus feel, I blend in and blur specific areas like arms, legs, and feet.
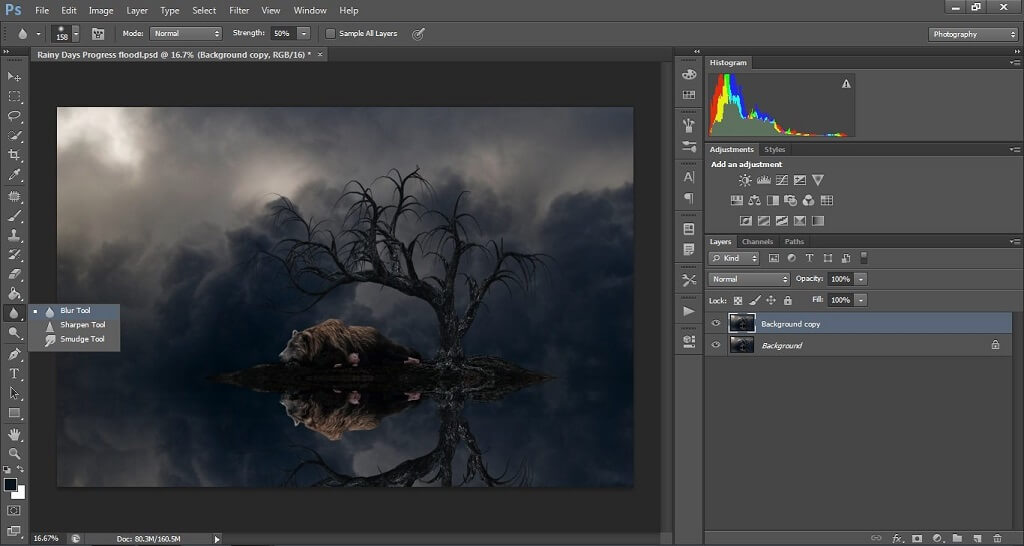
Once all the shadow layers are in place, I merge the original layer and shadow layer. Next, I select the Blur Tool (this tool looks like a raindrop) and change the Strength (or Brush Opacity) to 50% (try different percentages to achieve the look you are after). Then I paint blur on the outlined edges of the child and bear layers to blend and blur these a bit. Once I am satisfied, I merge these layers.
The composite is now ready for the water (flood) plug-in filter. You can purchase one online if you do not have this specific filter. I found one I liked and is very user-friendly from Flaming Pear. And you can install the trial version if you do not want to purchase it.
Once you select which flood (water) filter to purchase, the installation should be quick and easy. When I bought the flood plug-in from Flaming Pear, I received a download folder with the filter, license key, and installation instructions. Once the filter was installed, I went to my filter tab, and the flood filter was automatically listed under the filters tab. I clicked on the filter and was presented with a welcome screen where I keyed in the license key to activate it.
As shown below, this is what Flaming Pear's flood (water) plug-in looks like:
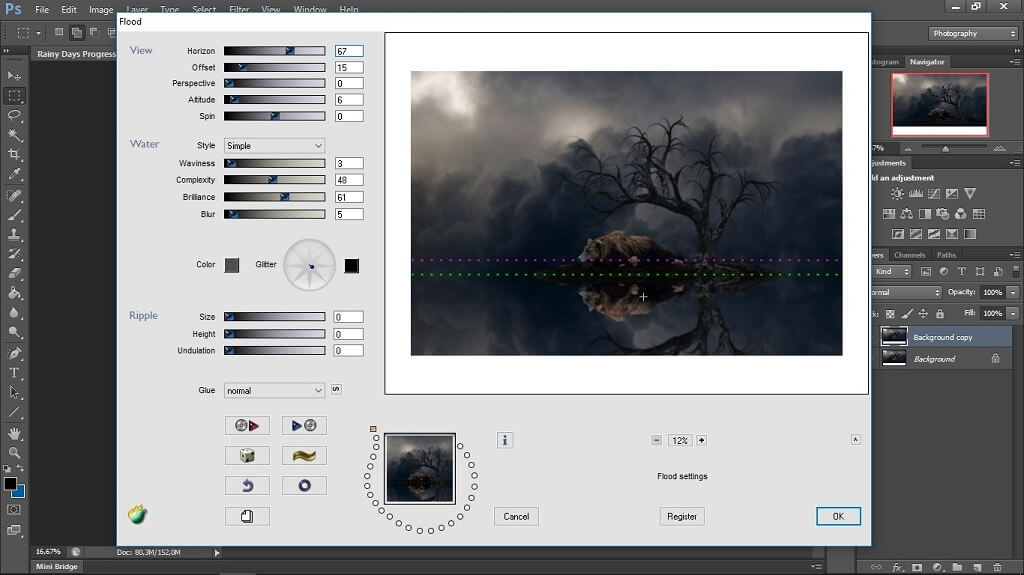
For my example composite, I only required a still, slightly blurred water reflection, so I only made minor adjustments to the view and water section sliders. Once the flood (water) filter was applied, I merged all layers.
The final step in completing the water filter adjustment is duplicating the background layer and blending the horizon with the blur tool.
The final step to this Photoshop composite is adding some creative flare!
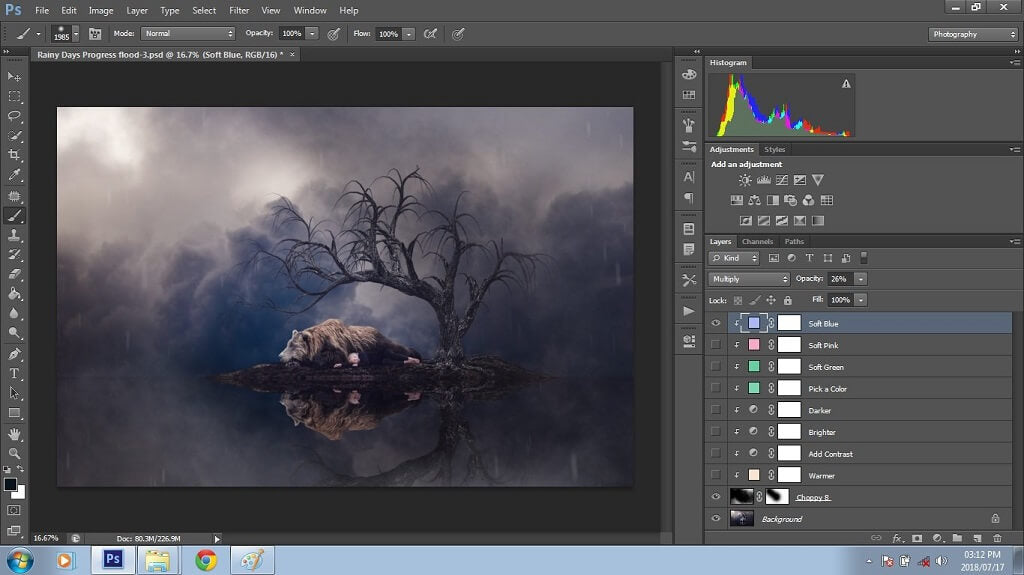
In all of my composite creations, I select the curves adjustment layer to brighten or darken tones when reaching this step. Generally, I tend to brighten the subject and darken the surroundings because it creates more focus on the subject and gives a subtle vignette feel to the composite.
Then, I like to enhance the light source of the composite, which in this composite comes from the top left corner.
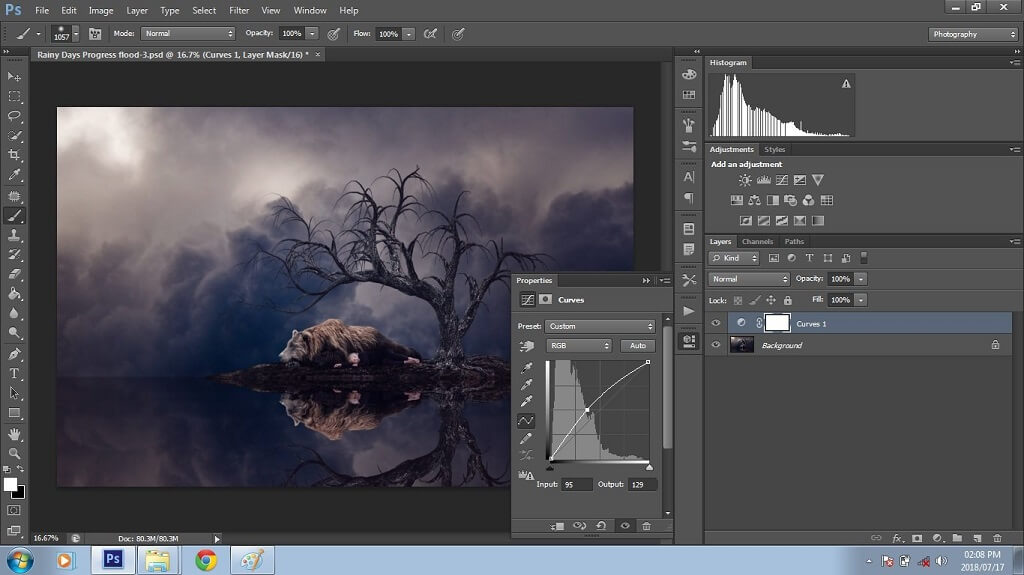
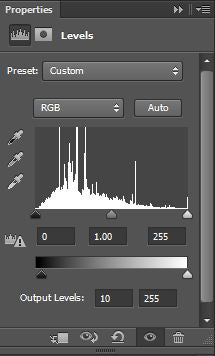
Next, I select the levels adjustment layer and set output levels to about 10. This will brighten the black tones and create a softer effect on the composite.
Finally, I decided to add one additional enhancement of rain and fog to the composite. For this, I used the Fog and Rain Collection from Pretty Presets & Actions, which I love!
In addition to fog and rain, Pretty Presets & Actions offers many other exceptional and user-friendly Photoshop actions and overlays for use in Photoshop. From stunning clouds and enchanting bubbles to delicate fairy wings, snow effects, vibrant leaves, and more, there are many options to enhance your composite images with ease.

What is a Photoshop Action? Actions are a series of Photoshop editing steps a creator has recorded that you can quickly replay with a click of a button. When purchasing actions/overlays from Pretty Preset & Actions, you will receive a folder containing the actions and overlays along with installation instructions.
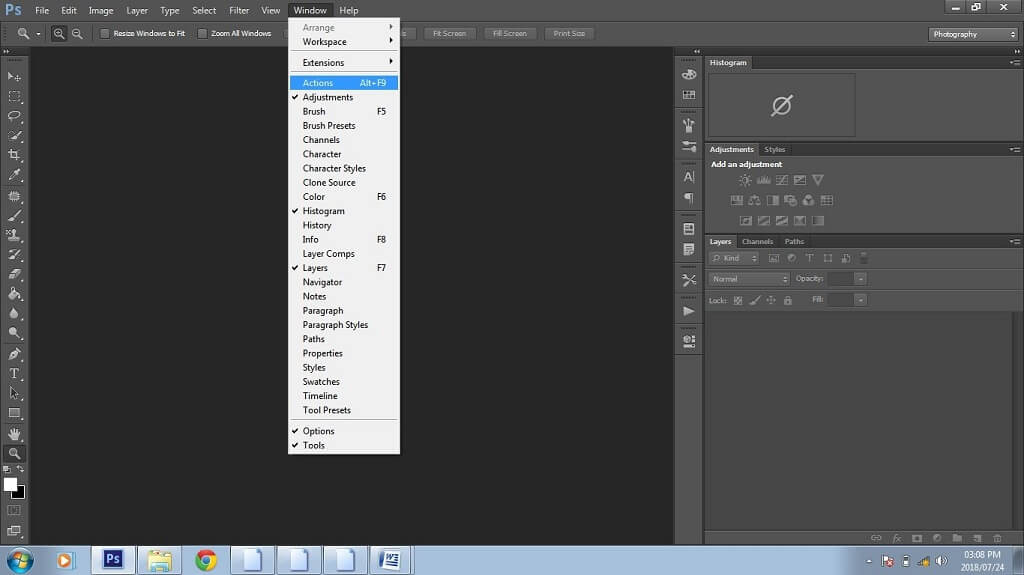
Photoshop Actions are easy to install. Open Photoshop, go to the folder containing your downloaded actions, double-click on the ATN file, and Photoshop will install them automatically. Once done, you can find the actions you installed by selecting Actions in the Windows tab, as shown below:
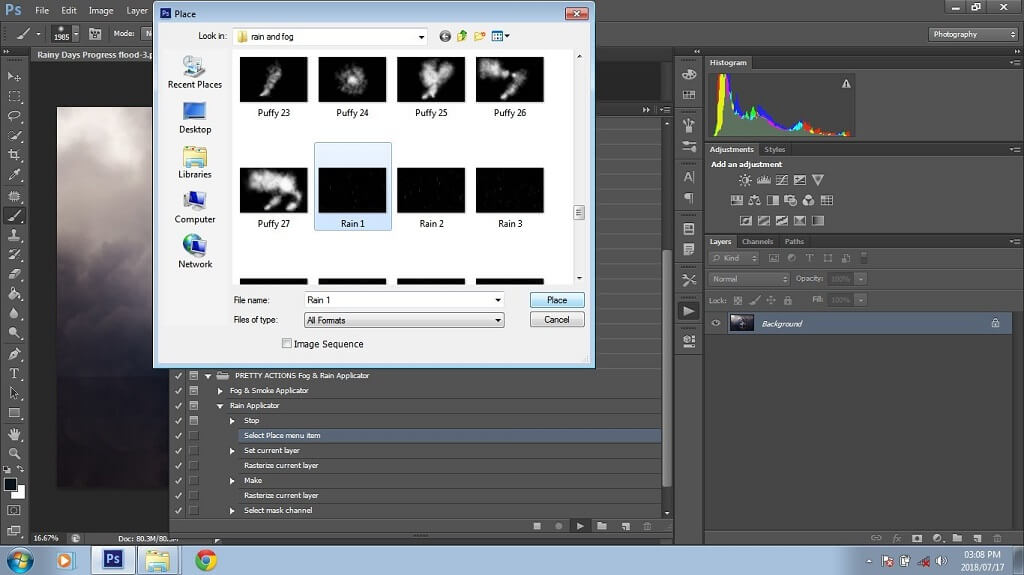
To run the rain action for my composite, I simply opened the actions panel, selected the Rain Applicator action, and then clicked the play icon (shown below):

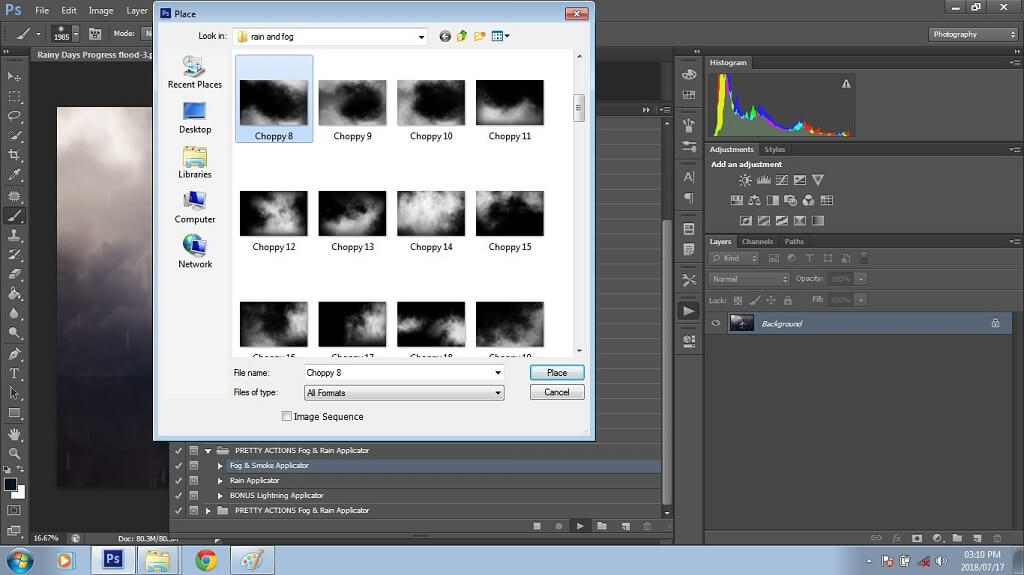
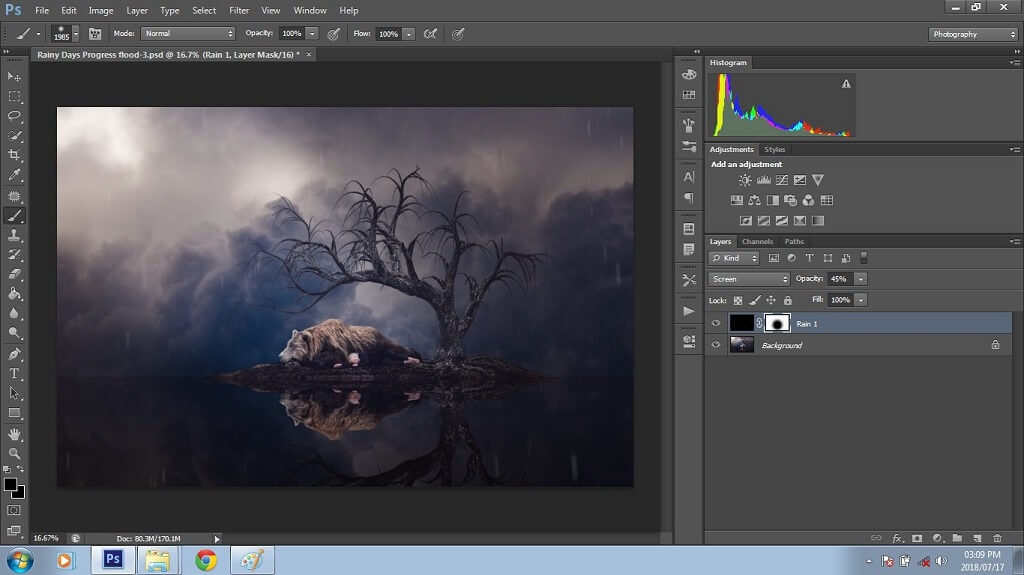
When you click play, the overlay is applied to the image. During the play process, a screen will open, asking you to find the overlay you want to use. For my composite, I selected Rain 1. I also ran the Fog and Smoke Applicator action and chose Choppy 8 when asked to place that overlay.
Once the fog and rain overlays were applied to my composite, I selected the brush tool and made sure that the foreground color was set to black. I then went to the mask layer next to each action to brush the rain and fog off my subjects. Once finished, I merged the layers, saved my work, and my Photoshop composite was complete!
Here is the final composite image with the rain and then the fog added:
Do you have any questions or comments about Creating Composite Images in Photoshop? Leave us a comment below - we would LOVE to hear from you! And PLEASE SHARE our tutorial using the social sharing buttons (we really appreciate it)!


Comments