- Lightroom Presets
- Best Sellers
- Mobile Presets
-
Photoshop
-
Learn
-
Support
-
Install
- Blog
By Anna Gay on | No Comments

Layer Masks are one of the most useful tools in Photoshop and learning how to use them will make your editing so much easier.
What is a Layer Mask?
Essentially, a Layer Mask is a duplicate of the original image (or, in Photoshop jargon, a new "layer") where you can make edits without affecting the original ("background") image or layer.
Using a Layer Mask is considered to be a form of non-destructive editing. It won't permanantly change your image and you can always go back in and remove it or make further adjustments.
In other words: LAYER MASKS ARE A LIFE-SAVER!
Also, if you make a mistake, you can quickly correct your mistakes without having to completely start over. Let me show you how:
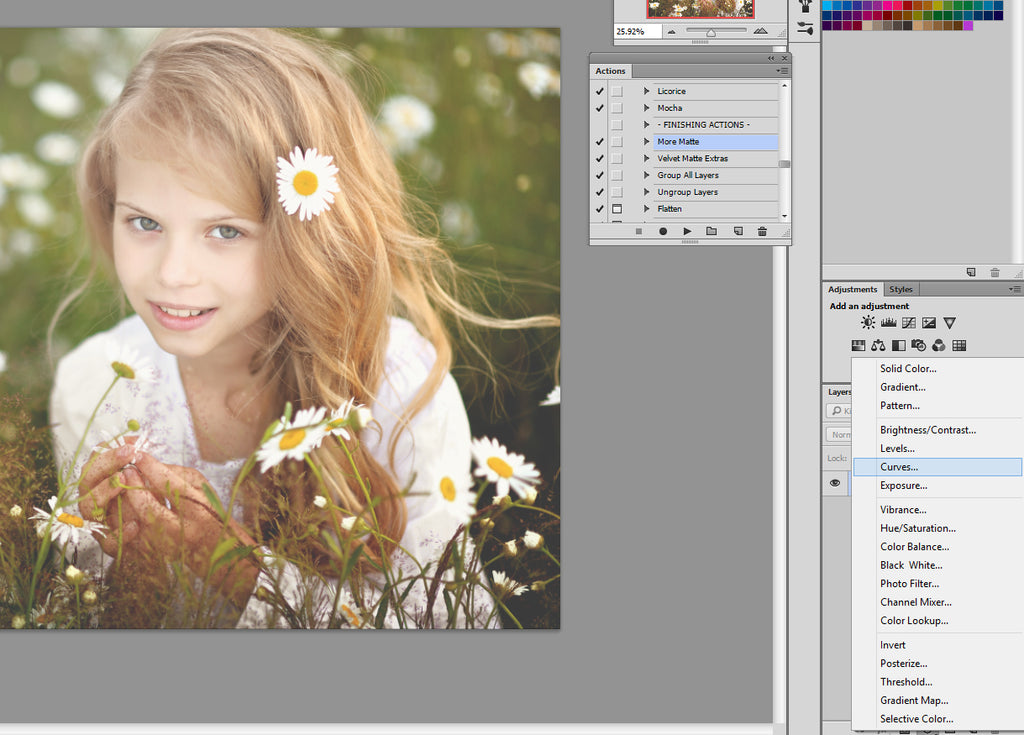
First, create a new Adjustment Layer by clicking the icon highlighted below, then selecting Curves:
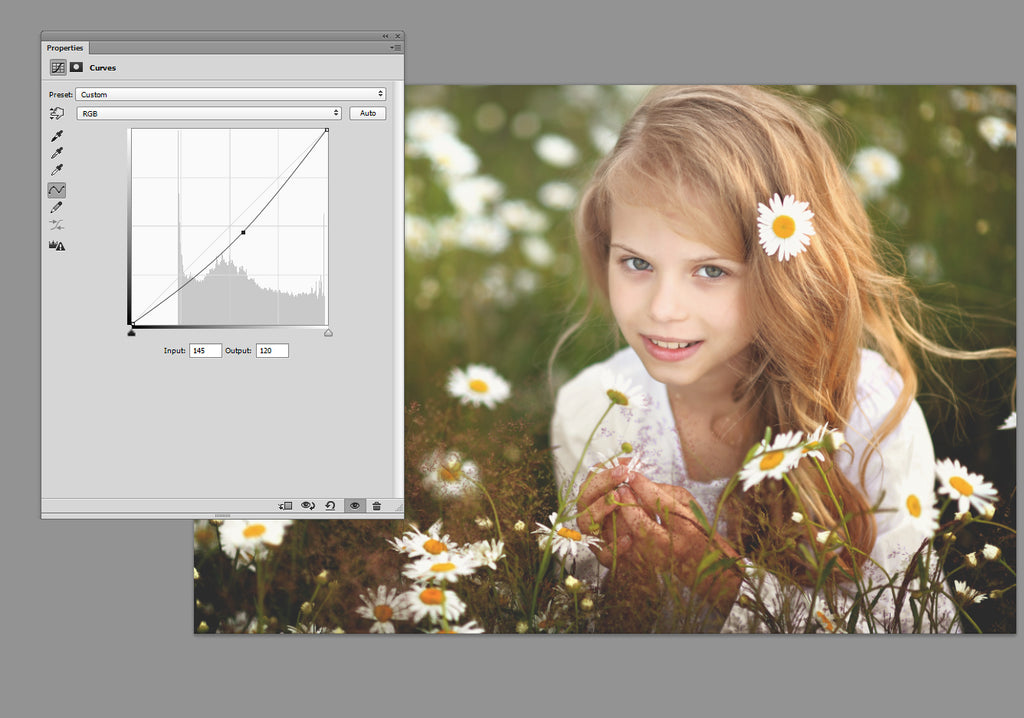
I am going to start off by lowering the curves in order to make the subject's hair stand out a bit more. Her hair, particularly the top, needs a bit more pop, so I reduced the Curves by pulling the center of the line down to the bottom right of the histogram. This will give her hair more depth:
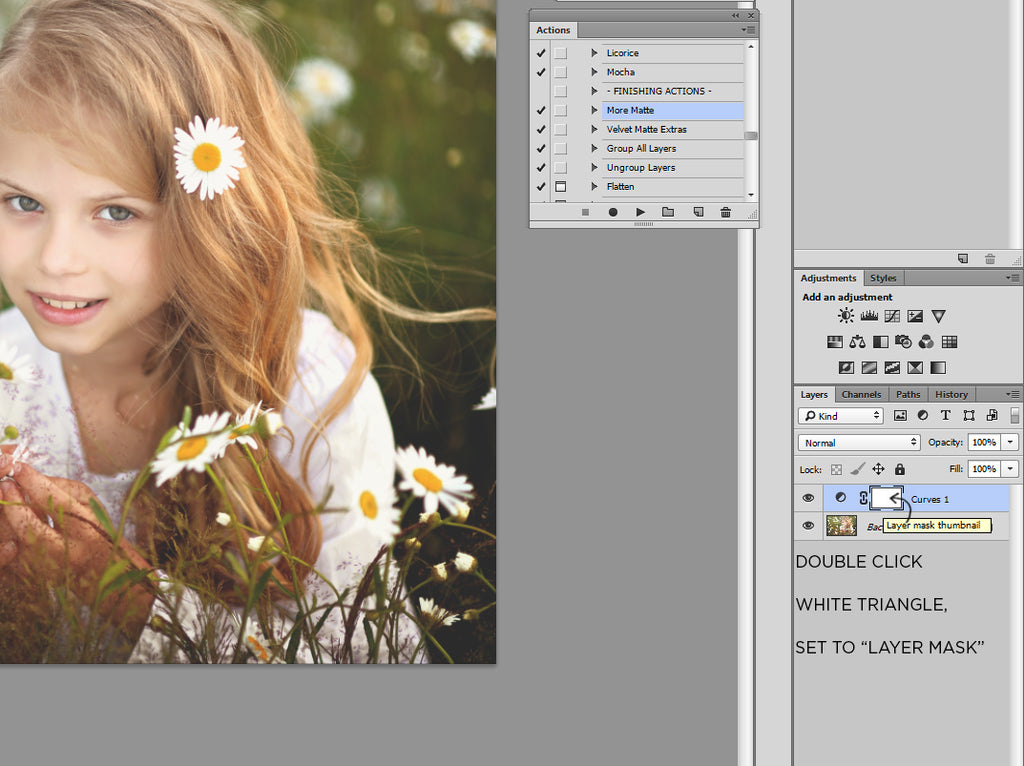
Since I only want the curves adjustment to apply to her hair, I am going to create a layer mask to erase everything except the adjustments on her hair. Make sure that your Curves mask is set to Layer, not Vector, by double clicking the white rectangle:
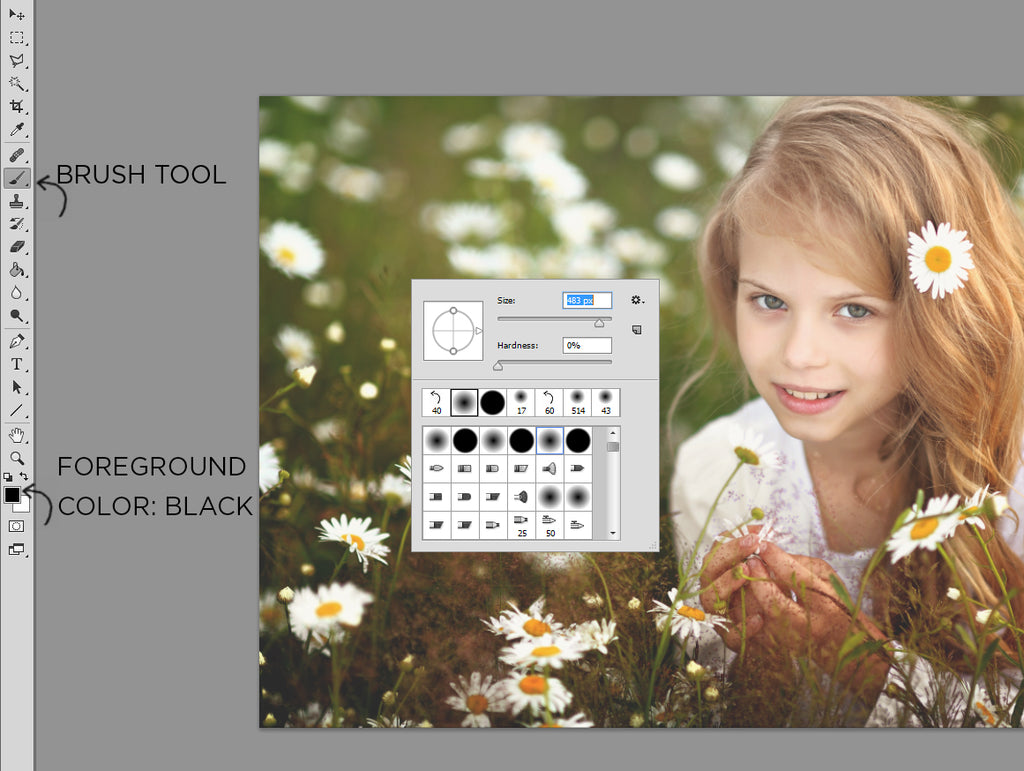
With your Curves Layer Mask selected, make sure that your foreground color is set to black.
Note: when using layer masks, black will take away/erase the adjustments you make on that layer, while white will put the adjustments back in.
So, if you are using black to remove adjustments and remove too much, all you need to do is change your brush color to white, and brush over the area where you removed too much.
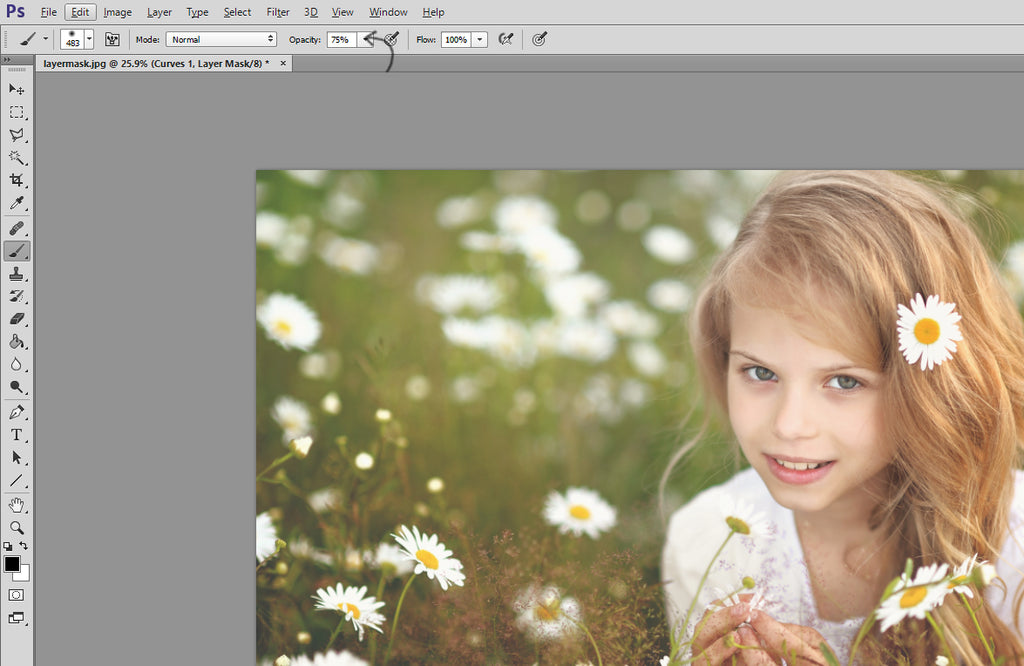
Select a brush tool with a soft, blurred edge. For this image, I am using a fairly large brush, since I will be erasing the majority of adjustments, except for the small portion on her hair. When you are ready to begin erasing the adjustments, simply hold down your left mouse button, just as you normally would with a brush in Photoshop:
You can also adjust the Opacity and Flow of your brush in order to make the effect less noticeable. After erasing all but her hair, I felt as though her hair was now too dark, so I reduced the opacity of my brush to 75% and brushed over her hair once:
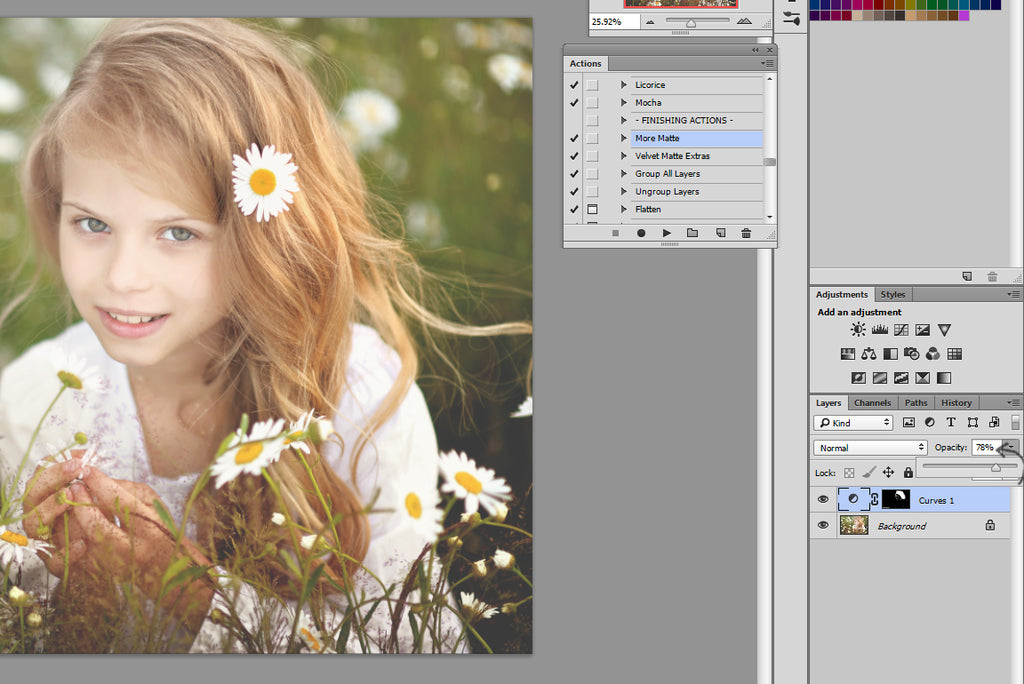
Another trick for softening the effect of an adjustment layer is to reduce the opacity of the ENTIRE LAYER. For this image, I reduced the overall opacity to 78% which softened the Curves adjustments even further:
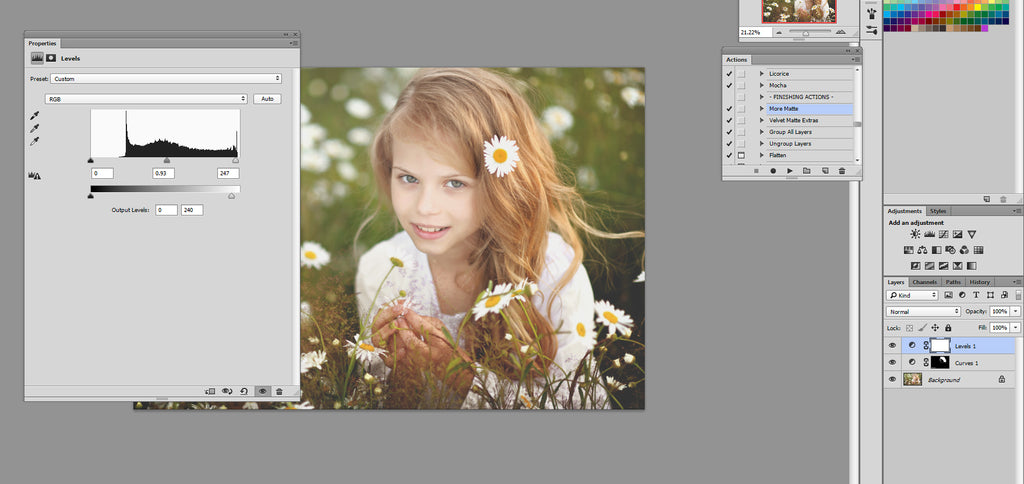
To make my subject stand out even more, I first created a new "Levels" Layer Mask (just like I did with Curves at the beginning) and moved my highlights output slider to the left. This will darken the image overall.
Then, to make my subject brighter, I erased the Levels adjustments on her, while leaving the rest of the image alone:
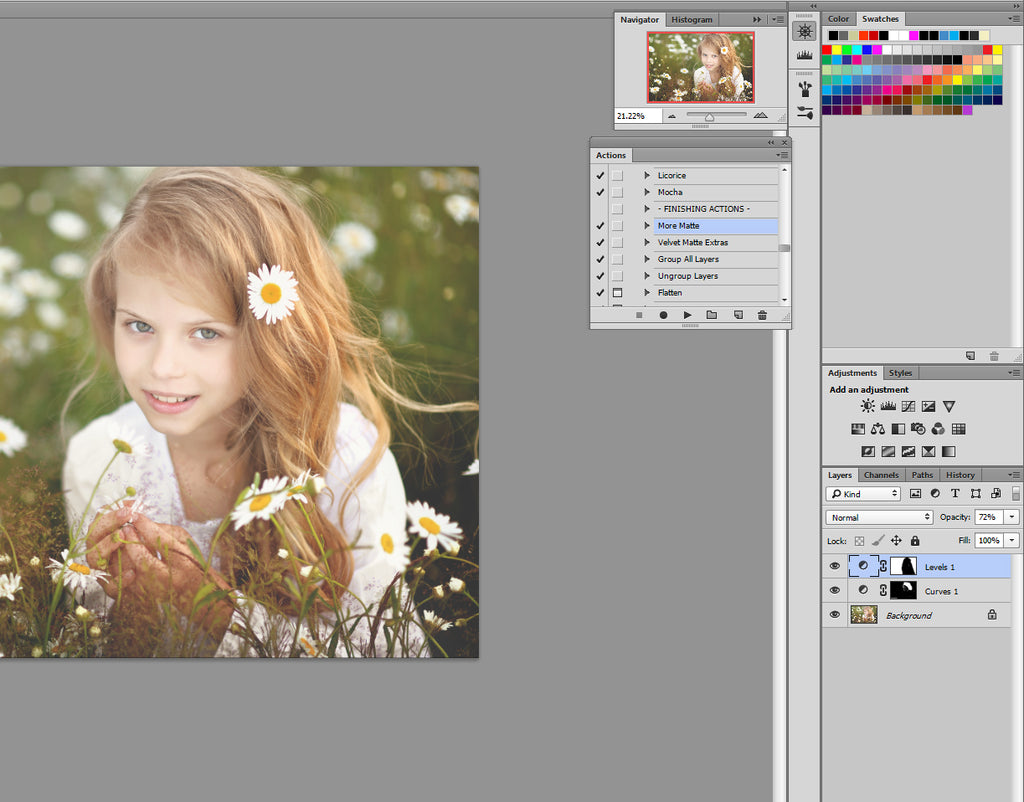
As you can see in the Layers panel, the black areas represent where I brushed over/erased the adjustments. So, on Curves layer 1, you can see that almost the entire rectangle is black - this is because I erased my Curves adjustments everywhere except her hair in order to give it more depth.
On Levels layer 1, you can see that only the subject is black, while the rest of the rectangle is white. This is because I darkened everything except the subject with this adjustment:
Do you have any questions or comments about Layer Masks in Photoshop? Just leave us a comment below - we would LOVE to hear from you! And PLEASE SHARE this post using the social sharing buttons (we really appreciate it)!


Anna Gay is a portrait photographer based in Athens, GA and the author of the dPS ebook The Art of Self-Portraiture. She also designs actions and textures for Photoshop. When she is not shooting or writing, she enjoys spending time with her husband, and their two cats, Elphie and Fat Cat.

Comments