- Lightroom Presets
- Mobile Presets
-
Photoshop
-
Learn
-
Support
-
Install
- Best Sellers
- Blog

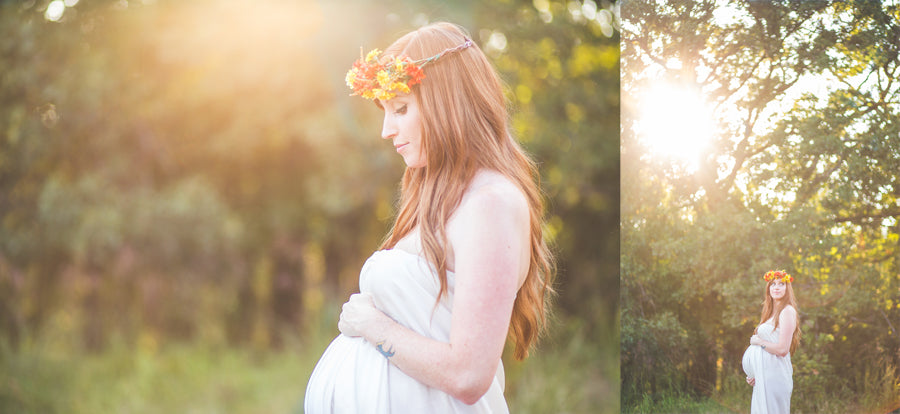
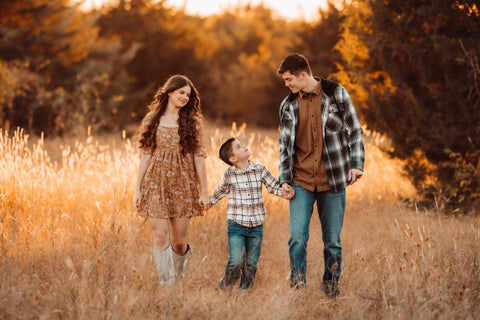
In photography terms, backlight is when your subject is illuminated from behind. This means you will place the light source behind your subject and in front of you (the photographer). Having the sun or light source behind your subject keeps them from squinting at the light and creates some gorgeous images.
We have all seen images with a beautiful, sunny haze and glow behind the subject. Whether the light source is the sun or artificial, backlight can be used to create jaw-dropping images. Shooting backlit photos can be tricky, and it is my hope to give you a few tips to try it out successfully.
When I first started shooting, I played it safe. I only shot in open shade. The light was always even and predictable. I could easily nail my exposure and focus and did get some great images, but I felt as if something was missing. It was the sun! For the majority of my backlit images, I use the sun. Window light can also be used for a backlighting effect.
Shooting into the light does create some challenges. The biggest, I feel is the difficulty in focusing. It is extremely difficult for your camera's autofocus to work when shooting into the sun or another light source.
I would get so frustrated when I first started shooting into the sun. You know that sound of your lens struggling to catch focus? Sometimes your camera does catch focus, but it can get locked on something other than your subject. These challenges are frustrating and irritating and can cause you to toss your backlighting aspirations aside. DO NOT GIVE UP!
To avoid this problem, there are a few solutions. Personally, I almost always use my free hand to block the sun going into my lens. This allows me to lock in my focus. Then, I just move my hand and shoot. Often times using a lens hood can help block enough of the light to get a perfect focus.
If you have an assistant handy, you can have them hold an object (like a reflector or something similar) in front of the light source so that you can lock in your focus.

To achieve a backlit image, you must put your subject between you and the light source. When scouting for locations, I always look for a spot where I can shoot into the sun. Open fields are one area that will give you a nice backlighting option.
I do like to shoot with the sun coming through a line of trees as well. Large windows are also a great backlight source. Honestly, if you can see the light during the day (outside or inside), you can position your subject to get a backlit photo.

Often times the source of the backlight is in the frame. You can also have the light just on the edge of the picture or directly behind the subject. Both give different effects (sun flare, exposure on the subject, etc) and are fun to play with to achieve the look you wish.
The lovely effect of rim light - the thin outline of light around the edge of your subject, is also easy to create using backlight.

Using backlight, you can also take silhouette photos. Instead of exposing for your subjects, use your light meter to expose for the background or sky. Whether it is the sky or an artificial light source, a crisp silhouette can be created by doing this.

Backlit photos are best shot while using manual mode. It is also helpful to shoot a in RAW format. Controlling all of the settings will allow you manage the perfect exposure on your subject.
Typically when I shoot a backlit image, I will shoot with my aperture wide open (around 2.0). I will also shoot with a low ISO (400 or less). It is important to use spot metering and manually choose your focal point. That will ensure you are getting proper exposure on your subject's face. (If your subject's face needs a little more light, try using a reflector to bounce light back on his or her face).
Figuring your settings to properly expose your subject often leads to overexposed skies in the background. This is when the importance of shooting in RAW is helpful. You can bring back so much information in images when they are shot in RAW format and editing RAW files in Lightroom is an easy task.
Here is a before and after image. The red areas in the before picture show the areas that are overexposed. (and yes, my white balance was a little way too cool. That's the bonus of knowing how to use Lightroom to its fullest extent.)
For more information, check out our full step-by-step tutorial on editing Backlit Photos in Lightroom

Backlit photos are romantic, dreamy, and maybe a little mysterious. The hazy light will help create a certain mood and emotion in your images and the most memorable photographs evoke emotion. Using backlighting in your images will help make your photography achieve those things!
Do you have any questions or comments about Backlighting? Leave us a comment below - we would LOVE to hear from you! And PLEASE SHARE our tutorial using the social sharing buttons (we really appreciate it)!


Comments