- Lightroom Presets
- Best Sellers
- Mobile Presets
-
Photoshop
-
Learn
-
Support
-
Install
- Blog
By Amy Phipps on | No Comments

A couple of weeks ago my daughter and two of her friends wanted me to take some photos of them. I was thrilled to do it. They are 13 and any chance I have to take photos of my daughter, I will jump at! One of her friends came home with us after school and the other friend was supposed to meet at our home at 4 pm. But then 4 pm turned into 5 pm.
The girls spent way too long getting ready so we had to scratch our original plan of taking photos at one of my favorite locations twenty minutes from my house. Knowing we were quickly losing light, I settled on a closer location that was only 10 minutes from our house. Unfortunately, by the time we made it out of the house, not even that location would work.
So we drove down the road for another mile or so. I looked out the car window and saw some gorgeous light coming from the west. Perfect! All I needed was a bit of open light to get some photos of these girls after all the preparations they had made, so I quickly pulled into an empty parking lot.
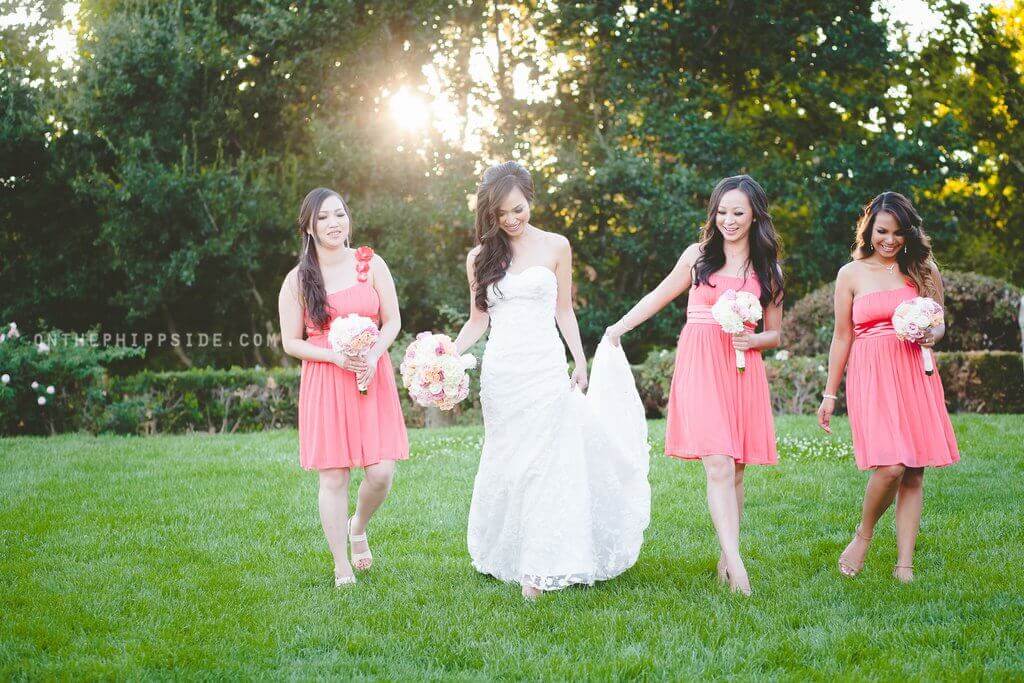
The image below is one of the first photos I shot - it was taken at around 7pm, with the sun directly behind her. The sunset time on this particular night was about 8pm.

Is this the time of day I normally take photos? No!
Personally, my favorite time of day is about 2-3 hours before sunset - the light that is coming in during that time of day is perfect. The sun is low enough in the sky at that time that it doesn’t create harsh shadows, or cause any glare and also creates a very flattering light to fall on skin.
The reason I’m sharing this little story with you is that light changes quickly. It’s important to know where your light is and how quickly it will change or go away. Just because your favorite location looks great at 6 pm, doesn’t mean it will look the same at 4 pm. And it definitely won’t look the same at 10 am.
Clients are always surprised when positioning the sun behind them. Yes, behind them!
I'm a big fan of backlit images which is basically when the subject is being lit from the behind. In order to do this properly, you have to know how to expose properly - you will want to make sure you are exposing for the skin when creating a backlit image. And I must add, that the only way to create an awesome backlit image is to shoot in manual. If you don't know how to shoot in manual, you need to learn how to do that first, and then learn to shoot backlit images!

(This photo was taken with the sun coming from behind and was also being filtered between leaves on the tree. This made for perfect lighting conditions around 90 minutes before sunset.)
Taking photos in open shade will ensure that you have the right amount of light and that you don’t have any harsh light shining in on your subject.
When I find a spot I want to shoot in, I run my hand through the air to see where the sun will hit. The sun will hit my hand in places I can’t see with my eyes. The open shade may look good, but running my hand through the air will help prevent any hot spots of light from falling on my clients.
Try to avoid patchy shade, as this will produce patches of light on your subject rather than giving you an evenly lit photo.

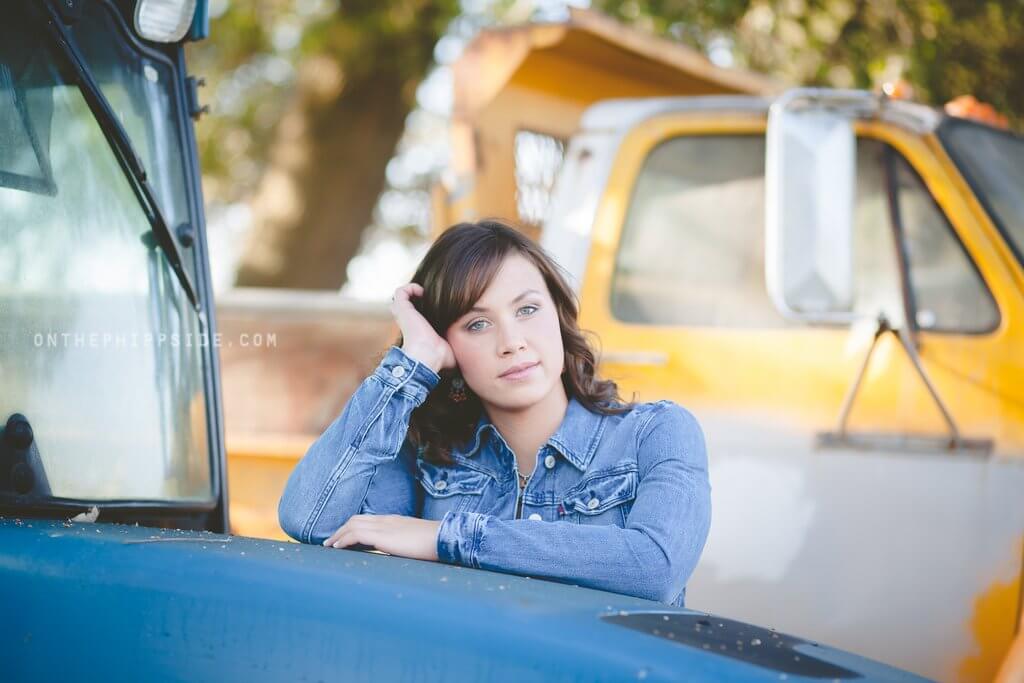
(This image was taken four hours before sunset. The light was being filtered through the trees and the truck also helped block some of this light so there wasn't a harsh light hitting her.)
If harsh light falls on your subject, try turning them! So often I see photos where if the subject had just been turned a little bit, the light would have fallen on them differently and would have produced a much more pleasing photo.
This often happens when light is coming from the side - you will see that half of their face is lit up while the other half is in shadows. In this case, the lit-up part will be blown out making the picture difficult to save. So why not just move your subject so the light isn’t falling on them from the side and BAM…no fuss in editing now!

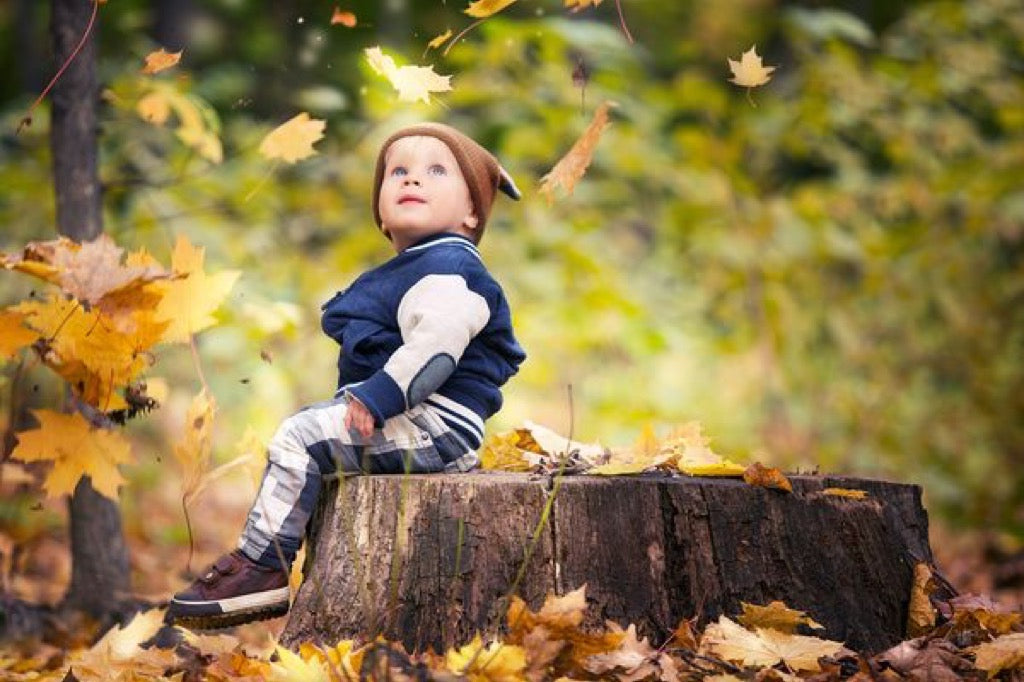
(This photo was taken during midday sun - not my personal favorite time of day for lighting. There wasn't anything to filter the light, so I had to make sure he was facing the right way or he would have had hot spots of light all over his adorable face.)
Understanding light will really help you to find the best light for your photography and shooting in good light will make your photos stand out from others.
Without a light source, there wouldn’t be photographs, so make sure to take time to understand the one thing all photos have in common…LIGHT!
Do you have any questions or comments about How to Find the Best Light for Photography? Leave us a comment below - we would LOVE to hear from you! And PLEASE SHARE this post using the social sharing buttons (We really appreciate it)!


Amy Phipps is the photographer behind On the Phippside Photography, located in Stockton, California. Amy has been married for 21 years and has 4 children. When she’s not trying to decide between which of her 43 black shirts to wear, you can probably find her sipping on a Dr. Pepper and walking around any day of the year in flip flops.

Comments