- Lightroom Presets
- Best Sellers
- Mobile Presets
-
Photoshop
-
Learn
-
Support
-
Install
- Blog
What are Tone Curves? How do you use Curves in Lightroom? We will answer these questions and more as we take a closer look at the Tone Curve in Lightroom, what it does, how to make adjustments to the Tone Curve, and how those adjustments will affect your images!

The Tone Curve (simply referred to as "curves" by most photographers) is a powerful tool in Lightroom that can affect an image's overall brightness and contrast. By adjusting the Tone Curve, you can make your photos brighter or darker and affect the contrast levels.
You will find the Tone Curve Panel in the Lightroom Develop Module on the far right. Click on the triangle to make the panel drop down so that you can make adjustments:
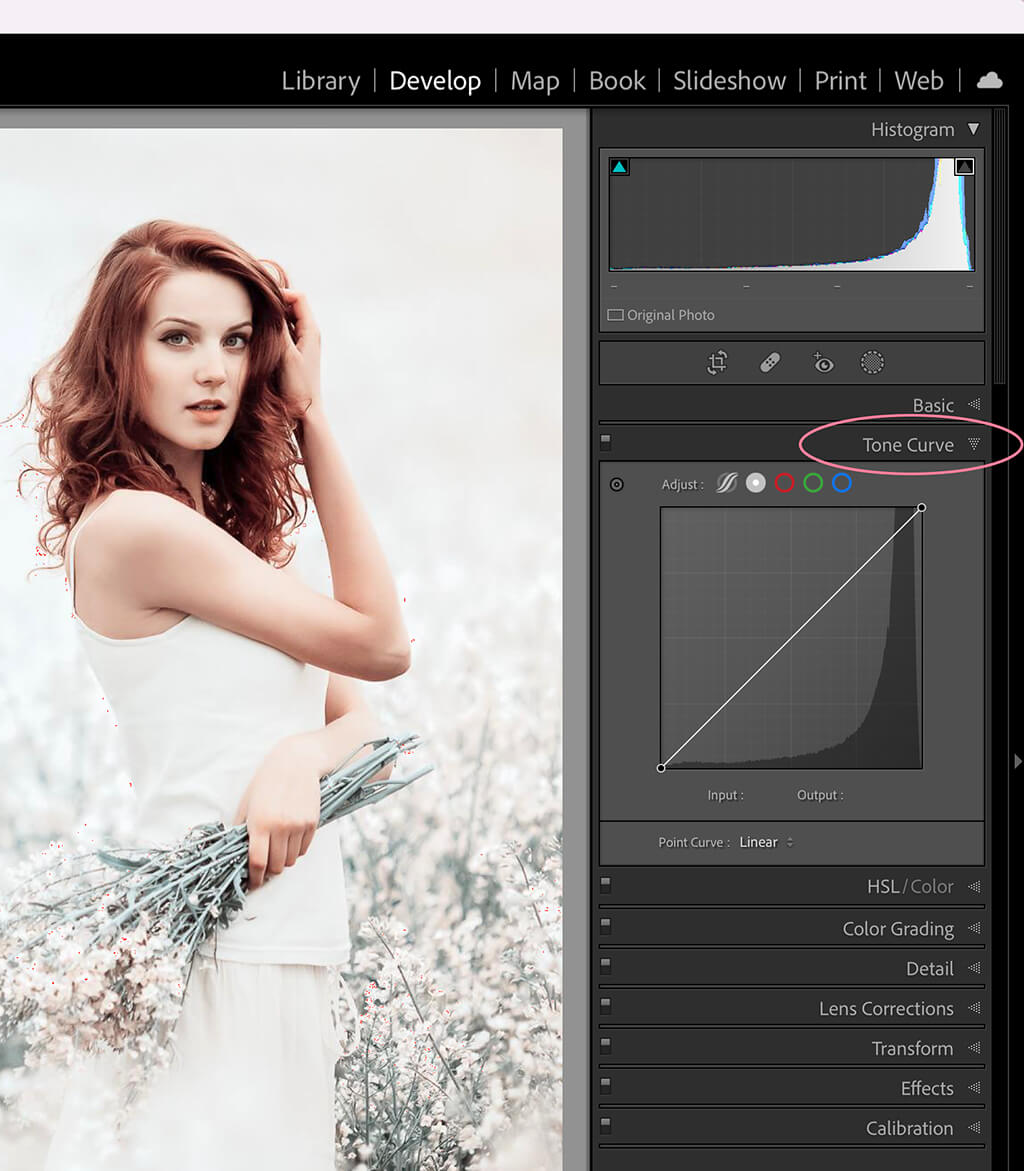
Let's look at some of the icons in the panel. By clicking the icon on the top left, you are enabling a feature that allows you to adjust the values of a specific tonal region, such as highlights or shadows, by placing your cursor over an area in your image that you would like to adjust.

For example, let's say I wanted to brighten my shadows. I can hover my cursor/mouse arrow over a region that has dense shadows, in this example, the subject's hair.
In the image below, I clicked on that area and pulled the tone curve line upwards to increase the brightness of the shadows.
As you can see in the second image below, it becomes slightly brighter. You will also see that the tone curve now has a slight arc to it after brightening the shadows region:

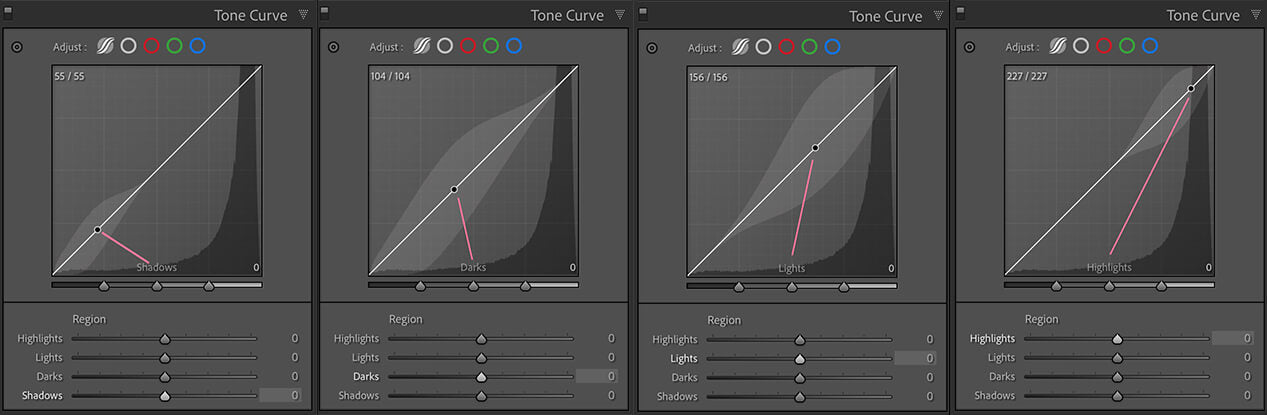
Beneath the tone curve and histogram, you will see the Highlights, Lights, Darks, and Shadow regions. By adjusting these sliders, you will also be adjusting the tone curve and vice versa.
If you hover over each region of the tone curve, Lightroom will show you what area is being affected. For example, when I hover on the top-right of the curve, my Highlights will be affected. If I hover in the middle, my Lights will be affected, and so on.
Try adjusting the sliders in the various regions to observe how the shape of the Tone Curve changes.

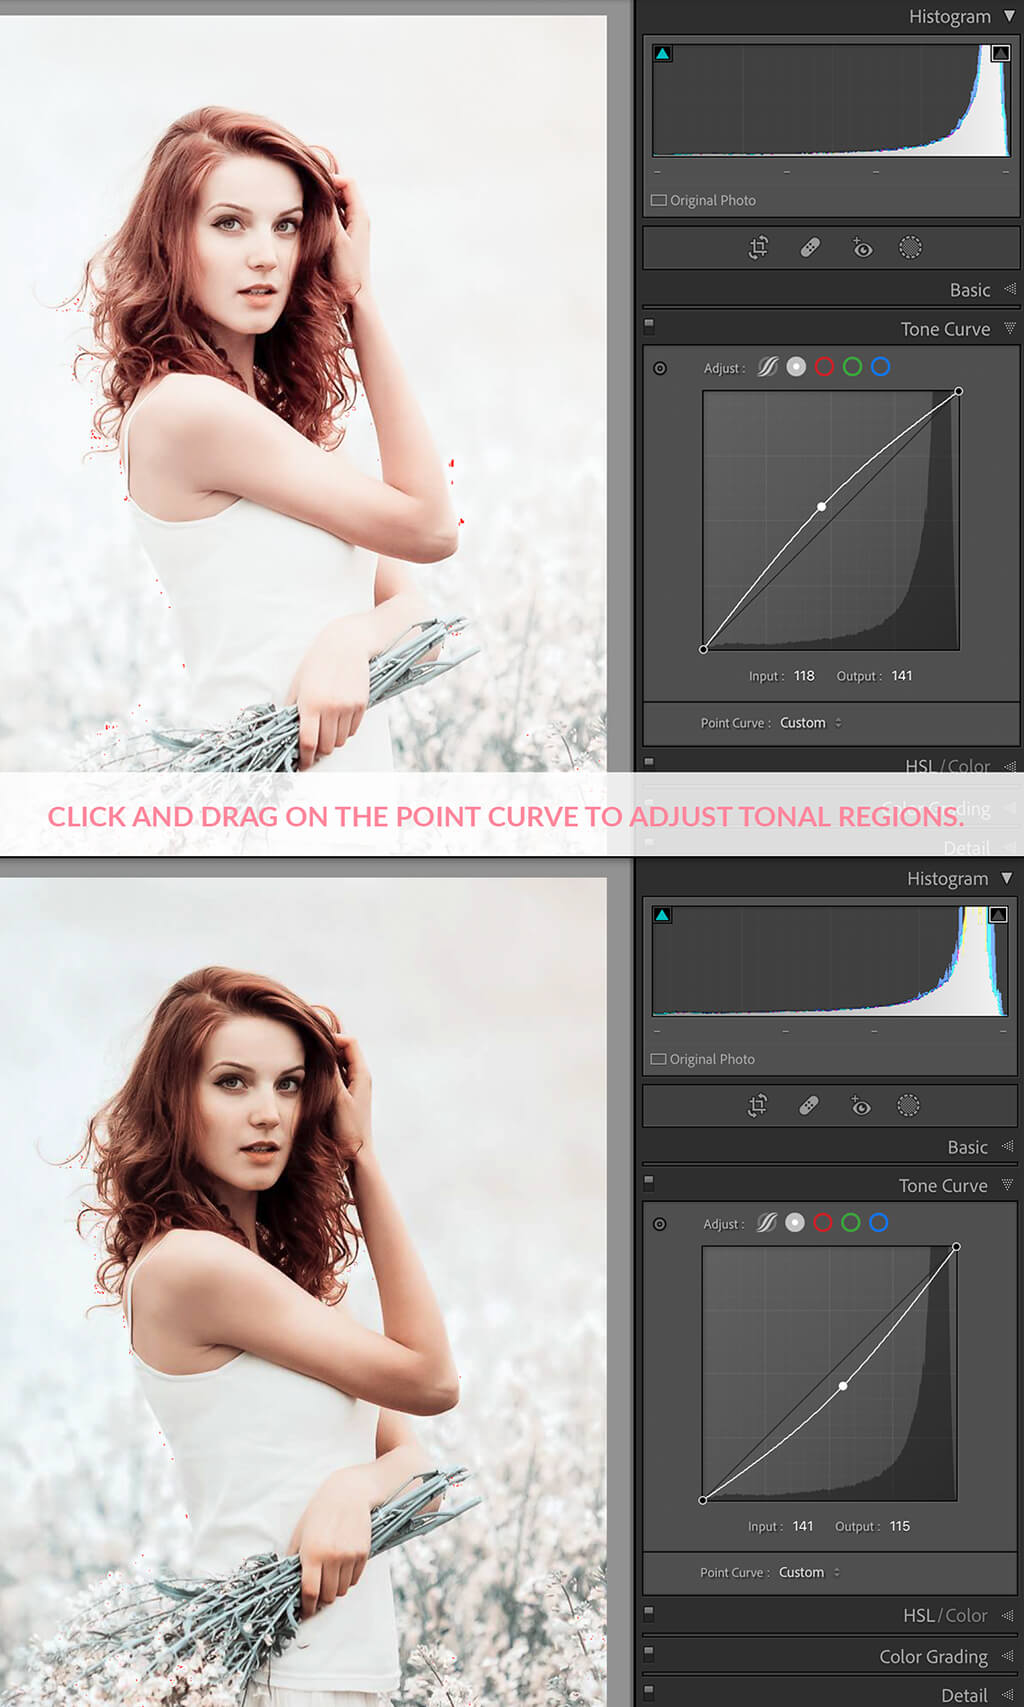
You can also adjust the Tone Curve independently of the sliders by clicking the Edit Point Curve icon at the panel's top (indicated by a white circle).

You can then manipulate the tone curve by clicking and dragging the line. Moving the line up towards the top left of the histogram will brighten your image. Moving the line down towards the bottom right will darken your image.
There are also tone curve presets, which you can select by clicking the up/down triangles next to the words Point Curve: Linear.
Linear is the default Tone Curve setting. The other two settings (Medium Contrast, Strong Contrast) will increase the contrast of your image.

In the Strong Contrast example below, notice that the point curve has a slight "S" shape. S-curves give your image contrast, so the more significant the S, the more contrast you will have between your highlights and shadows.

In the Lightroom Tone Curve panel, you also have the ability to work within the RGB (Red, Green, and Blue) channels. In this section, we will make adjustments to the RGB channel, which is all three channels together.

Aside from applying your own custom edits to the tone curve, you will also find in some cases that you will want to tweak the tone curve after applying a preset.
I applied the "Clean Color," and "Hazy Matte" Presets from the Clean Edit Portrait Workflow Collection in this example. Take a look at the tone curve.

I wanted to reduce the matte effect and brighten the image a bit more after applying the preset, so I pulled the tone curve towards the upper right, just a bit, to brighten the image. Then I pulled the left-most point down about halfway between where it was and the corner to reduce the matte effect.

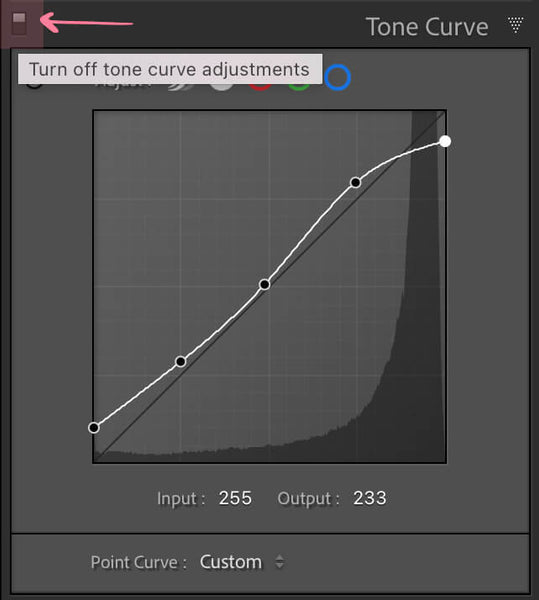
Finally, if you want to see your image without the Tone Curve adjustments, you can turn them off by clicking here:
Now, let's look at using the Red, Green, and Blue channels individually to help color balance an image. Then we will look at how you can adjust the Lightroom Tone Curve after applying a preset.
You can select the individual color channels by clicking on the corresponding circle at the top of the Tone Curve panel. For instance, click on the red circle to select the red channel.

When you click on the curve, you can pull the line in various directions to affect each channel's color. If you move the line up towards the top left, you will be adding more of that color to your image. If you pull down to the bottom right, you will be removing that color from your image.
For example, if I pull the curve to the top left in the Red channel, I am adding red to my image. If I pull to the bottom right, I am removing red from my image and adding Cyan (since it is the opposite of Red):

The same applies to both the Blue and Green channels as well. Just remember:
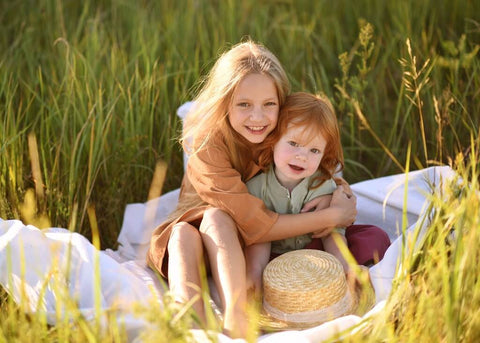
Below is a practical application of one of the many ways you can use the individual color channels to edit your image. The adjustments you make to the curve will be much more subtle than those applied above.

I felt there was a little too much green in this image, so I moved the tone curve down slightly to the bottom right. Keep in mind that a little goes a long way when using the tone curve, so you will not need to adjust it very much in most cases.
I then pulled down the Green channel to reduce the green tones in the image. Finally, I pulled down the curve in the Blue channel. This added yellow to the image (since yellow is the opposite of blue), which compliments the golden backlight in the photo.

In some cases, you may want to adjust the Tone Curve AFTER applying a preset. For this example, I used "Reverie" (one of my favorite presets) from Pretty Presets Dark and Moody Collection.

After applying the preset, I wanted to brighten the image a bit, so I opened the Tone Curve panel and saw that there was a slight S-curve. I pulled the middle and upper four points slightly up and to the left. This brightened the image just the right amount.

You may want to apply those same tone curve adjustments to other images from the same photoshoot or batch. The easiest way to do this is by using Lightroom's "Sync" option located at the bottom of the Develop panel. We have a great tutorial on How to Sync Photos in Lightroom here.
Do you have any questions or comments about Using the Tone Curve in Lightroom? Just leave us a comment below - we would LOVE to hear from you! And PLEASE SHARE this post using the social sharing buttons (we really appreciate it)!


Comments