- Lightroom Presets
- Best Sellers
- Mobile Presets
-
Photoshop
-
Learn
-
Support
-
Install
- Blog

Shutter speed and aperture are usually discussed in terms of how they affect the exposure of an image, but as part of our ongoing series on obtaining the sharpest possible image, I want to talk about how shutter speed and aperture affect both the actual and perceived sharpness of an image.
This post assumes that you already have a working knowledge of shutter speed and aperture. This post is a beginner/intermediate level post, rather than an introductory one. If you are new to photography or need a refresher (don't we all), here are 2 tutorials on shutter speed and aperture basics:
Shutter speed can affect the overall sharpness of an image, as well as more localized sharpness on the subject.
These two terms are often used interchangeably, but they are actually two different concepts. Each, however, is a result of a shutter speed that is too slow.
Camera Shake - this occurs when the camera is being handheld and the photographer moves, causing the entire image to be blurry, affecting the overall sharpness of the image.
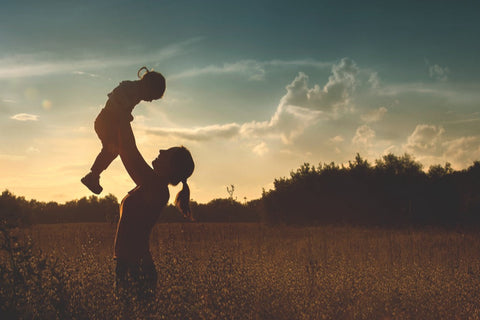
Motion Blur - when the camera is still, but the subject (such as a fast-moving kid) is blurred because of a slow shutter speed, motion blur occurs. This is a more localized effect on sharpness, as parts of the image will still be sharp, while others, particularly the subject, will be blurry.
When shooting handheld, a simple guideline to help you find the proper shutter speed to avoid camera shake is the Reciprocal Rule, which suggests that, in order to avoid camera shake, the shutter speed of your camera should be at least the reciprocal of the focal length of your lens.
That sounds complicated, so let me break it down in an example:
Let's say you are shooting with a 50mm lens. The focal length of the lens is 50mm, so the reciprocal shutter speed would need to be no less than 1/50 to avoid camera shake.
If you have a 200mm lens, your shutter speed would need to be no less than 1/200 to avoid camera shake.
Here is a visual example:
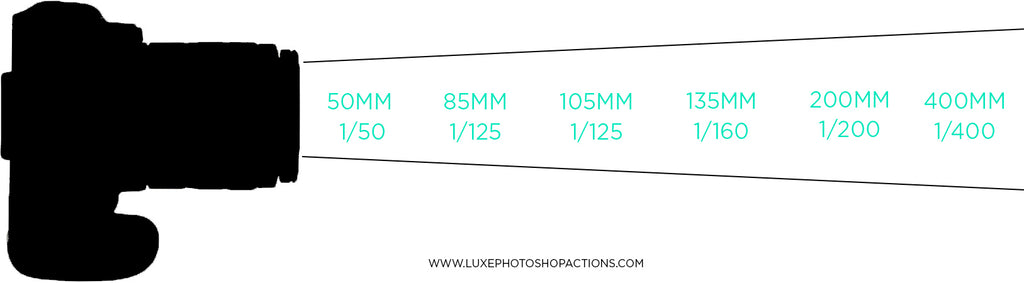
Note that the 85mm - 135mm lenses do not have a reciprocal shutter speed of 1/85, 1/105, etc. - those exact shutter speeds do not exist on standard DSLRs. If the reciprocal shutter speed is not available, round up to the next available shutter speed on your camera.
The Reciprocal Rule is more of a guideline, really, and will also depend on you, your body/the strength in your arms, and how you hold a camera. For me, personally, I could never shoot handheld at 1/50 without camera shake, but my husband, on the other hand, totally could! Use the Reciprocal Rule as a guideline, but also experiment to see what your own limitations are with slow shutter speeds.
Having a way to stabilize your camera is the most straightforward way to avoid blurry images as a result of camera shake.
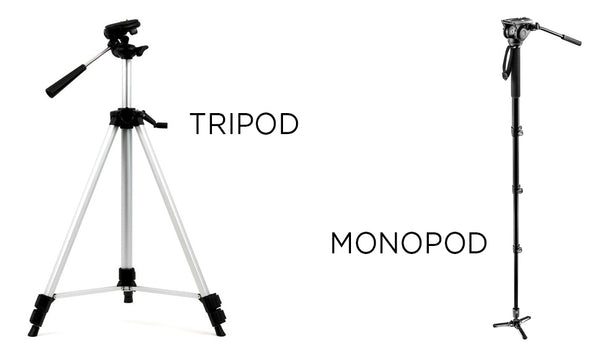
Tripods come in a wide variety of sizes (and prices). They work very well for photography that doesn't require a lot of moving around. Tripods lend themselves really well to posed shots with subjects that aren't moving. Candid, on-the-go portraiture and tripods don't often mix.
If tripods do not offer you enough mobility, you may want to look at a a monopod instead. As the name suggests, the monopod has a single leg, as opposed to the tripod, which has three. You will be able to get around a bit more quickly, simply because monopods aren't as cumbersome as tripods.
The way in which you hold your camera plays a big part in whether you'll get a blurry image or a sharp one.
The best practice is to hold your arms against/close to your torso when you are holding your camera. The further you extend the camera away from your torso, the more likely your arms are to shake.
You may also find it helpful to brace yourself when you are shooting. This can be done on just about anything that will support your body weight, so get creative, and don't be afraid to get in some funky positions - the goal is to get a sharp image!
Slow shutter speeds are usually the culprit when it comes to images that aren't sharp, but aperture can also be a factor. Even though aperture is more of a focusing issue, choosing the incorrect aperture can give the illusion that the image is not sharp.
When shooting with a wide aperture, especially when you have your lens wide open, you will need to pay close attention to where your camera is focusing. If you are shooting at f/1.4 and your camera focuses on the bridge of the subject's nose, their eyes will not be sharp.
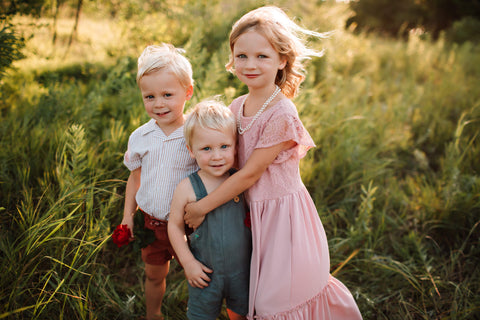
The same idea applies when you are photographing multiple people with a wide aperture - if they are not on the same focal plane (ie - in a row), someone will be sharper and someone else will be slightly out of focus, especially if you are standing close.
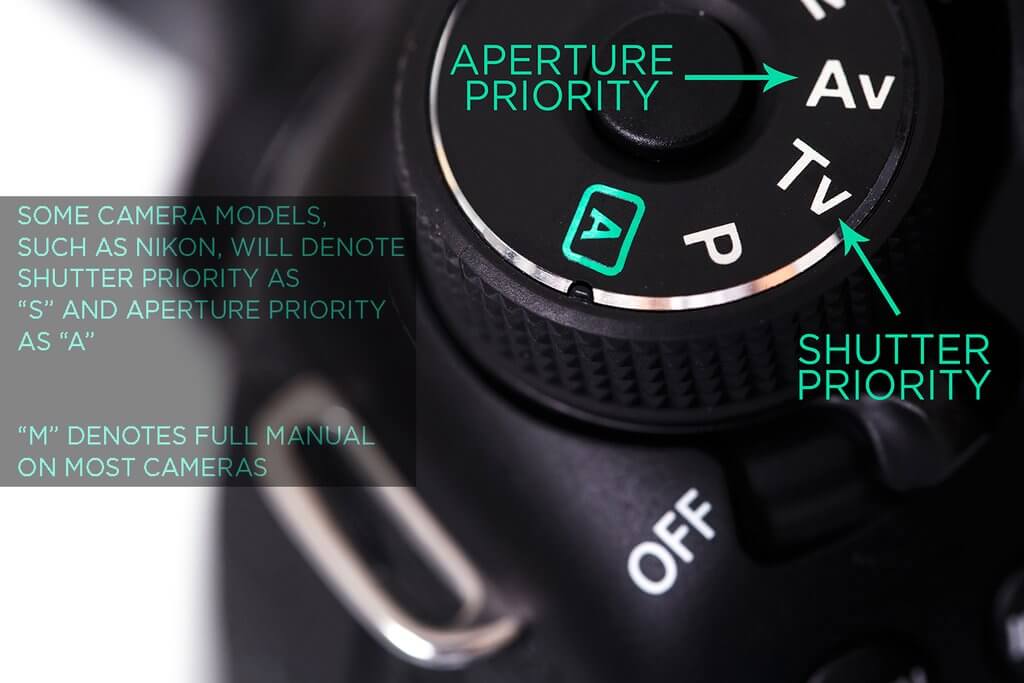
Aperture and shutter priority modes on your camera give you the ability to choose either a set aperture or shutter speed value, and the camera will automatically do everything else to achieve the proper exposure.
Priority modes can work well in a lot of situations, but they can also cause problems in others. Let's look at some pros and cons:
If you are like me and know that there is a certain shutter speed that is just too slow, shutter priority let's you designate a certain shutter speed. I generally set mine at 1/200, just to be on the safe side.
The good news here is that camera shake will not occur because I have chosen a fast shutter speed, but the bad news can often be that, to compensate for a fast shutter speed, my camera is going to open up my lens. If I am photographing a group of people with a wide open lens, I may run into some focusing issues, as we discussed above.
My options are to compose my shot in such a way that everything will be in focus, or to switch to aperture priority.
In aperture priority, you can control your camera's f/stop, and the camera will automatically adjust the shutter speed. Aperture priority mode is a great shooting mode when you know what aperture is going to work best for you in a given situation.
The drawback is that, for example, if you are photographing a large group, and your aperture is set to f/11, there is a chance that the shutter speed will become slow enough to cause camera shake.
In this case, you could either use a tripod, or switch to full manual.
If the shutter speed and aperture values that your camera assigns in each priority mode are not allowing you to achieve the intended results, you will want to switch over to Manual mode.
Here, you are in control of your shutter speed, aperture, and ISO - you will manually set each one, and the camera will not change anything automatically. The great thing about total control is exactly that: total control! One drawback is that, if you are not used to shooting in manual, it can slow you down a bit when you are first learning. I wouldn't suggest attempting to shoot in manual for the first time in a high stakes situation, such as a wedding. Instead, casually play around with manual mode until you fully understand it.
There are photographers who will say "all manual, all the time" and there are photographers who will say that they always use one of the priority modes. If you are learning how to use each, shooting mostly in manual is going to make you more technically aware later down the road than if you are constantly relying on a priority mode to automatically help you achieve the proper exposure.
I am not going to say you should be using one mode over the other, and I think there are times when each one is a valid choice, but that varies from situation to situation, as we discussed earlier. You will just need to weigh out the pros and cons for each, depending on your situation.
Did you find this article helpful, or do you have any questions about what we have discussed? We love hearing from you! Please feel free to join us in our private Photoshop Actions Facebook Group!
Your Guide to Sharper Images: Choosing the Lens That's Best for You
Your Guide to Sharper Images: Choosing the Correct ISO Setting
Your Guide to Sharper Images: Back Button Focus 101
How to Hold Your Camera: Achieving Sharper Hand Held Photos
Do you have any questions or comments about How to Shutter Speed & Aperture? Just leave us a comment below - we would LOVE to hear from you! And PLEASE SHARE this post using the social sharing buttons (we really appreciate it)!


Comments