- Lightroom Presets
- Mobile Presets
-
Photoshop
-
Learn
-
Support
-
Install
- Best Sellers
- Blog
If you were to ask me what my absolute go-to, all-time-favorite type of lighting was for pretty much any situation, I’d answer with a resounding and heartfelt, “Window light!”
It’s true. No other natural lighting source I’ve found is as versatile and as flattering. Whether illuminating a soft portrait or creating a moody look with heavy shadows, window light can meet your every need.
That’s not to say that all windows are created equal because they’re not.

One of the key benefits of window light is that it’s always available. Whether you find yourself dealing with heavy rain or stifling heat, none of these issues will stop you from photographing a beautiful image indoors.
Using a fixed lighting source like a north or south-facing window in the middle of the day (bonus - you can actually shoot in the middle of the day!) also really simplifies your setup. There is no need to reposition light stands or strobes - just rotate yourself and/or your subject. The lighting will remain consistent.
To help you better utilize window light in your photography, here are my top five tips:

Cameras can have a hard time focusing in dark or high contrast situations - and there is nothing worse than pulling an image you adore into Lightroom or Photoshop, only to find that it is out of focus. Not only that, but if you find yourself utilizing the window in a coffee shop, for example, you will want to be as quick and discreet as possible.
Waiting around while your camera hunts for focus will make you stand out like a sore thumb. Manual focus allows you to bypass your camera's difficulties with focusing. So, if your camera is struggling to focus, use manual focus.
(HINT: If you’re planning a client photoshoot inside a business location (like a coffee shop), make sure to get permission from that business before you start. However, if you’re just taking photos of your best friend while you have coffee, there is no need to obtain prior approval).
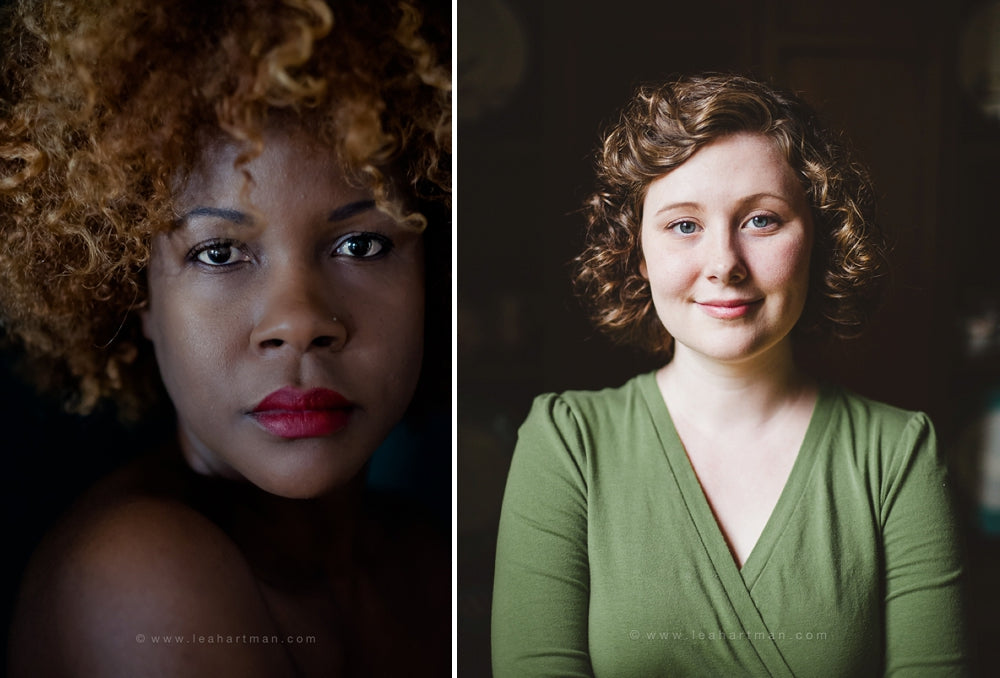
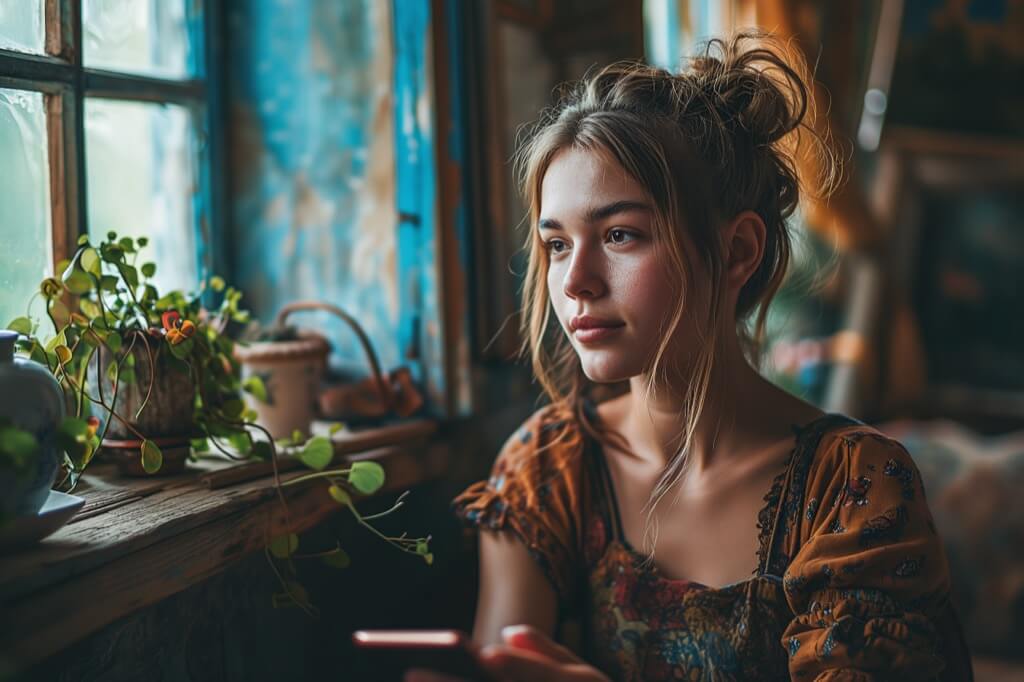
Where you position your subject in relation to the window will have the most significant impact on your image.
Play around with different positionings, and you’re sure to find one that fits your subject and your creative vision.
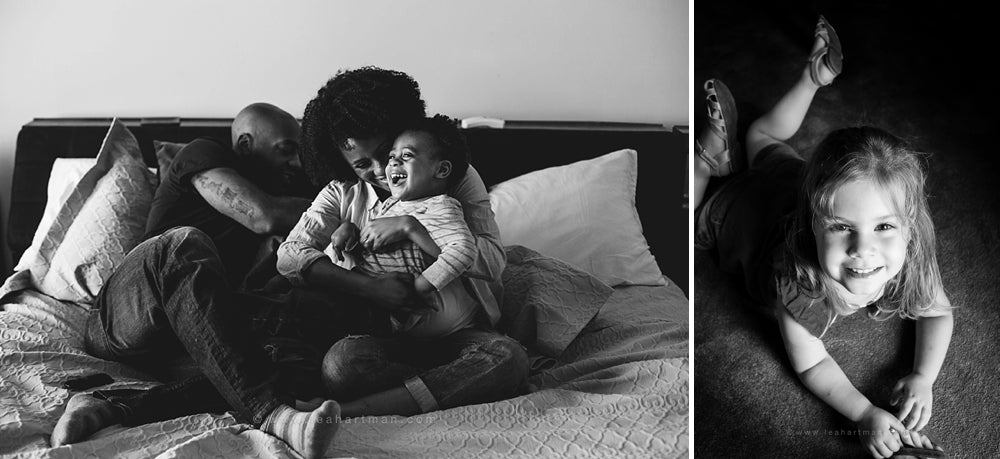
Take a look at the images below, and you can see just how versatile window light can be. Each of these photos is taking advantage of just one window!
If possible, control the amount of light with shades or blinds.
Sometimes, the light is just too much (especially if you’re dealing with east or west-facing windows). And sometimes the light isn't bright enough.
Take advantage of any tools at your disposal to counter these situations. A simple adjustment might be all that's required to tone down or increase the amount of light at your disposal.
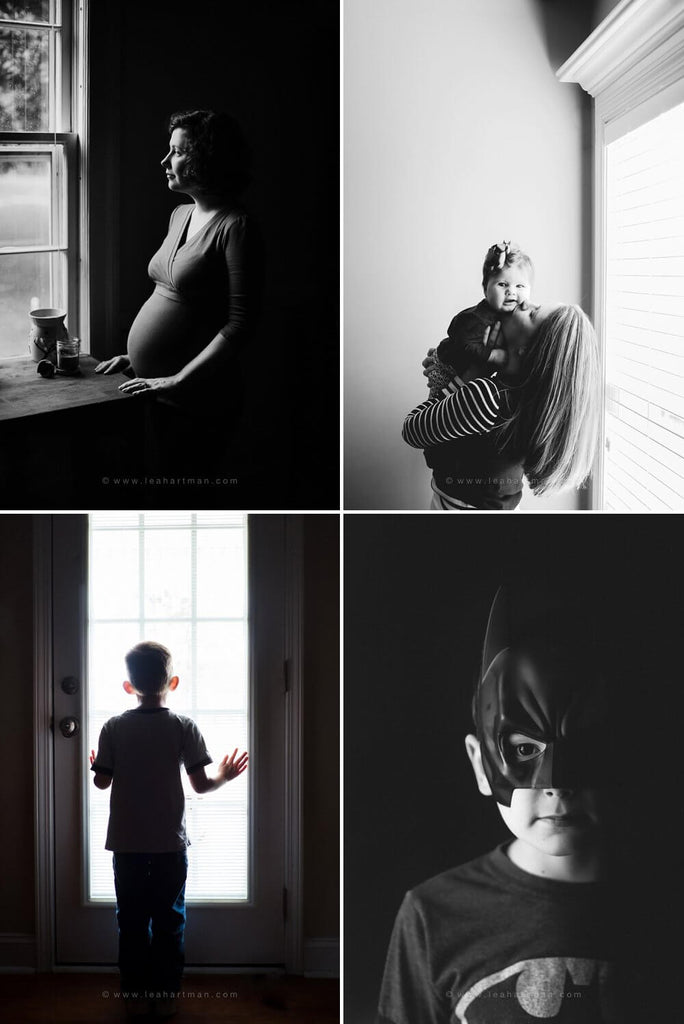
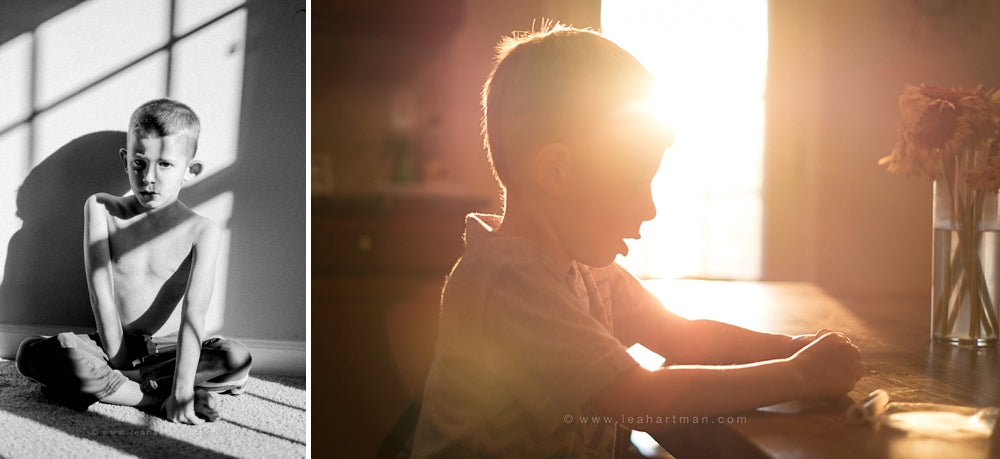
In addition, the window coverings can create a really fascinating light pattern you want to take advantage of. This is one of my favorite ways to play with window light. I love interesting lines and shapes caused by window panes, blinds, and direct sunlight.
I also love the beautiful glow that can be achieved when a subject is backlit by a window that is positioned behind the subject. Both examples below utilize directional window light, but each effect is quite different.
I mentioned earlier that windows with directional lighting (east or west-facing) can create harsh shadows. But what if that’s the only window you have to work with, and high contrast isn’t your thing? The solution is to place a reflector (foam core board, a neutral wall, a menu, an actual reflector, etc.) on the other side of your subject to bounce light back onto the darkened portion of your subject's face.
Though you can’t see it in the image below, with a large window just out of view on the right-hand side of the frame and the smaller window behind, my son needed to hold a reflector (an open hymnal with white pages) just out of view to bounce light back up onto his face.

If you’re looking for the easiest, quickest way to get a beautiful portrait utilizing window light, simply position your subject to face the window. Have them step backward until the light on their face is even and smooth and stand in front of them, careful not to block the light. It works every time!
You can also have them face the light and position yourself to their side. It will ensure their face is illuminated correctly and also provide more contrast and depth.
Let me offer one more bit of practical advice. To practice with window light, grab an egg and make it your subject (I like to use eggs because their shell is matte and not highly reflective, similar to human skin).
Draw a little face on the egg if you like. Study how the light hits the egg as you reposition it AND yourself. Snap a few pictures for later study and commit what you observe to memory. The more you practice recognizing good light, the easier it will be to identify it in real-world situations.
Oh, and if you’re half as clumsy as me, you might want to opt for the hard-boiled egg variety. Happy photographing!
Do you have any questions or comments about using Window Light in your photography? Leave us a comment below - we would love to hear from you! And PLEASE SHARE this post using the social sharing buttons (we really appreciate it)!


Comments