60% Off Today! Shop the Enchanted Garden Retirement Sale!

  • Log in
  • Cart (0)
  • Checkout
Pretty Presets and Pretty Photoshop Actions
  • Lightroom Presets
  • Mobile Presets
  • Lightroom Brushes
  • Photoshop 
    • Photoshop Actions
    • Photoshop Overlays
    • Limited Edition Holiday Collections
  • Support 
    • About Us
    • Contact Us
    • Order Lookup
    • Lightroom 101 Workshop
    • Photoshop 101 Workshop
    • Lightroom FAQ
    • Photoshop FAQ
    • Free Lightroom Training
    • Free Photoshop Training
  • Install 
    • How to Install Lightroom Presets
    • How to Install Lightroom Brushes
    • How to Install Presets in the Free Lightroom Mobile App
    • How to Sync Lightroom Presets from CC to Mobile
    • How to Install Photoshop Actions
    • How to Install Photoshop Overlays
  • Blog
Home   /   Lightroom Tutorials   /   Using Photoshop Clarity & Contrast to Create a Soft Dreamy Effect

Using Photoshop Clarity & Contrast to Create a Soft Dreamy Effect

By Anna Gay on April 07, 2016 | No Comments

Creating a Soft Dreamy Scene with Pretty Photoshp Actions

Have you ever tried to achieve soft, dreamy images in Photoshop/Adobe Camera RAW, but ended up with images that turned out fuzzy and seemingly out of focus? One way to avoid that scenario is to balance Clarity with Contrast in order to retain sharpness and detail, while still achieving that dreamy look that so many people love! In this Photoshop tutorial, we have created a video and a step-by-step blog post to walk you through the process!

Watch the video below to see how:

For those of you who prefer written instructions, here's how

After opening your image in Adobe Camera Raw, reduce the Clarity. Since Clarity affects the midtones of your image, and due to the fact that most properly exposed images are composed of mostly midtones, you will probably see a significant softening of your image:

Creating a Soft Dreamy Scene with Photoshp Actions

In order to add depth to your image after reducing the Clarity, you can boost the Contrast, which creates more definition between highlights and shadows, giving your softened image more of a tonal range:

Creating a Soft Dreamy Scene with Photoshp Actions

Once you have reduced the Clarity and boosted the Contrast, you may find that your image becomes too saturated. In this example, the greens and yellows in the image became a bit too loud, so I opened the HSL panel (Hue/Saturation/Luminance panel):

Creating a Soft Dreamy Scene with Photoshp Actions

By reducing the Saturation of the Yellows and Greens, I was able to reduce the intensity of those two colors without affecting the colors in the rest of the image, preventing the image from becoming too washed out looking:

Creating a Soft Dreamy Scene with Photoshp Actions

You may also find it helpful to adjust the Luminance sliders of a particular color. By moving my Green Luminance slider to the left, towards black, I was able to add depth to the image without losing the softness that we are going for with this edit:

Creating a Soft Dreamy Scene with Photoshp Actions

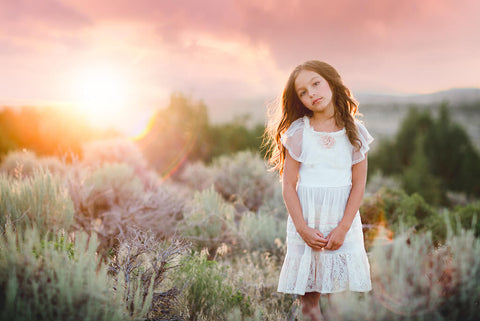
Here is a before (top) and after (bottom) example to illustrate the changes. As you can see, the edited image is much softer than the original, but it still retains its depth and sharpness:

Creating a Soft Dreamy Scene with Photoshp Actions

Do you have any questions? We love hearing from you! Please stop by and join us in our private Pretty Photoshop Actions Facebook group!

Looking for Photoshop actions to help you create dreamy yet sharp and detailed images? Be sure to check out the PURE Color Workflow.

Also, be sure to check out all of Pretty Actions other great Photoshop Actions and Overlay Collections! 

Related Articles

150+ Free Adobe Lightroom Tutorials
150+ Adobe Lightroom Tutorials We've put together this fantastic resource page just for you!  It includes OVER 150 of...
Read More
100+ Free Photoshop Tutorials
100+ Photoshop Tutorials We've put together this fantastic resource page just for you!  It includes OVER 100 of our f...
Read More
200+ Free Photography Tutorials
200+ Photography Tutorials We've put together this fantastic resource page just for you!  It includes OVER 200 of our...
Read More
Pretty Presets for Lightroom author Anna Gay

Anna Gay

Portrait Photographer

Anna Gay is a portrait photographer based in Athens, GA and the author of the dPS ebook The Art of Self-Portraiture. She also designs actions and textures for Photoshop. When she is not shooting or writing, she enjoys spending time with her husband, and their two cats, Elphie and Fat Cat.

April 07, 2016

Comments

INFO & SUPPORT
  • Lightroom FAQ
  • Photoshop FAQ
  • Contact Us
  • Order Lookup
Sign up for great freebies and tutorials

Get notified about promotions, giveaways and webinars before they happen!

Join the pretty Community

Come join the #1 Lightroom & Photoshop Facebook Group to help you learn how to edit your photos more confidently today!


  • About Us
  • Testimonials
  • Policies
  • Terms of Service
  • Write for Pretty
  • Pretty Scholarship

© 2023 Pretty Presets for Lightroom.