- Lightroom Presets
- Best Sellers
- Mobile Presets
-
Photoshop
-
Learn
-
Support
-
Install
- Blog
By Anna Gay on | No Comments
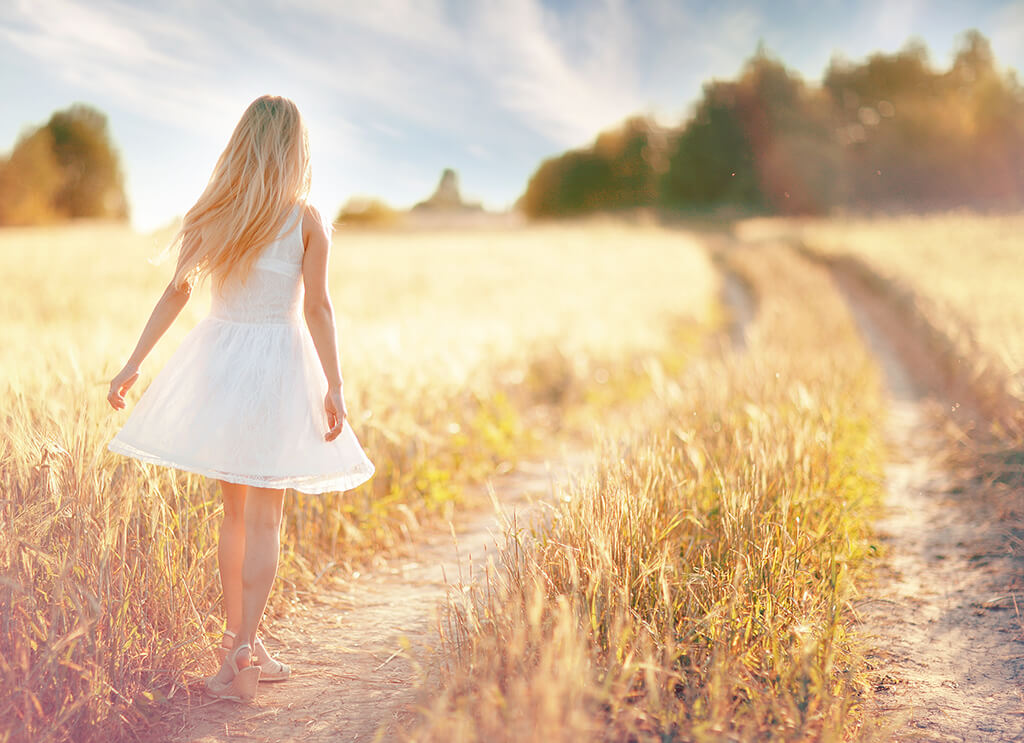
The Hue Saturation Panel in Photoshop is a simple yet fine-tuned tool for color management. You can use Hue Saturation to adjust unwanted color casts in your images, such as incorrect white balance, or you can use them to change and manipulate colors for creative editing.
Below is a basic overview of some of the features of the Hue/Saturation panel, along with an example of an image edited using a Hue/Saturation adjustment.
First, let's create a new Hue Saturation adjustment layer:

Next to the word Preset, you will see Default, which means that all of the values are zeroed out, but if you click on the drop-down menu next to Default, you will see that there are several presets that will increase your contrast, saturation, etc.
The presets are great for quick editing, but if you want to go a little deeper to get the most out of your hue saturation tool, you will need to make custom adjustments.
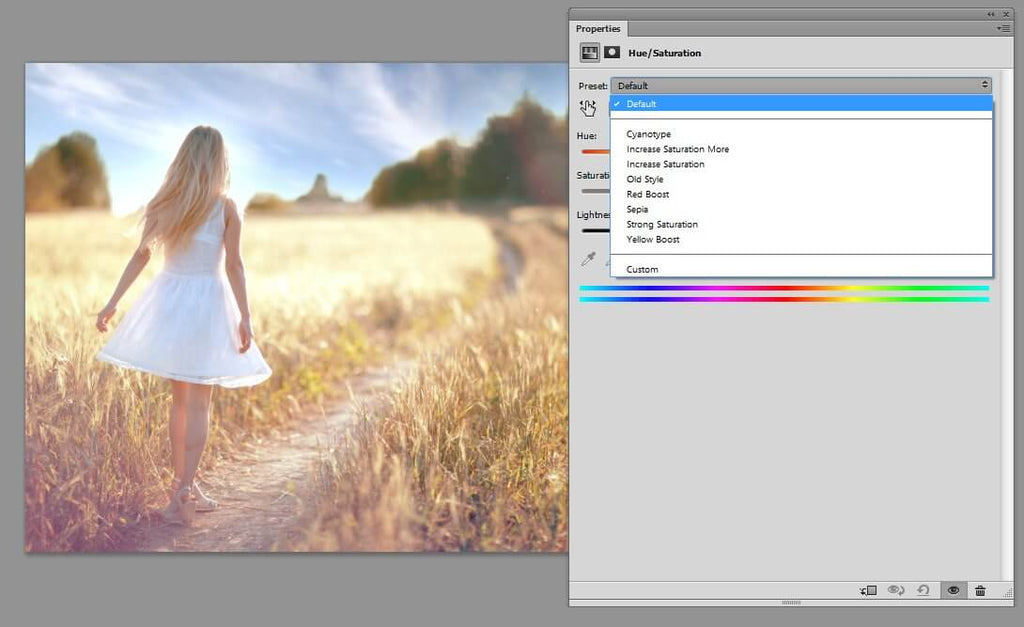
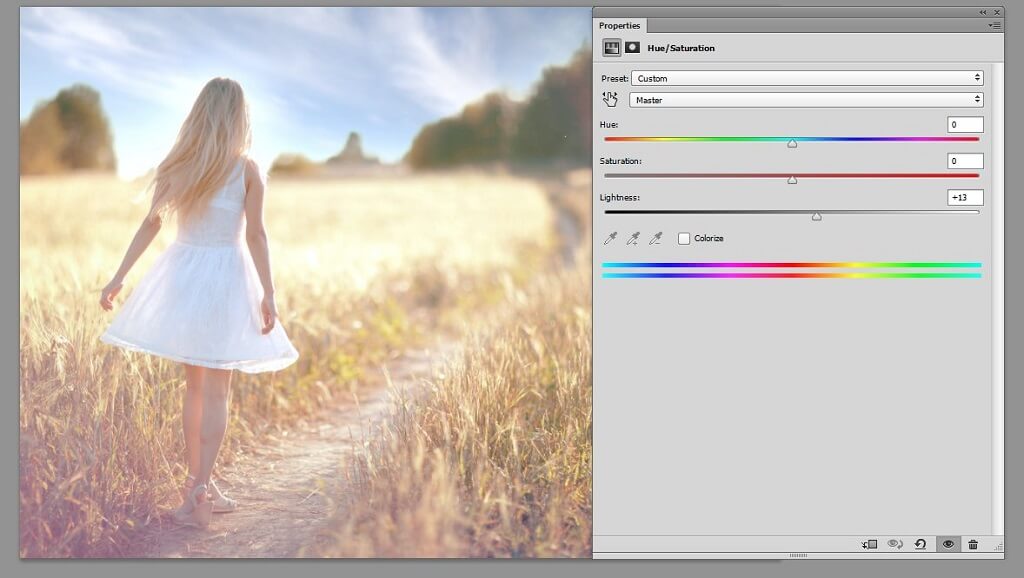
On its most basic level, the Hue/Saturation panel will affect your overall Hue, Saturation and Lightness.
In other words:
In the example below, I have bumped up the Lightness, and as you can see, it brightens ALL of the tones in the image: highlights, midtones AND shadows:
You can also work within the individual color channels.
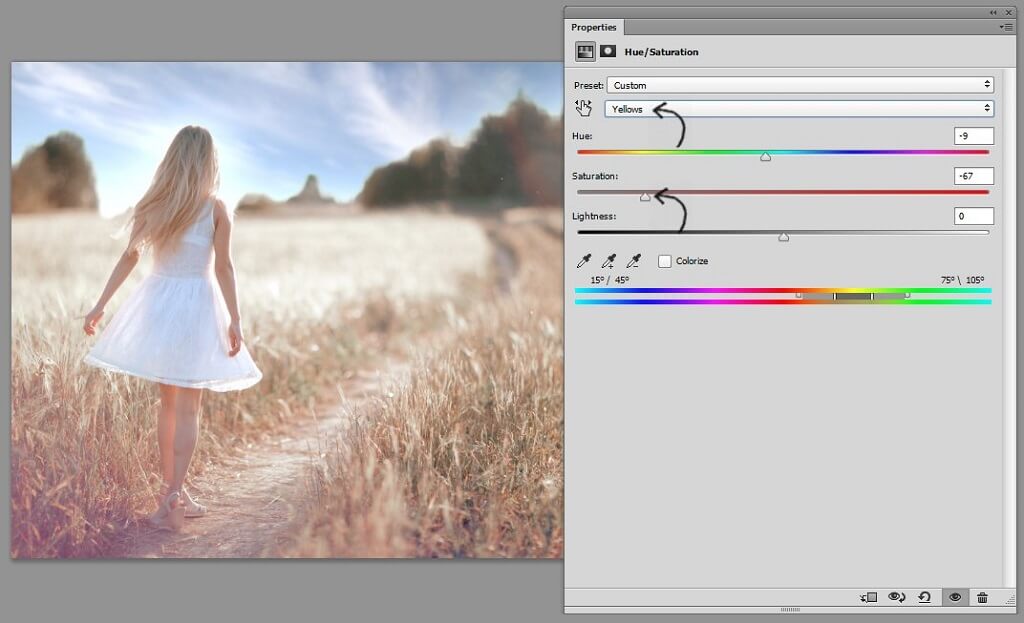
For example, by selecting the Yellows channel in the drop-down menu, any changes that I make will affect only the yellows in my image:
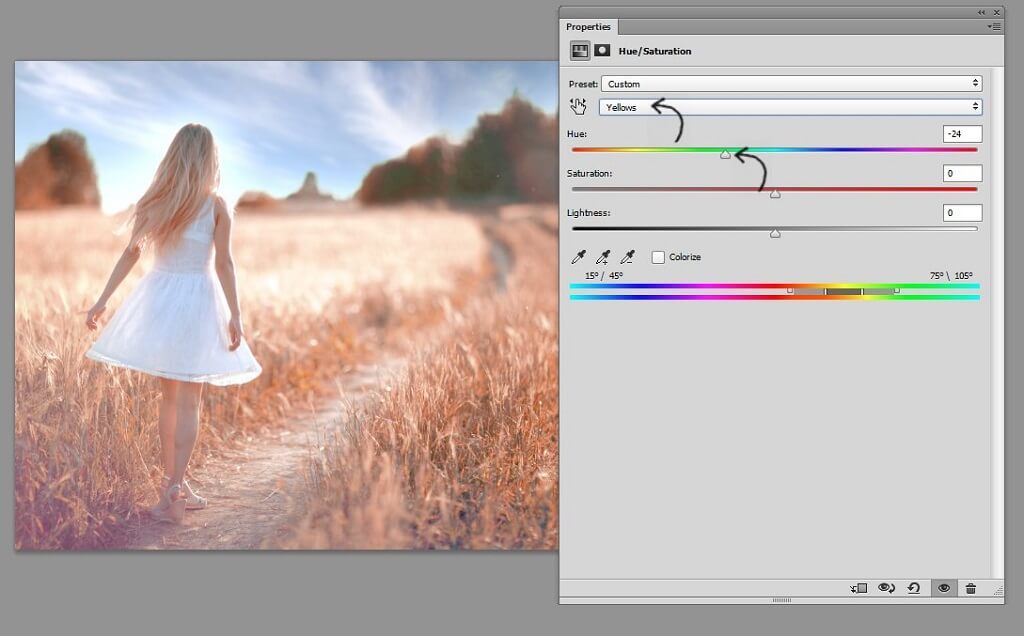
As you move the Hue slider, you will see the yellow portions of your image being affected. This image has a lot of yellow in it, so by moving the Hue slider to the left, the yellows are shifting to orange. The amount of each color will vary from image to image, and how much you need to change each color for your edit will also vary.
When I reduce the Saturation, notice how everything but the sky becomes less saturated - this is because everything but the sky has a lot of yellow in it, and I am only changing the Yellow channel here - I am not reducing the saturation in red, blue, green, etc. - only yellow:
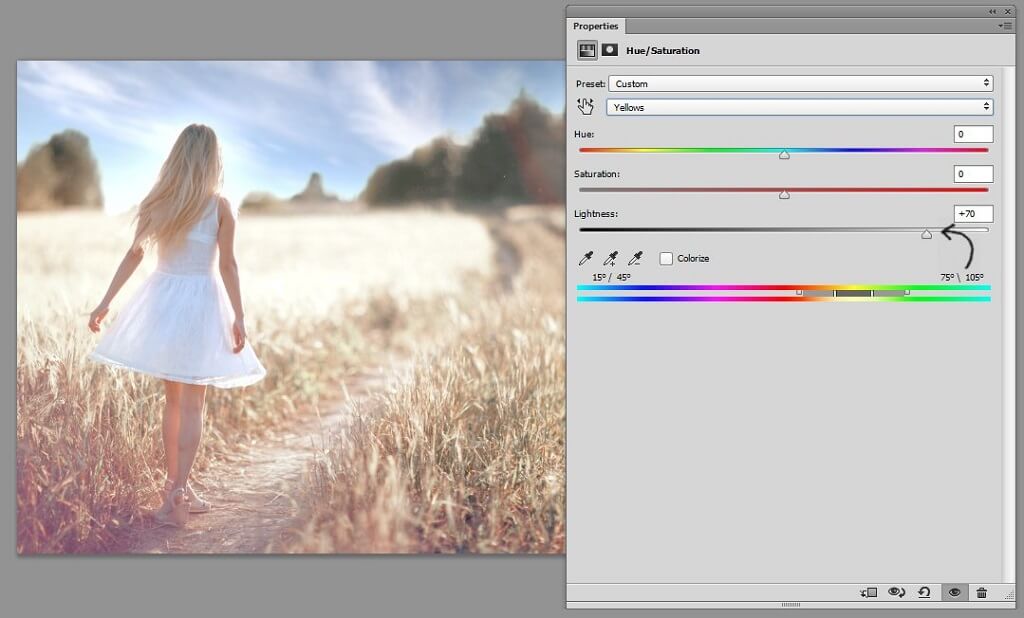
We saw above how Lightness determines how dark or bright the selected range of colors will be. Moving my Lightness slider to the right, as you can see, brightens the yellows substantially. The opposite would be true if I moved the slider to the left - the field, the subject's hair, and anything with yellow in it would be darkened:
If you are experimenting with the sliders and you do not see any changes occurring, make sure Layer Visibility is selected. Also, you can easily revert back to the default settings by clicking the arrow highlighted below:

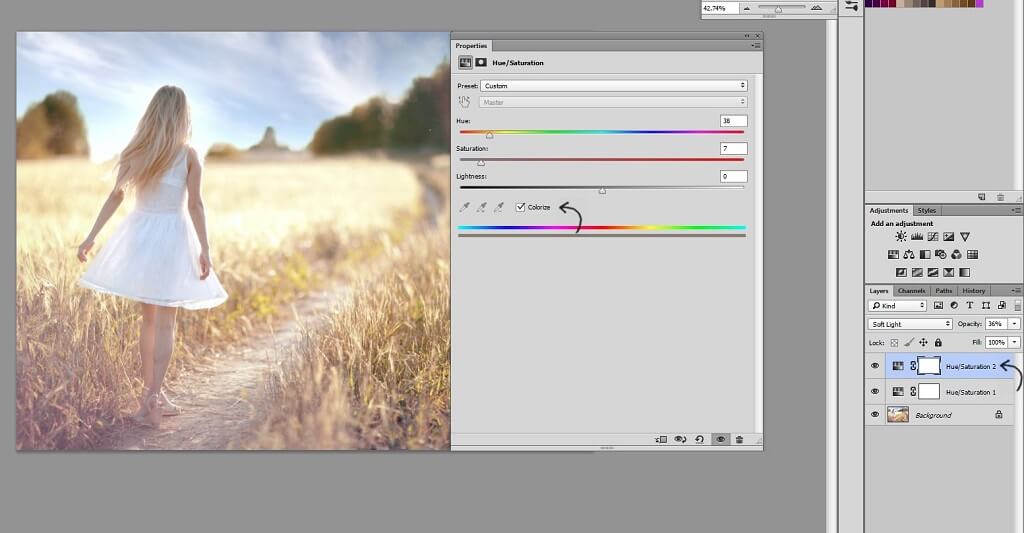
You can also create a monotone image with the Hue Saturation slider. First, make sure you are on the Master color channel, because you want to work with all of the channels here, not just a specific one like in the example above. Then, check the box beside Colorize:
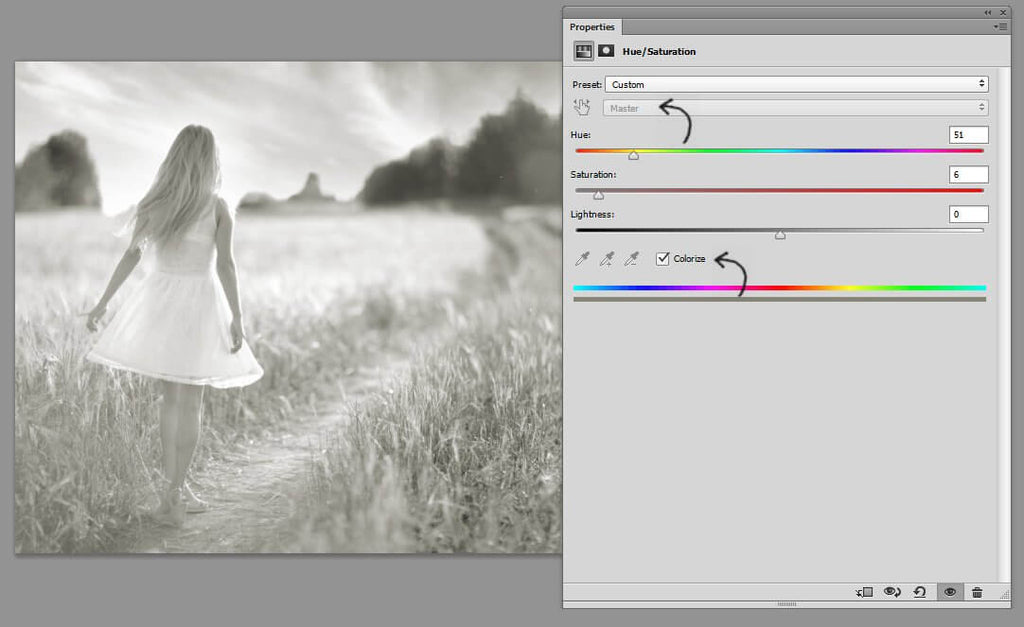
You can now change the Hue and the Saturation to be any color, and either very saturated or more subdued, as in the example above.
Above were slightly extreme examples of color adjustments to illustrate how each slider behaves, so now I'll show you something a bit more practical that is in line with how to properly use the Hue/Saturation panel for color management without editing too heavily.
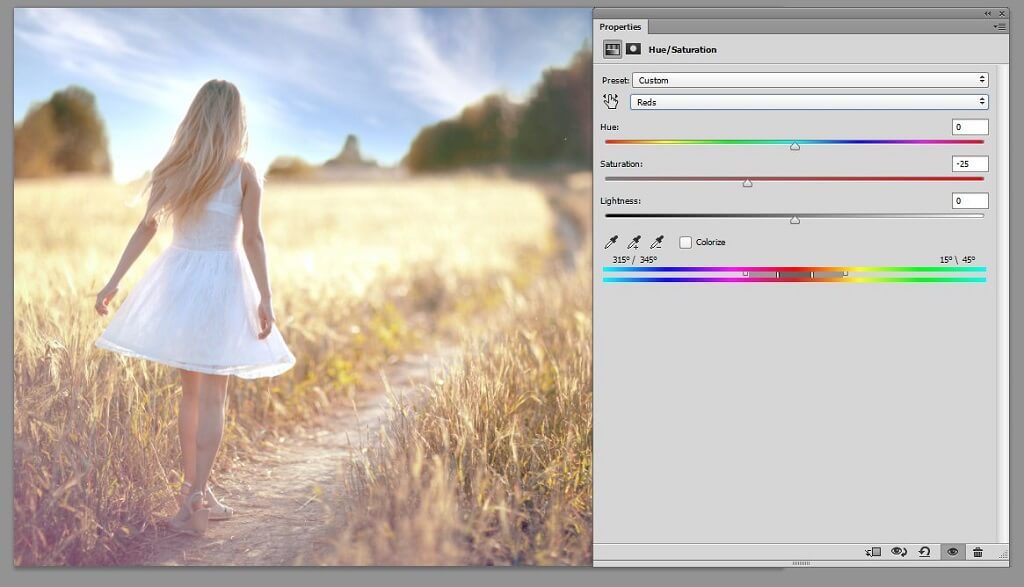
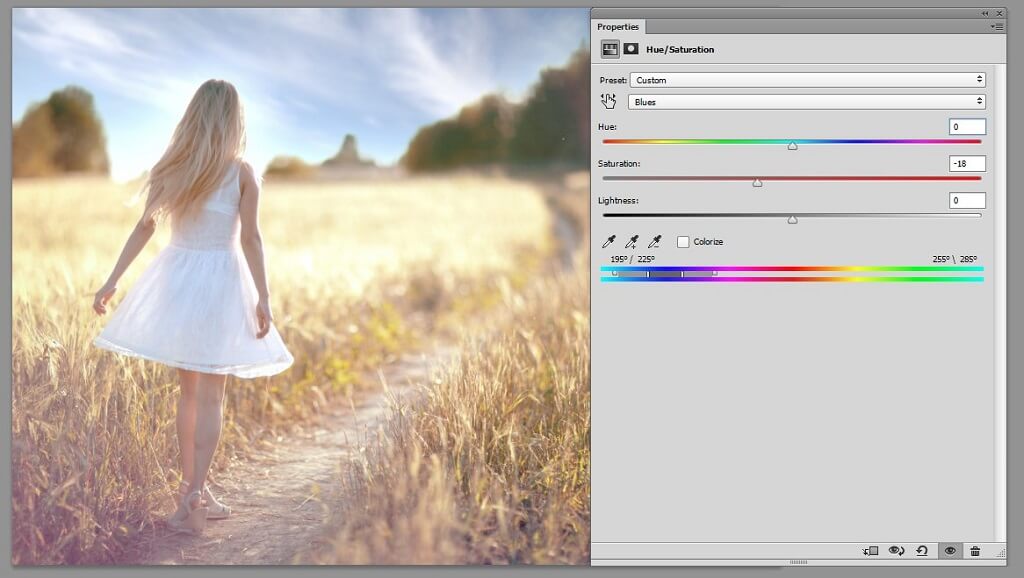
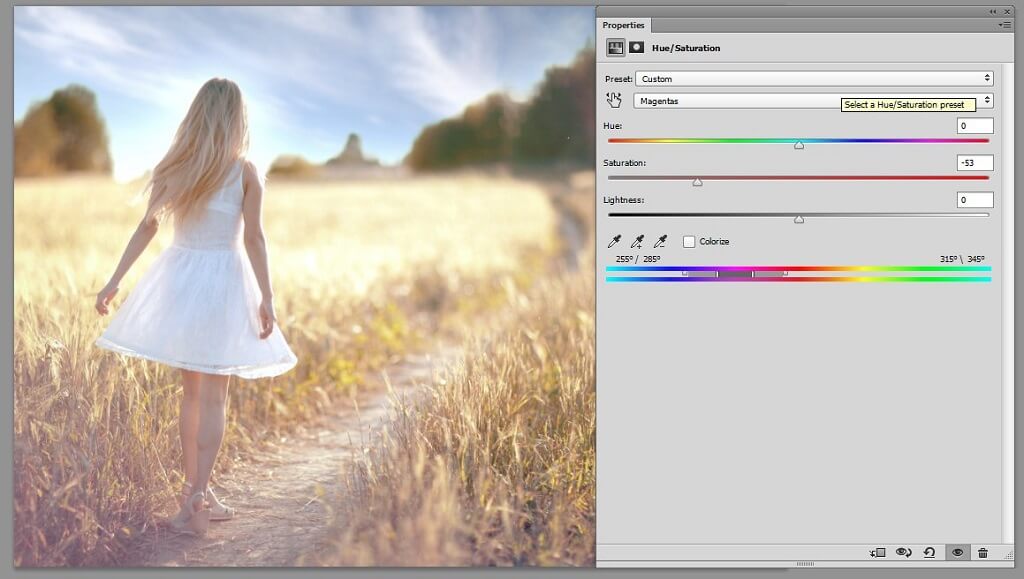
In my original image, there are a couple of channels that are too saturated, so I am reducing the saturation for each channel by selecting the channel in the drop down menu as we did above with the Yellows channel:
Reds Channel:
Blues Channel:
Magentas Channel:
Next, I am creating a new Hue/Saturation layer and this time, on the Master channel I am using the Colorize feature. I am also setting my Blending Mode in my layers panel to Soft Light, and reducing the overall Opacity. This will brighten the image and at the same time give it a more muted look:
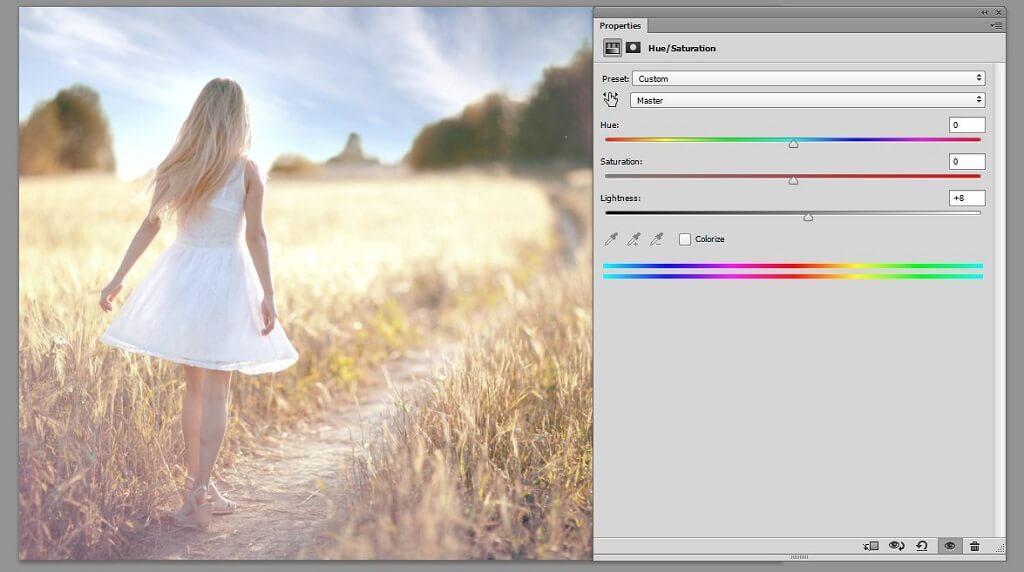
Finally, I am finishing off by creating one more new Hue Saturation layer, and bumping up the Lightness in the Master channel just a tiny bit:
If you are interested in actions that will help you beautifully edit color, be sure to check out our PURE Color Workflow Photoshop Actions Collection.
Do you have any questions or comments about Hue and Saturation in Photoshop? Leave us a comment below - we would LOVE to hear from you! And PLEASE SHARE our tutorial using the social sharing buttons (we really appreciate it)!
Anna Gay is a portrait photographer based in Athens, GA and the author of the dPS ebook The Art of Self-Portraiture. She also designs actions and textures for Photoshop. When she is not shooting or writing, she enjoys spending time with her husband, and their two cats, Elphie and Fat Cat.

Comments