- Lightroom Presets
- Mobile Presets
-
Photoshop
-
Learn
-
Support
-
Install
- Best Sellers
- Blog
Have you recently installed Lightroom or Lightroom Classic? Starting out with new software can feel daunting, but don't worry!
We've outlined a few simple steps to help you begin editing your photos immediately. Additionally, we'll provide a FREE Lightroom Hacks download and links to some of our most popular blog posts to further assist you in mastering this fantastic tool!

Important Note: In this post, we will reference both Lightroom Classic and Lightroom (CC), as accessing tools on each software version can be slightly different. Keep in mind that:
If you would like to know more about which software version might work better for you, read this post.
To kick off your journey with Lightroom or Lightroom Classic, the initial step involves importing your photos. Fortunately, the process is straightforward.
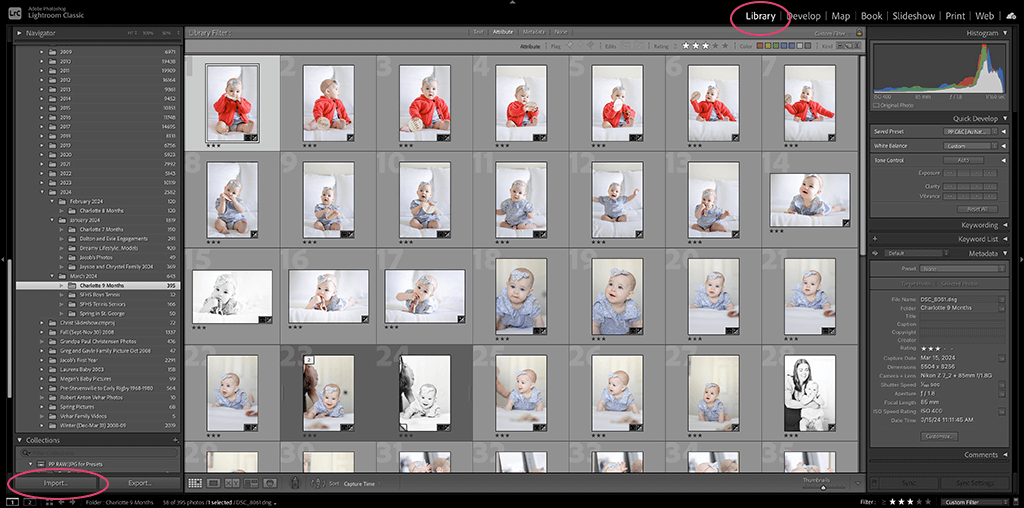
1. Access the Library: Start by clicking on "Library" in the upper-right corner.
2. Initiate Import: Find and click the "Import" button located at the lower-left of the Library module. This action opens the Import window.
3. Select Source: On the left side of the Import window, choose where your photos are currently stored. If you're adding new images to your hard drive and to Lightroom, select "Copy" or "Copy as DNG." If the photos are already on your hard drive and you simply want to make Lightroom aware of them, just click the "Add" option.
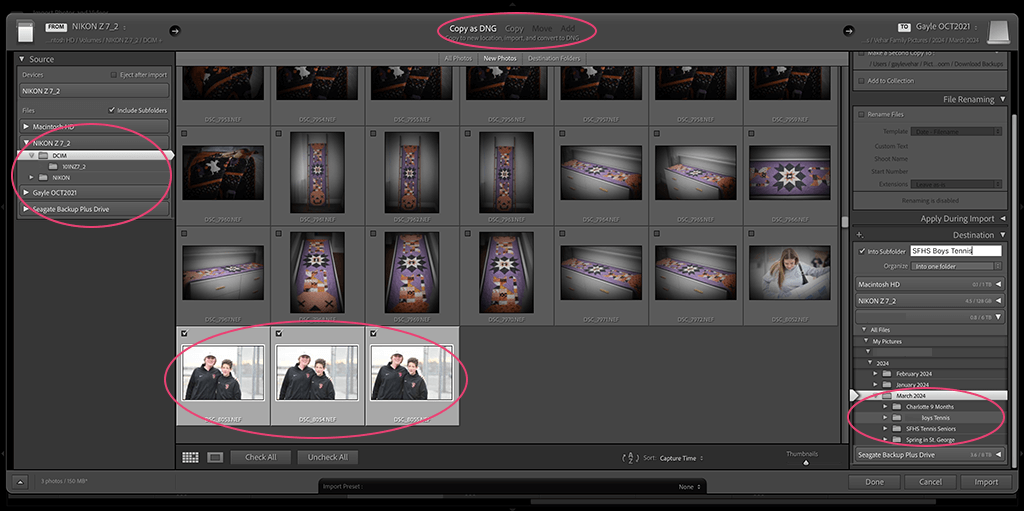
4. Choose Photos to Import: In the central section of the window, check the photos you wish to import.
5. Set Destination: Finally, specify where on your hard drive you want the photos to be saved. This is done in the Destination section on the right side of the Import window.
6. Complete the Import: Click the "Import" button at the lower-right of the window. Lightroom will then process and import your images to the chosen location on your hard drive, making them available for editing in Lightroom Classic.
1. Open the Import Interface: Navigate to File > Add Photos. This action opens a dialog box.

2. Select Your Images: From this dialog box, you can browse and select the photos on your hard drive that you wish to import into Lightroom. After choosing the images, click on "Review for Import."
3. Review Your Selection: A new window will display the selected photos, each marked with a checked box. If you decide not to import any specific photo, simply uncheck its box.
4. Confirm Import: Once you've finalized your selection, press the "Add Photos" button located at the top-right of the window to import the images into Lightroom.
To begin editing in Lightroom Classic, select the photo you want to edit and click on the Develop Module to access all the editing tools. All the Lightroom presets you installed will be on the left side of the Presets panel.
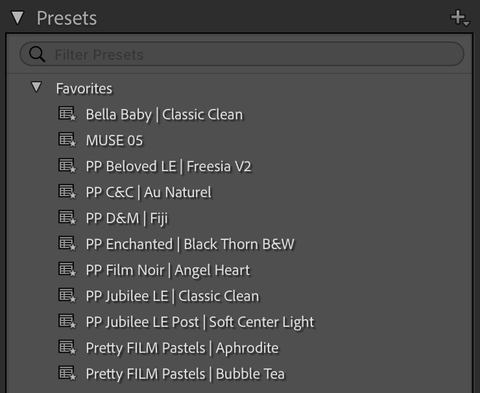
If you are using Lightroom CC instead, look for the two interlocking circles icon to open the presets panel.

Lightroom Presets are essentially a set of pre-recorded editing steps that you can apply to any image with a single click. They are crucial for streamlining your editing process and achieving a consistent look quickly and easily.
At Pretty Presets for Lightroom, we offer a wide variety of expertly crafted presets designed to match different editing styles. Our presets typically come in collections that maintain a cohesive style and are available for purchase for instant download.
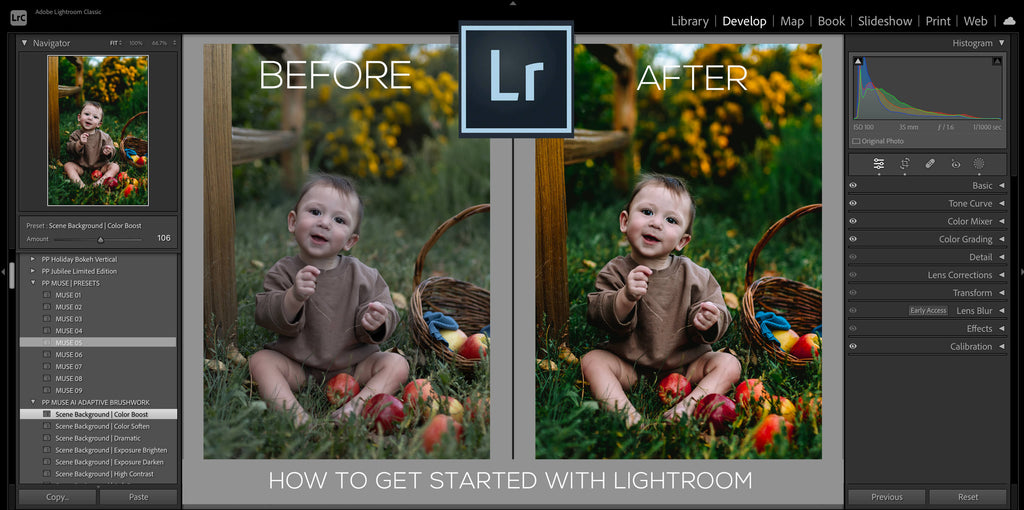
The image below was edited with presets from the Salted Evolution Preset Collection.


Presets are compatible with ALL versions of Lightroom. However, if you wish to use presets on Lightroom mobile apps, including Lightroom for iPad, you will need presets in a specific file format. Our mobile preset collections are designed to be installed directly on the Lightroom mobile app for both phones and iPads, allowing you to enhance your photos on the go!
Here are detailed instructions to help you install presets on various devices:
After importing the presets into your Lightroom version, applying them is very straightforward. For desktop versions of Lightroom, simply click on a preset to apply it. You can also hover over the preset to preview its effect on your image.
In the Lightroom mobile app, tap on the preset name to apply it to your photo. To confirm and save the changes, tap the checkmark in the bottom-right corner. If you decide against the changes after applying a preset, tap the "x" in the bottom-left corner to revert them.
The image below was edited with presets from the Muse Evolution AI Preset Collection.


Brush presets are essential when using the Masking Tool in the Develop Module of Lightroom Classic. Unlike global presets, brush presets, also known as masking presets, are installed differently. Please follow the instructions in this post to install them.
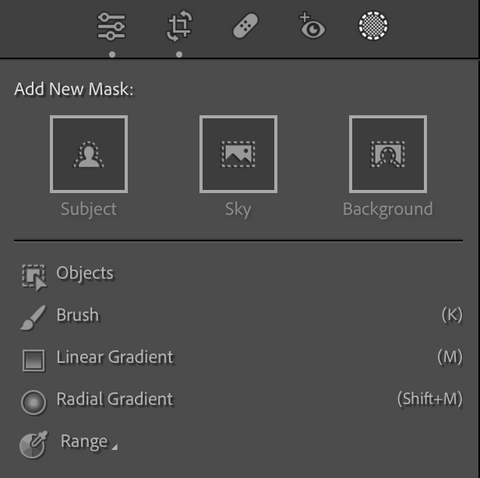
1. Accessing Mask Tools: The Mask tools allow you to refine specific areas of your image. To access these tools, click on the Masks icon located in the tool Toolbar above the Basic Panel.

2. Choosing a Masking Method: Upon selecting the Masking icon, various tool options will appear, enabling you to select how you want to apply the mask. Lightroom Classic leverages AI technology to make targeted adjustments to the subject, sky, or background. Popular choices include:
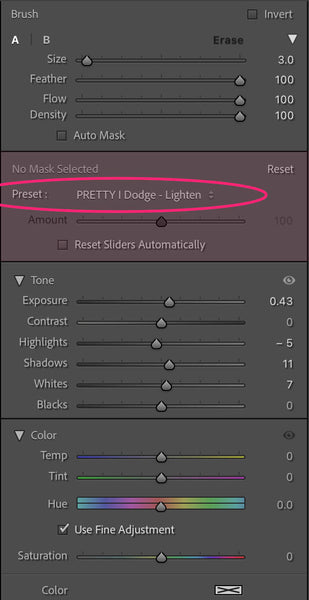
3. Finding and Applying Brush Presets: After selecting a masking tool, a new set of options will appear. First, locate the presets box to access the brush presets you've installed. Its position varies depending on the masking tool you've chosen.
Typically, the preset section will display "Custom." Click on this to open a dropdown menu containing all the brush presets you have installed.
Select any preset to apply it to your image. If the effect is too strong or too subtle, you can easily adjust the intensity using the amount slider to achieve the desired effect.
NOTE: This same Masking tool can be found in Lightroom. HOWEVER, Brush Presets can ONLY be installed in Lightroom Classic. In the standard Lightroom version, all masking adjustments must be made manually by adjusting the sliders.
While presets are incredibly useful in the editing process, they often require more than just a one-click application. This is because presets can't fully adapt to the diverse range of exposure and lighting conditions your photos might have.
Therefore, it's crucial to know how to make adjustments in the Basic Panel, regardless of whether you use presets.
The two most critical adjustments in this panel are White Balance and Exposure.
Both settings are fundamental to enhancing your photo's appearance.
The simplest method to adjust white balance is through the top section of the Basic Panel. Here, you'll find an eyedropper tool located in the upper-left corner. To use it, click on the eyedropper, then move your cursor over parts of your image that should appear neutral—such as gray, white, or black objects.
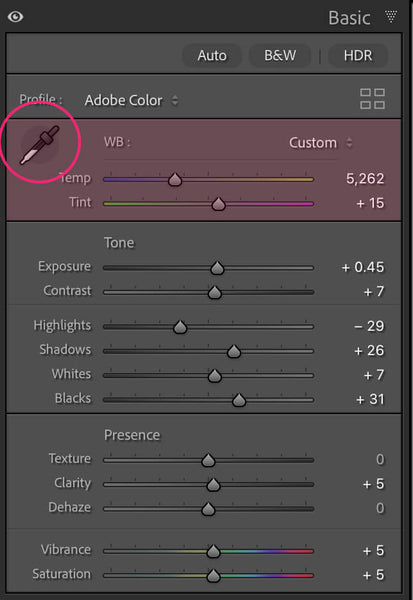
As you hover over these areas, a small preview in the upper-left corner of the Develop Module will display what your image would look like with the white balance set to that point. When you spot the right balance for your photo, click on that area to apply the change. If the white balance requires further adjustments, tweak it using the sliders until it perfectly matches your vision.
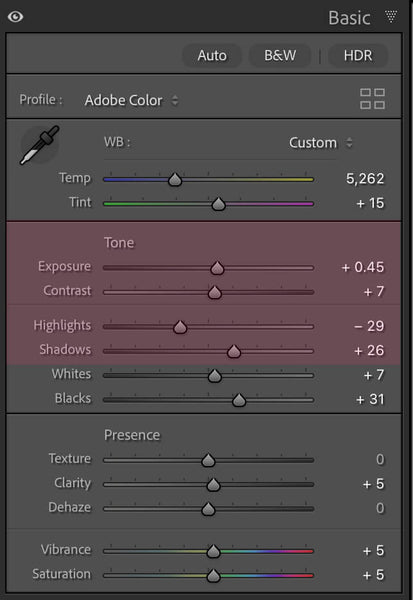
Adjusting exposure is much simpler. Simply move the Exposure slider to the right to brighten your image or to the left to darken it. If your photo requires a more substantial adjustment, you might also need to tweak the Highlights and Shadows sliders to achieve the desired exposure balance.
Unlock Adobe Lightroom's full potential with our comprehensive guide, "7 Lightroom Hacks." This essential resource starts by familiarizing you with the Lightroom workspace, emphasizing the importance of the Library and Develop Modules for organizing and adjusting your photos. Next, learn how to utilize powerful keyboard shortcuts, effectively sync edits across photos, and so much more!
Perfect for beginners and advanced users alike, this guide is packed with actionable tips and tricks to help you make the most of Lightroom's powerful features. DOWNLOAD 7 AMAZING LIGHTROOM HACKS!

This post offers an introduction to Lightroom, but there's MUCH MORE to learn. Our site has a wealth of additional information to help you advance further.
To deepen your understanding and enhance your editing skills, be sure to explore these more advanced tutorials:
This guide aims to ease your start with Lightroom (CC) or Lightroom Classic by providing clear, step-by-step instructions on how to import and edit your photos using the powerful tools each version offers.
Whether you're adjusting white balance and exposure or applying advanced presets and brush techniques, Lightroom provides the flexibility to enhance your photos across any device.
As you unlock new possibilities with each feature, don't forget to explore our rich array of resources and tutorials to truly master Lightroom's full potential. Happy Editing!
Do you have any questions or comments about Getting Started with Lightroom? Leave us a comment below - I would love to hear from you! And please SHARE this post using the social sharing buttons (we really appreciate it)!


Comments