- Lightroom Presets
- Best Sellers
- Mobile Presets
-
Photoshop
-
Learn
-
Support
-
Install
- Blog
By Anna Gay on | No Comments

One of the most important aspects of your business is your branding and how you present yourself to potential clients.
Having cohesive branding will go a long way towards getting your name out there, but doing it yourself can be daunting for most people. However, as a photographer, YOU ARE ALREADY CREATIVE, SO WHY NOT USE YOUR CREATIVITY TO CUSTOMIZE YOUR OWN BRANDING that perfectly represents you and your business?
There are many different design elements that go into a photography business – website design, blog layout, business cards, pricing and packaging, watermarks, the list goes on and on!
One of the best places to start is your LOGO, which will most likely go on EVERYTHING you put out for marketing and advertising in some form or fashion.
For example, I like to shoot with actual vintage film cameras in my photography business, so when I'm editing digital files, I want to give them a retro vibe too. Therefore, to BEST REPRESENT MY OWN BUSINESS, my branding includes a lot of vintage textures with retro fonts and clip art.
Once you figure out what sets you apart, think of ways you can incorporate those elements into a visual representation of YOUR BUSINESS!
There are endless ways of putting everything together and various software programs that can help you, but since many of us already use Adobe Photoshop, let’s look at creating and designing a logo in Photoshop. We will do this in 4 simple steps. Note: this can also be done in Photoshop Elements.
Let's get started:
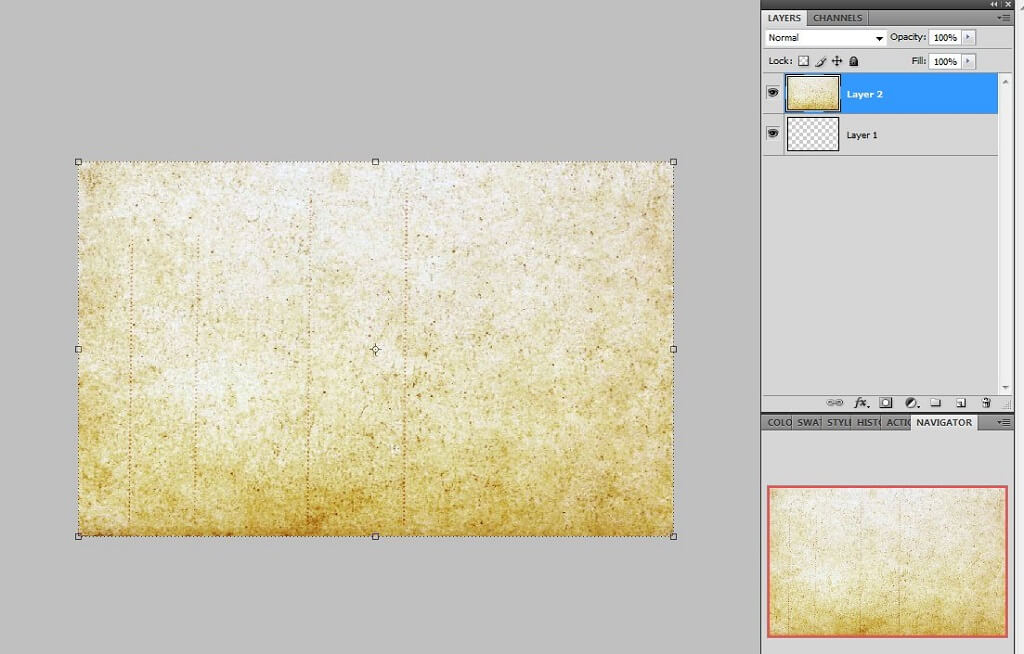
Start by creating a new Photoshop document. To do that, select File>New. Make sure the background color is set to transparent, and the document's width and height are similar in shape to a business card.

Next, I want to use a texture as the background for my image. To do that, drag and drop a texture onto the first layer of the Photoshop document that was just created.

Next, you will want to add some embellishments to your logo using the Photoshop Brush Tool.
Brushes for Photoshop are an easy (and really fun!) way of customizing your branding and making it unique. Many brushes can be found free online, and HERE is a great place to browse for them.
Installing Photoshop brushes is easy, too. Once your brushes are downloaded, unzip the file and double-click on the brush files to automatically install them in your Photoshop brush library.
Before selecting a brush, change the Foreground color to a shade that will match the texture. When you click on the Foreground/Background color icon (on your left-side toolbar), this box will open:

When you hover over the texture while this box is open, you will see what looks like a dropper tool. Use this dropper to click on various sections of the texture to help select a color that is already in your logo's color palette. Here, I used the dropper to select a color, then made it slightly darker for extra contrast.
Next, select the Brush tool (circled below).

Then, right-click on your image to bring up your brush library.

Create a new Photoshop layer. There should now be three separate layers.
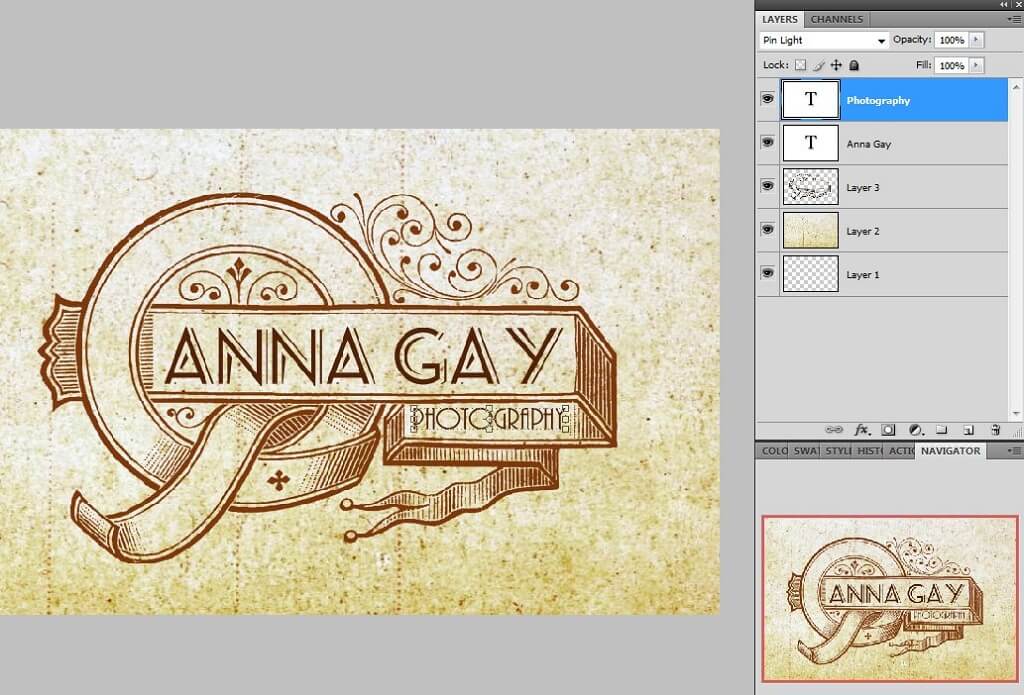
When I placed my embellishment, it didn’t quite blend in with the texture, so I changed the Blending Mode of Layer 3 to Pin Light. When working on this type of project with various brushes, textures, and fonts, experiment with all the various Blending Modes and Opacity until you feel that everything blends together nicely.
Now it’s time to add some text, which can be done by clicking on the "T" icon (circled below) on your Photoshop toolbar. This will automatically create a new layer for you. You can alter the color of your text in the same way we changed the color of the brush tool. To add contrast, I made the text color slightly darker than the embellishment.

Just like Photoshop brushes, there is an array of free downloads for unique fonts, and they are also installed the same way. I download the majority of my fonts HERE.
At this point, I cropped my image so the text would not appear too small compared to the rest of the image and once again set the blending mode on this layer to Pin Light.

I wanted the word "Photography" to be slightly different (but similar in style to my other text), so I selected a different font that worked well in combination and once again, I set the Blending Mode to (you guessed it!) Pin Light.
I added one final touch to my logo design using a faux film brush (which sadly, is no longer available).
Once you are happy with your finished logo, you may want to do a final crop, as I have done here.
It's always good to save a copy of your logo design as a PSD file. That way, if you want to go back and make changes later, you can easily tweak any layer without starting from scratch.

As I mentioned previously, this is just one of many ways to create a logo in Photoshop. So have fun, experiment, and always strive to keep your brand in mind when tying all of your design elements together!
Do you have any questions or comments about How to Create a Logo in Photoshop? Leave us a comment below - we would LOVE to hear from you! And PLEASE SHARE our tutorial using the social sharing buttons (we really appreciate it)!


Anna Gay is a portrait photographer based in Athens, GA and the author of the dPS ebook The Art of Self-Portraiture. She also designs actions and textures for Photoshop. When she is not shooting or writing, she enjoys spending time with her husband, and their two cats, Elphie and Fat Cat.

Comments