- Lightroom Presets
- Best Sellers
- Mobile Presets
-
Photoshop
-
Learn
-
Support
-
Install
- Blog
By Gayle Vehar on | No Comments

I am SO EXCITED to share this little tip with you today! It is quite possible that this is something that was SUPER obvious to everyone but me, but it took me a couple of years to have this "Ah-Ha" moment.
For a REALLY LONG time, I have wished that Lightroom had sliders in the brush tool that said "remove red" or "remove green" and I could just paint with those brushes in specific areas of my photo. But it doesn't, which left me taking photos into Photoshop every time there was a color cast/tint on skin that needed work or redness on the face that needed to be managed (i.e. red nose from the cold, red eyes from allergies, etc.)
Then one day an idea just popped into my head. A way that I could do the very thing that I had always wanted to do. Maybe not as simple as I had wished. But still pretty good!
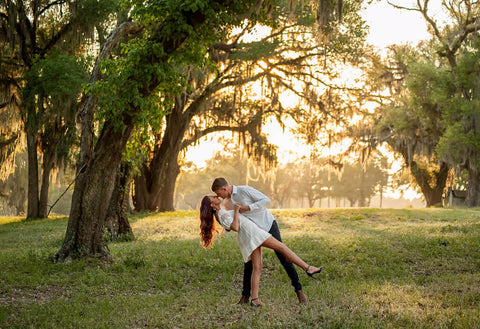
For this example, I am using a dance couple photo I took. This young man showed up to the shoot with a sunburn. In addition, he was wearing red and there was a red canopy at the location. You can bet that we were struggling with color casts everywhere! Color cast issues used to be something that I would take to Photoshop to fix just a few years ago. Not today!

(Straight out of camera image.)
Click on the brush tool and change the brightness to about 5 (I don't always do this - but for this example it works nicely) and then move down to the color box and click!
This will pull up a color box with lots of options. I know that green counteracts red and red counteracts green. The same is true of blue and yellow. So, using the eyedropper, I will select a green color. You can adjust the saturation of the green color that you chose with the little slider with an "S" in front of it below all the colors. When working with skin or eyes, I usually keep this somewhere between 5 and 12% saturation.
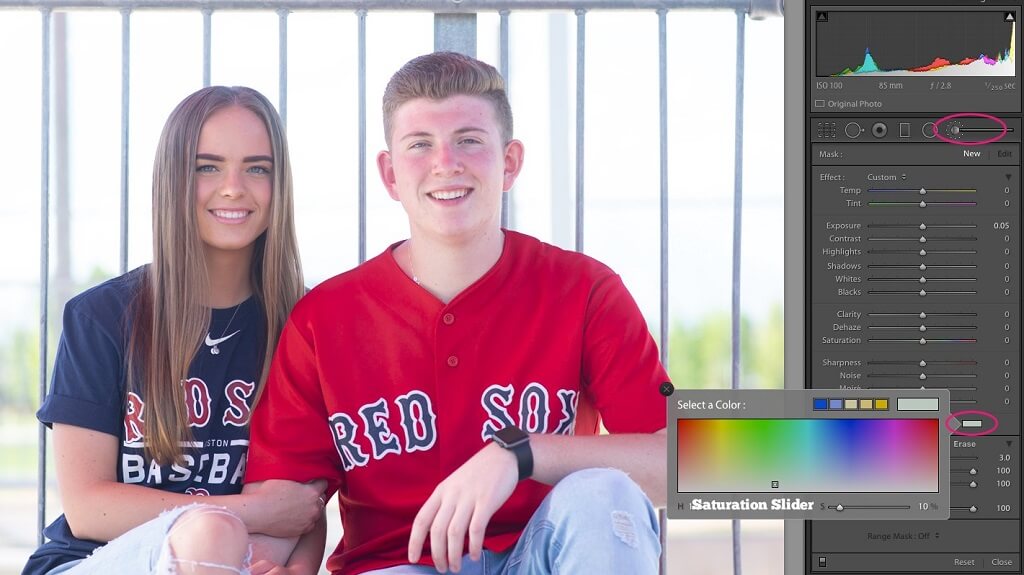
I used the brush tool to paint over the sun-kissed areas of their faces and their hair that is picking up color from the red canopy above them. You can brush over the area multiple times or change the saturation amount if the correction isn't enough. You can also reduce the saturation if the correction is too much.
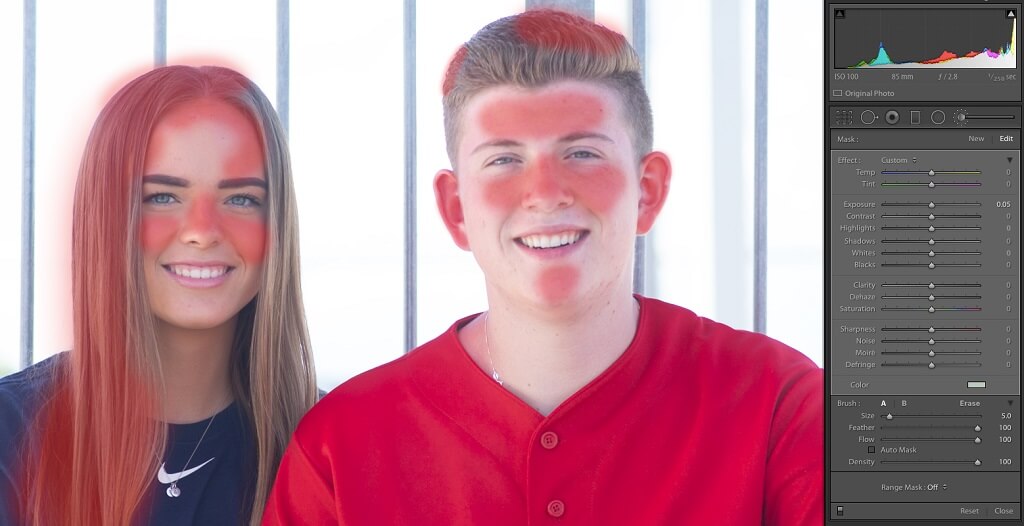
Notice the difference after painting on the photo with the slightest bit of green!
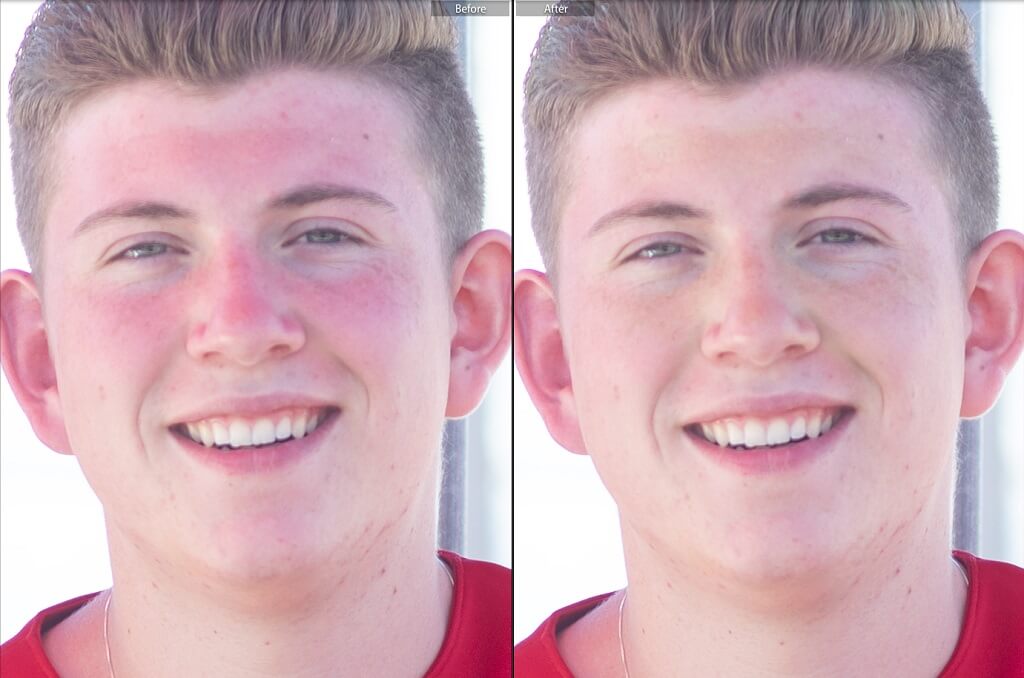
You can apply this same technique to areas of an image where you might have a bit of a color cast from a piece of clothing or an object in the photo. You can apply this same technique when you have green color casts from grass or trees. To correct any color cast, use the opposite color on the color wheel.
Green will cancel red casts and Red will cancel green casts. Yellow will cancel blue casts and blue will cancel yellow casts.
For other cast colors, you may need to consult the color wheel and use a hybrid of these to help.
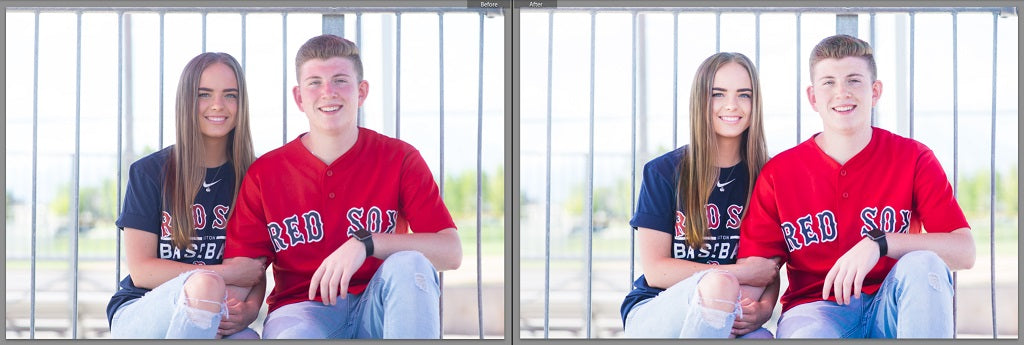
To make correcting color casts easier, we offer several collections with brushes that will take the guesswork out of correcting color casts. You will find various brushes to help correct color casts in the Clean Edit Portrait Workflow, the Bella Baby Complete Workflow, the Perfect Portrait Brushes, as well as the Enchanted Garden Collection.
If you are more of a visual learner, here is a short video that will show you the steps you need to take to remove pesky color casts in Lightroom.


Hi!! I am Gayle. I am a wife to my handsome husband and mom to 4 beautiful kids. In my spare time, I am a photographer and blogger at Mom and Camera. I have a passion for sharing my love of photography with others. I teach local photography classes and regularly share photography tips and tricks on my blog. I hang out there a lot—I’d love you to stop by and visit!

Comments