- Lightroom Presets
- Best Sellers
- Mobile Presets
-
Photoshop
-
Learn
-
Support
-
Install
- Blog
By Amanda Padgett on | No Comments

Many photographers, both professional and hobbyists, have more than one editing program. And, more often than not, those two programs are Adobe Lightroom and Photoshop or Photoshop Elements.
If you are new to one or both of these programs, you may not realize how beautifully they are designed to work together.
Today we want to show you how to set up your external editing settings in Lightroom and how to move your images and work between Lightroom and Photoshop quickly and easily.
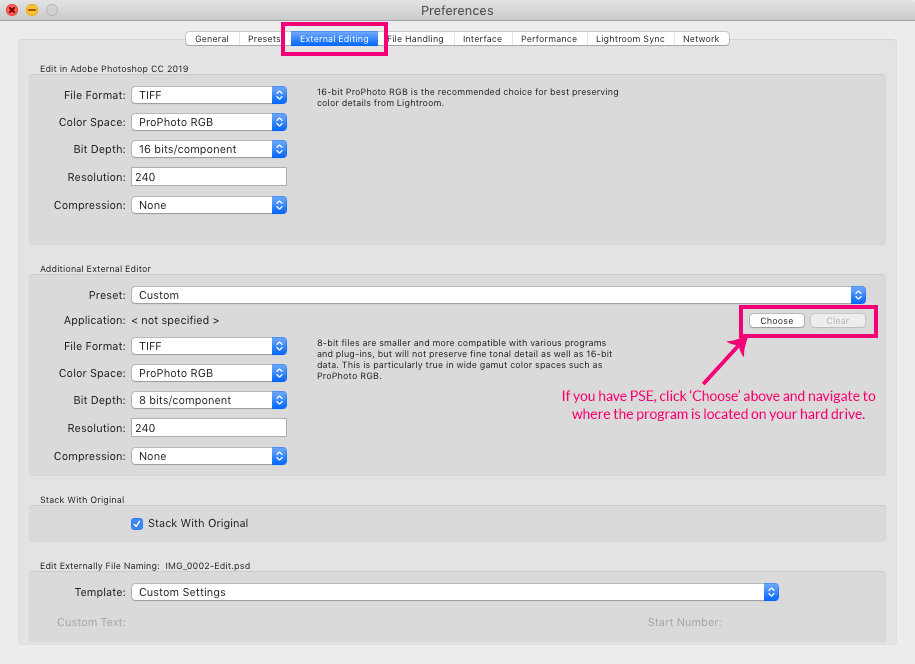
Usually, Lightroom will "find" Photoshop and link up with it without you having to do anything. However, there are a few changes you may want to make to the settings to make things easier. You will go to the Lightroom Preferences menu to make those changes.

After you make any changes, you will need to restart your Lightroom so the new settings will be in effect when you take an image to Photoshop or Photoshop Elements.
If you have Photoshop Elements instead of (or in addition to) Photoshop, Lightroom may automatically find it as it does with Photoshop. If it doesn't do this automatically, you can add it as an additional editor by selecting it in the External Editing tab.
The settings should be the same as listed above, except you need to change the bit depth to 8 bits. A limited amount of editing can be done in Photoshop Elements at 16-bit depth, but you would not be able to use layers at all, so I choose to take them in at 8-bit.

After you update the external editor settings, your images are now ready to move between programs and moving them between Lightroom and Photoshop (or Photoshop Elements) will be super easy.
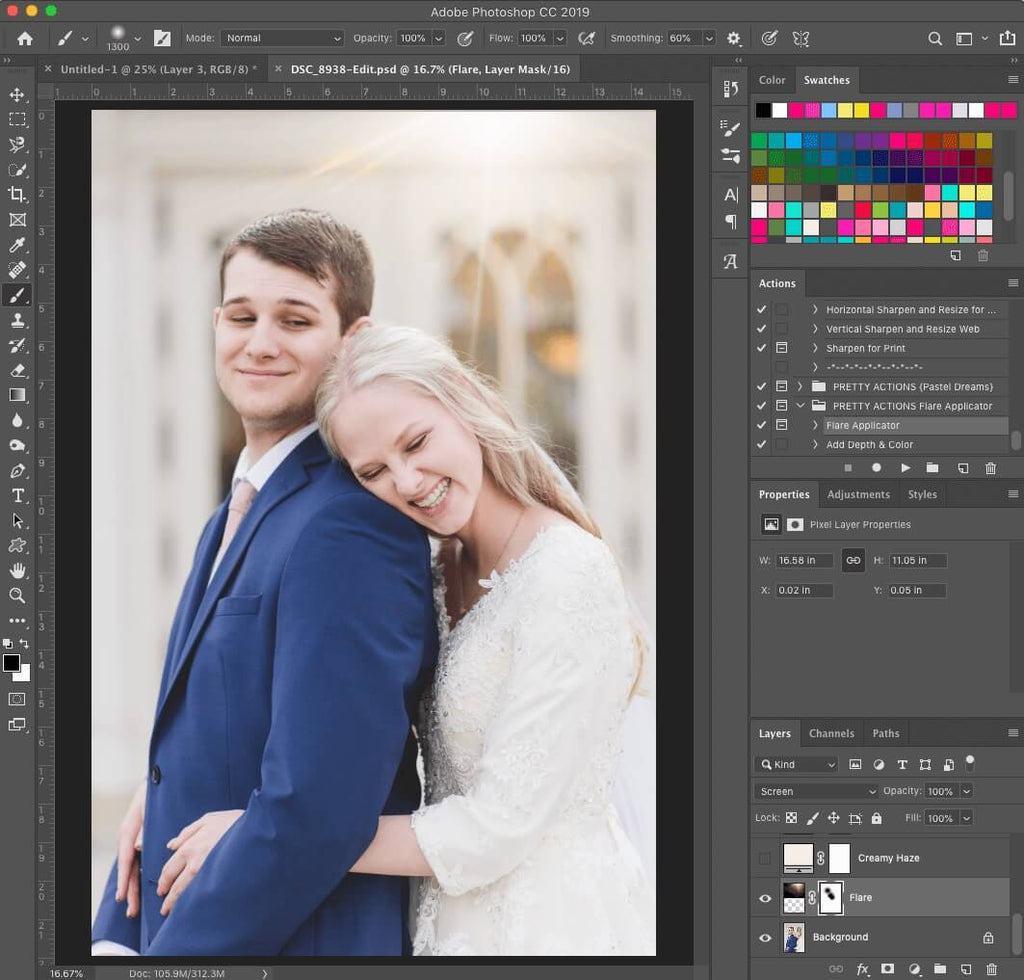
To move an image from Lightroom to Photoshop, go to the Lightroom Develop module, highlight the image you want to move to Photoshop, and press Cmd/Ctrl + E (Lightroom shortcut). Your Photoshop or Photoshop Elements will open up, and your image will load. The image will be whatever file type you specified in your above Lightroom Preferences (the default is a .tif file).
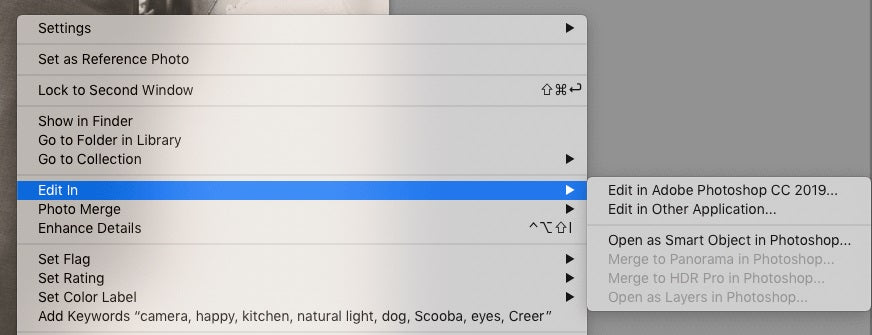
You can also right-click on the image and choose Edit In>Photoshop CC or Photoshop Elements, or Photo>Edit In>Photoshop CC or Photoshop Elements.

One of the best parts of moving an image between Lightroom and Photoshop using the steps above is that you will have access to the image WITH the Lightroom edits in Photoshop and also WITH the Photoshop edits when it's moved back to Lightroom to finish.
When you have finished editing your image in Photoshop, save it using the keyboard shortcut Cmd/Ctrl + S (Photoshop shortcut). Once you save your .tif file with the Photoshop adjustments, within a few minutes, it will be available in Lightroom.
Once it's back in Lightroom, you can make additional adjustments, including adding Lightroom presets, brushes, and filters.
When finished, export your image from Lightroom to merge all of the changes together!
If you are more of a visual learner, we have a fantastic Lightroom to Photoshop and Back Video that will walk you through the process. Enjoy!
Lightroom and Photoshop are two totally different editing programs, each with different strengths and weaknesses.
Moving between them quickly and easily will allow you to take advantage of each of their strengths and utilize them to create the best images for yourself and others!
Additional Reading: 3 Lightroom Settings to Change RIGHT NOW!
Do you have any questions about How to Take Images Between Lightroom and Photoshop? Leave us a comment below - we would LOVE to hear from you! And PLEASE SHARE this post using the social sharing buttons (We really appreciate it)!


Hi! I'm Amanda, a homeschooling mom of four, from South Carolina. I am passionate about photography, photo editing, and helping others learn to love their camera and editing programs.

Comments