- Lightroom Presets
- Mobile Presets
-
Photoshop
-
Learn
-
Support
-
Install
- Best Sellers
- Blog
Have you ever edited photos in Lightroom and posted them to Facebook or Instagram? I’m sure most of you have.
Were you happy with the quality of the images once uploaded? If the answer is “NO,” you probably exported your images from Lightroom using less than ideal settings, which Facebook and Instagram converted into a blurry mess.
If you want your images to look their VERY BEST on Facebook and Instagram, you will need to make some adjustments to Lightroom’s default export settings.
Let’s face it; exporting from Lightroom can be confusing. There are many different settings to select and endless combinations of numbers to input.
So today, I will break it down in a step-by-step format and show you precisely what you need to do to export photos from Lightroom so they look their best on Facebook, Instagram, and pretty much anywhere else you post on the web!
Additional Note: If you are trying to export from Lightroom Mobile, we have a separate tutorial with mobile instructions here.

Once you have selected your images and are ready to export, you need to open Lightroom's export dialog. You can get to the export dialog in three different ways:
It doesn’t matter how you get there. Any of these will work, so choose the easiest option for you to remember.
The Export Dialog Box has many different sections. We will review each and select the best settings for exporting to Facebook and Instagram.
Export Location is the first section in the export dialog. Use this section to tell Lightroom where to place the image or images you are exporting. You do this by choosing the drop-down menu next to the words "Export To."
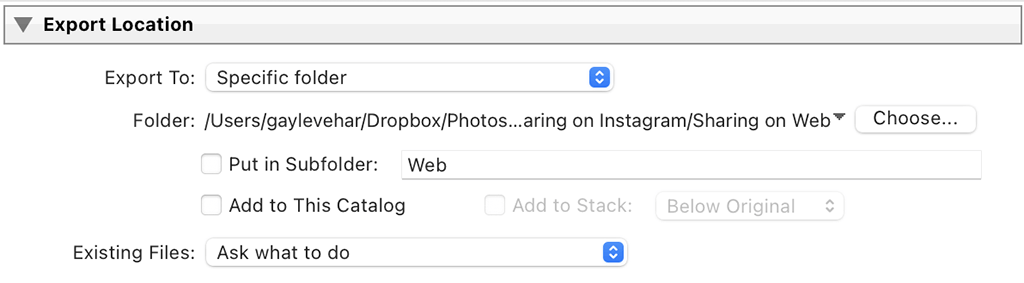
The option you choose will depend on where you want the image to go. If you want to choose a specific folder OUTSIDE the folder where the image currently resides, then choose the "Specific Folder" option. If you want the image to be exported into the same folder where the image currently resides, then choose "Same Folder as Original Photo."
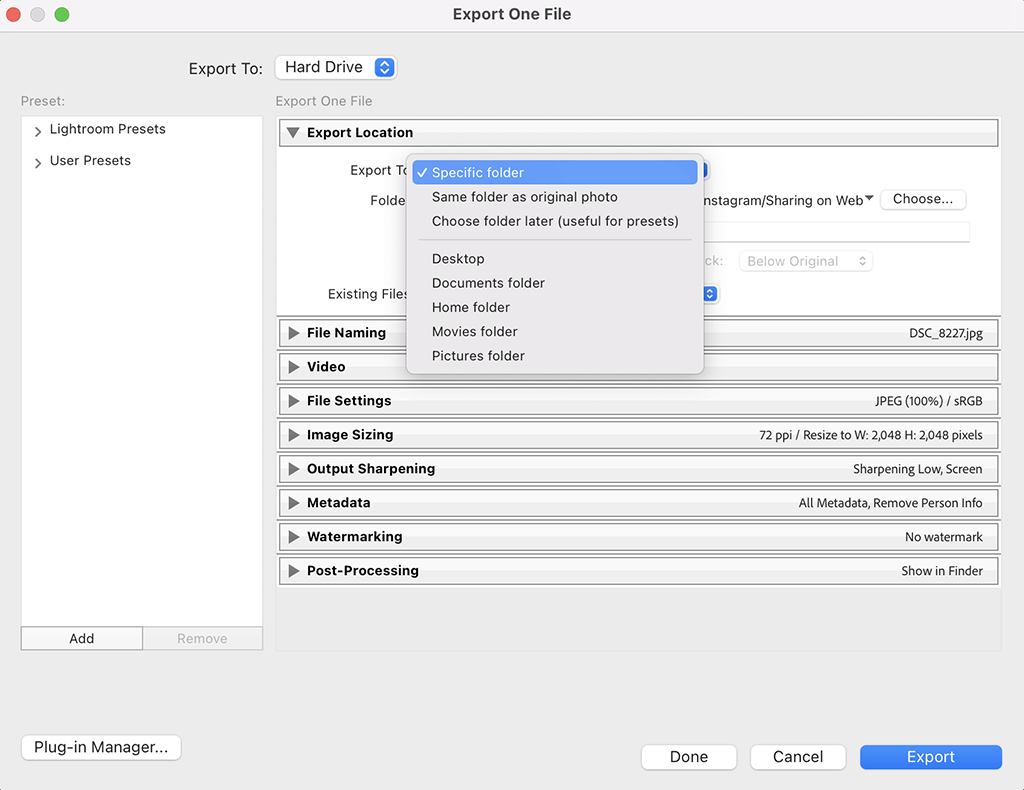
Some other default locations include Desktop, Documents, Pictures, etc. These locations come with most of the same options mentioned above. This means you can set a subfolder and give it a name in any of these locations. CHOOSE THE EXPORT LOCATION THAT WORKS BEST FOR YOUR WORKFLOW.
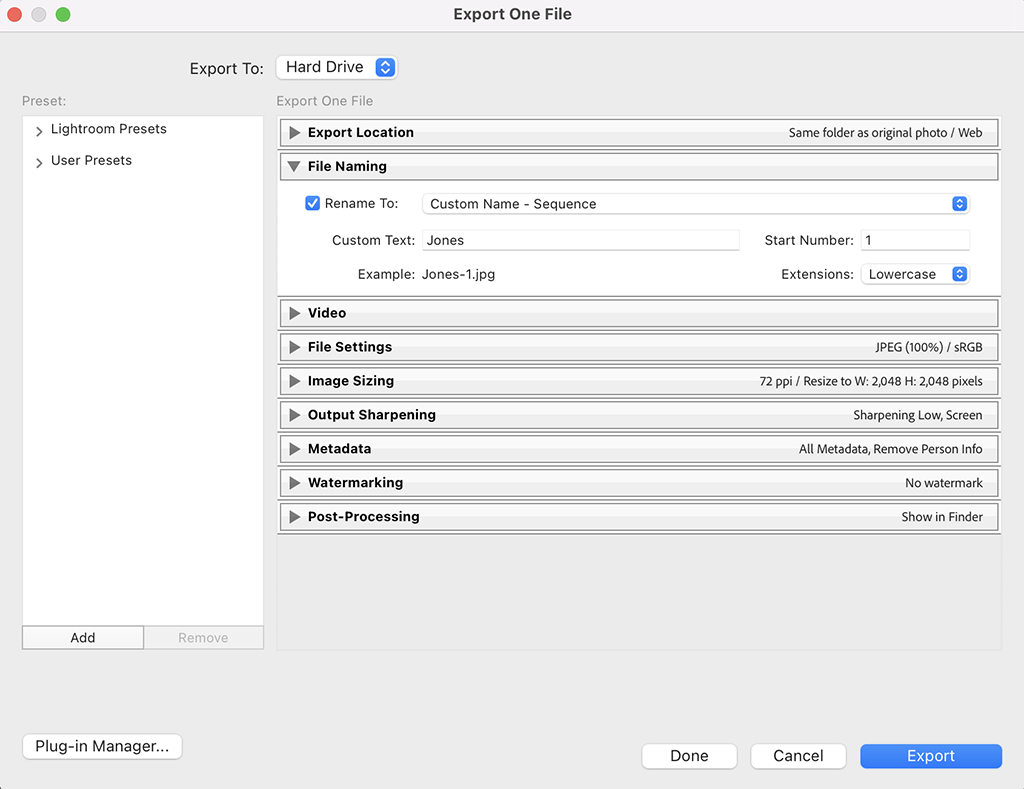
The File Naming section of the export dialog box is where you can choose how the photos you export are named. This box is helpful if you are exporting many files at one time for a client. It is NOT needed when exporting to share on Instagram or Facebook.
This section will provide several pre-set options for file naming, or you can even uncheck the "Rename to" box, and Lightroom will keep the original name that was created on import.
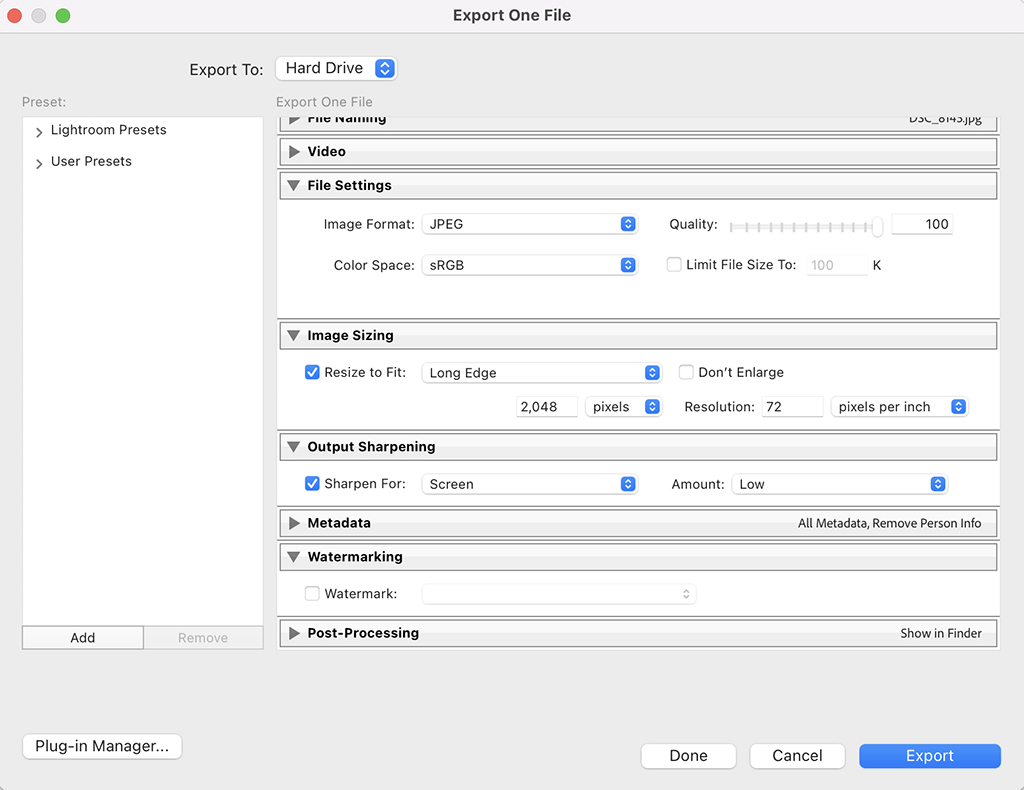
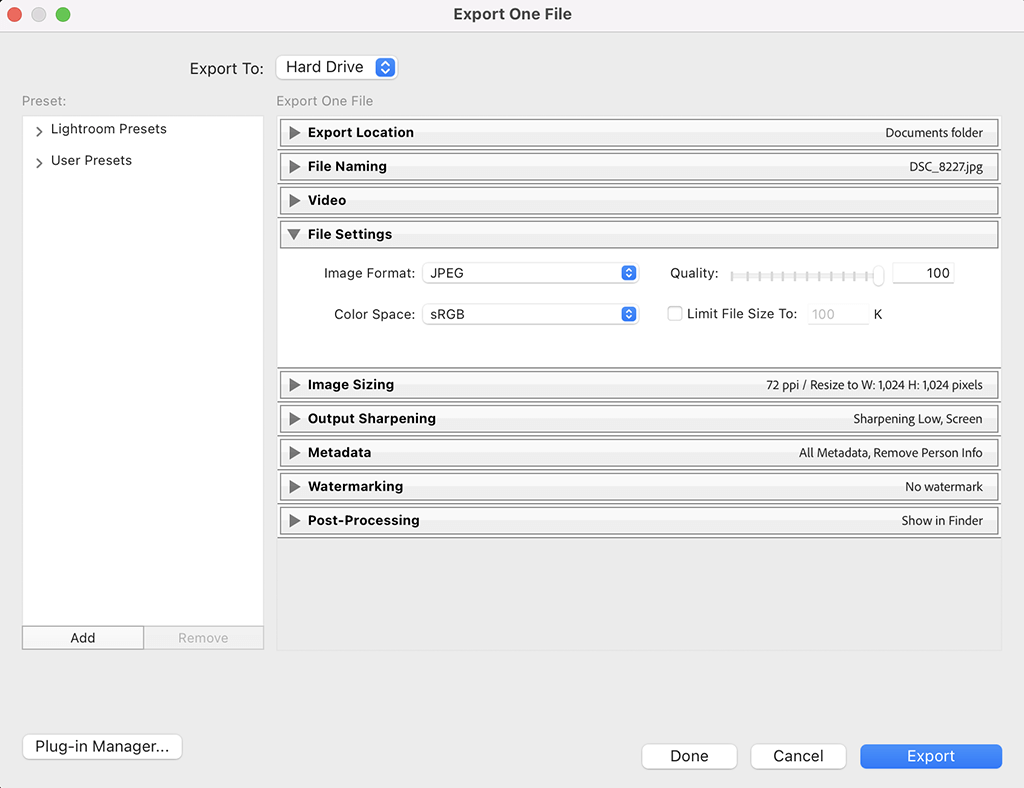
In the File Settings section, you need to ENSURE that your Image Format is set to JPEG. This setting is THE MOST WEB-FRIENDLY of the available options.
Set the Quality to between 75 and 100. I usually choose 100.
Set the Color Space to sRGB. sRGB is the Color Space used by the web so that it will render the best.
DO NOT check the box “Limit File Size To.” If you check this box, your image quality can decrease significantly.
In the Image Sizing section, check the box Resize to Fit and select "Long Edge." In the box next to “Pixels,” I specify 2048 when I am exporting for Facebook and 1080 when I am exporting for Instagram.
Technically, you can use any number between 1000 and 2048, but these are the numbers each platform specifies as their optimal settings.
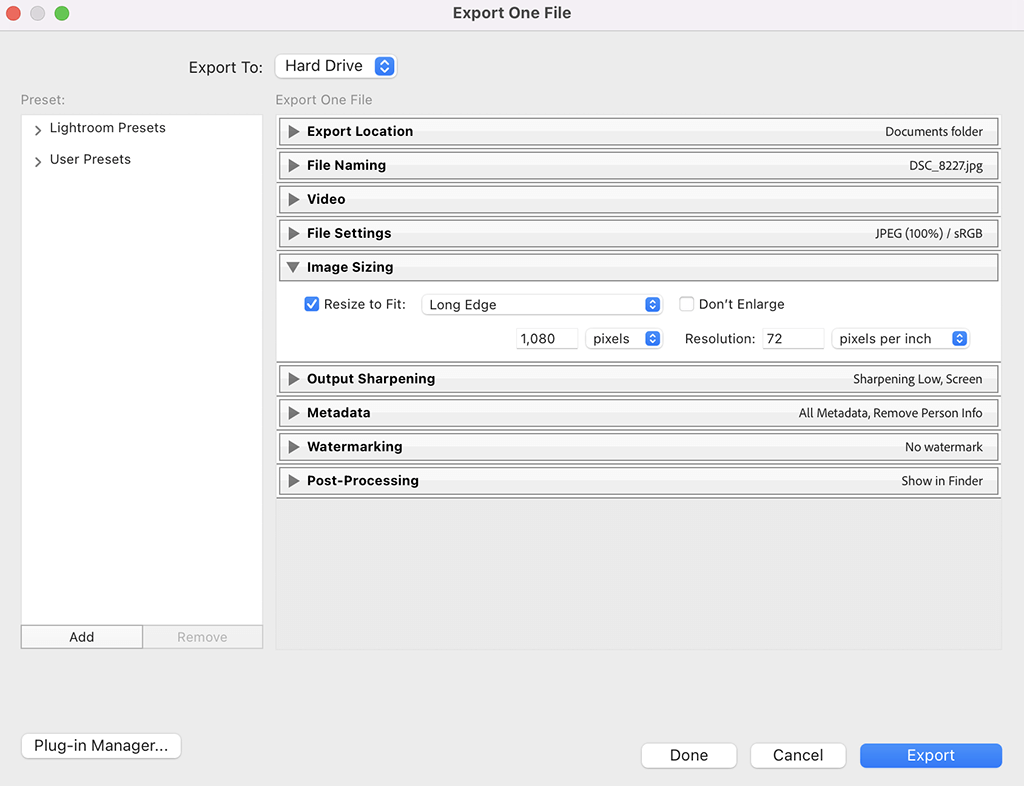
You can also do the same thing by choosing Width and Height (instead of Long Edge) and typing 1080 OR 2048 in both the width and height boxes next to pixels.
In the Resolution box, type 72 and make sure the box next to it is set to “pixels per inch.”
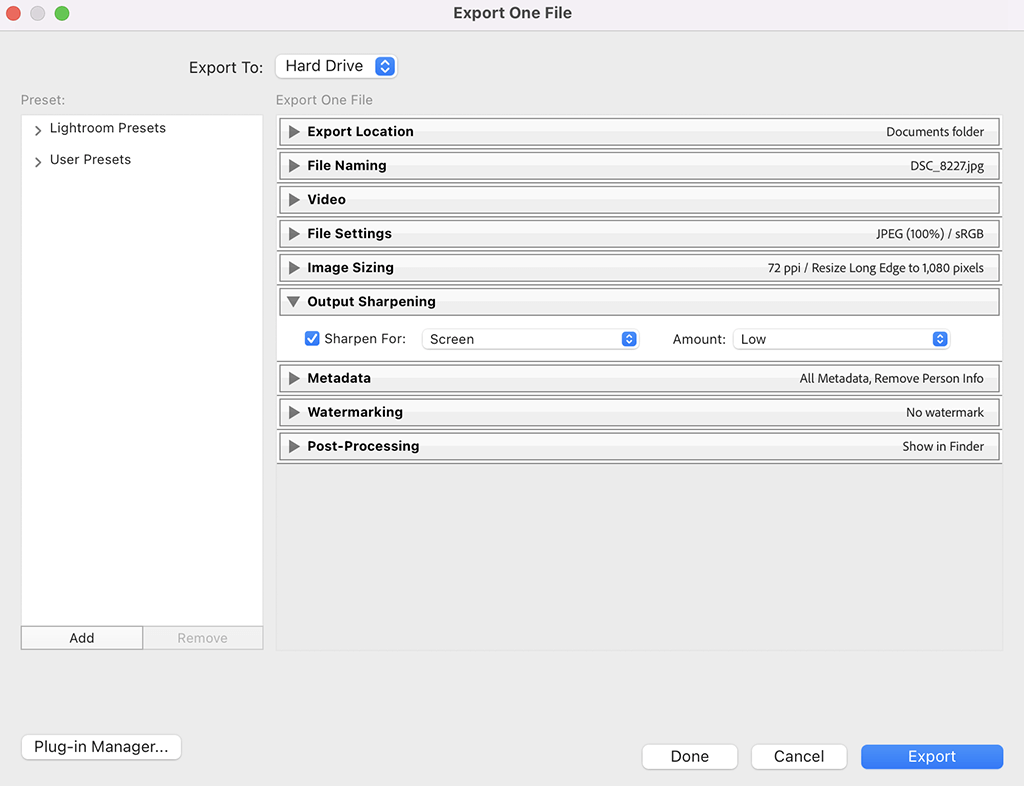
In the Output Sharpening section, check the box next to “Sharpen For.” Select "Screen" from the drop-down menu and set the Amount to "Low."
Over-sharpening your images can happen quickly. If you already sharpened your images in the Detail Panel of the Develop Module, then I WOULDN'T ADD ANY ADDITIONAL SHARPENING WHEN EXPORTING YOUR IMAGES.
If this is the case, simply uncheck the "Sharpen For" box and move on to the next section.
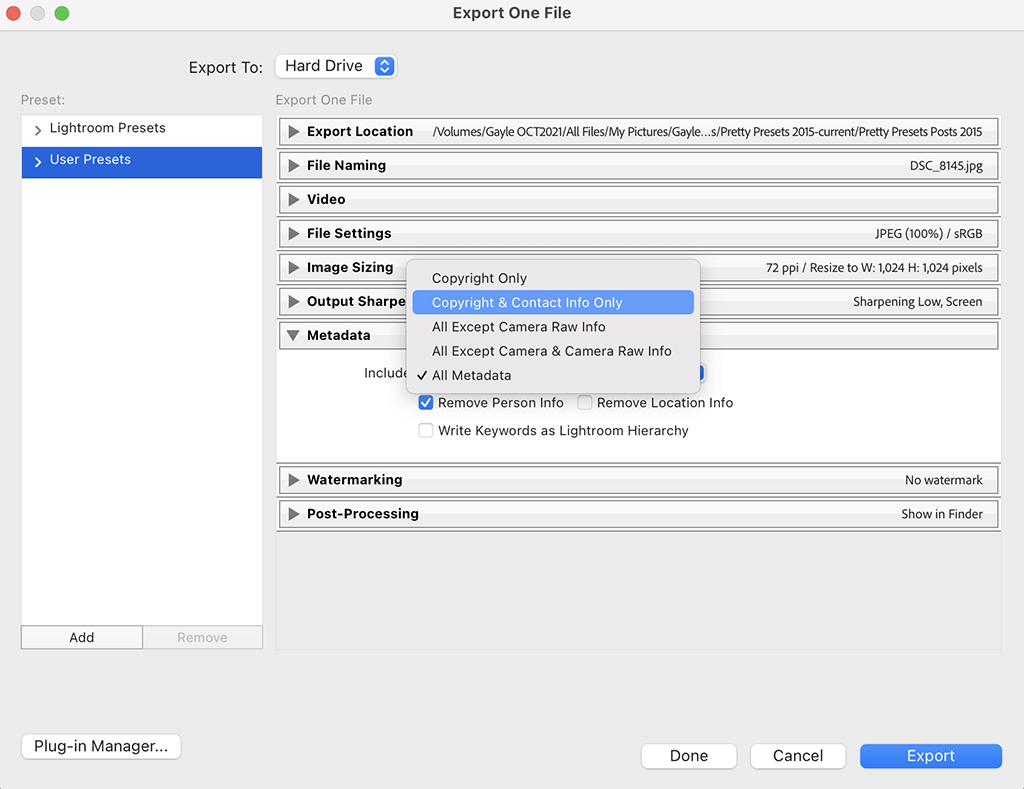
Metadata includes all the information embedded in your image by your camera. Things like exposure settings, camera used, lens used, and even location info can be included with the metadata on your photos.
This section allows you to choose which metadata is included. You can choose to include "All metadata" or the "Copyright only" option. There are several other options that include some copyright information and eliminate others. I prefer to include only the copyright and contact information when sharing photos on Facebook and Instagram.
Keep in mind that even if you include your copyright and contact information, someone can still scrub (remove) that info from your image and present it as their own. This is ALWAYS a risk when sharing photos online.
In the Watermarking Section, you can choose whether you want your images to be watermarked or not.
If you would like them to be watermarked, check the box next to "Watermark" and select the watermark you want to use from the drop-down menu. If you have already created your own watermark, you will see it listed here.
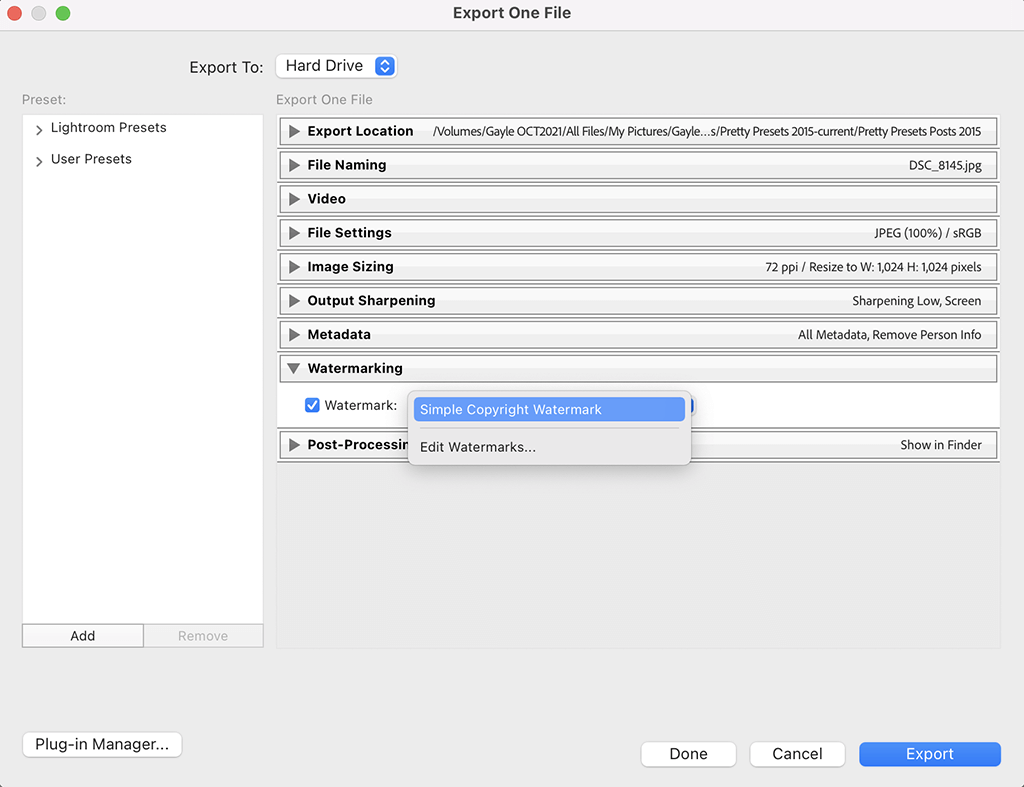
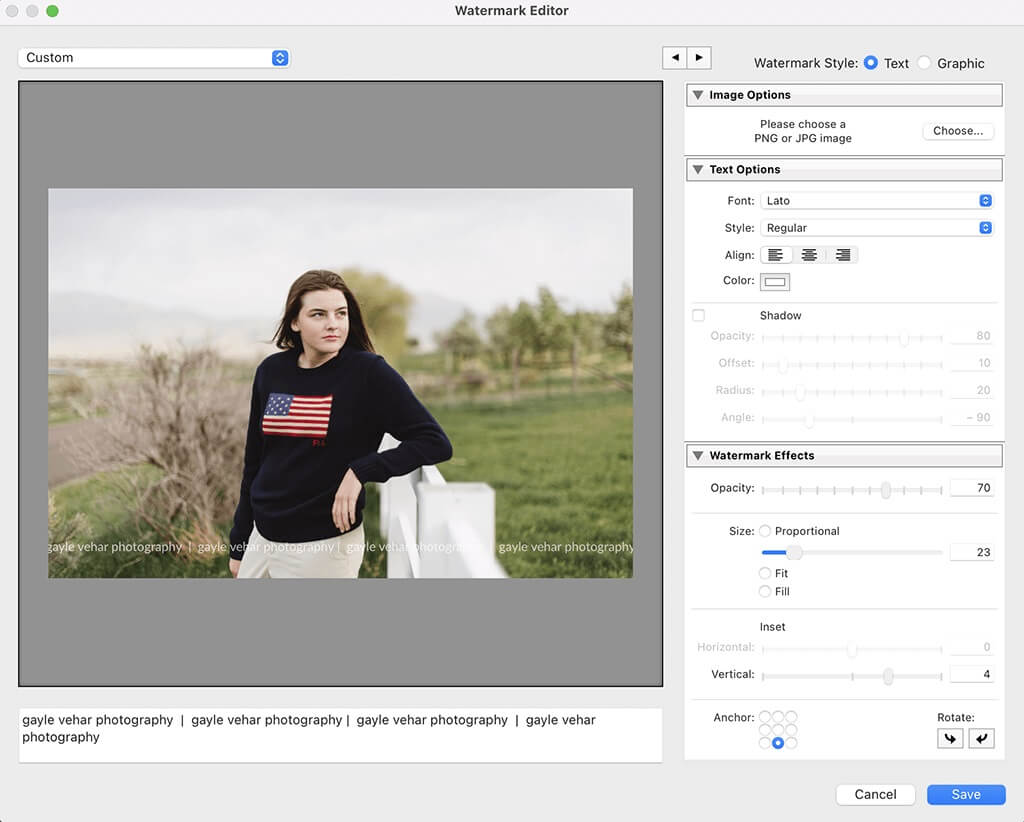
If you have not previously created a watermark, you can do that directly from this export screen by selecting "Edit watermarks" from the dropdown menu. This will open a new screen where you can create a text or graphic watermark to use when exporting.
If you would like additional help, here is an excellent tutorial for creating watermarks in Lightroom.
The Post-Processing section tells Lightroom what you want to do with the photos once they are exported. There are a few options:

Once you have selected the proper export settings for use on Facebook and Instagram, it is super helpful to create an export preset to save these settings for future use. And it is very simple to do.
When ready, tap the "Add" button at the bottom of the Preset window. In the window that opens, name the export preset and specify the folder to place it. The "User Presets" folder is fine, or you can create a new folder if you prefer for organizational purposes. Then click "Create" to create and save the preset.
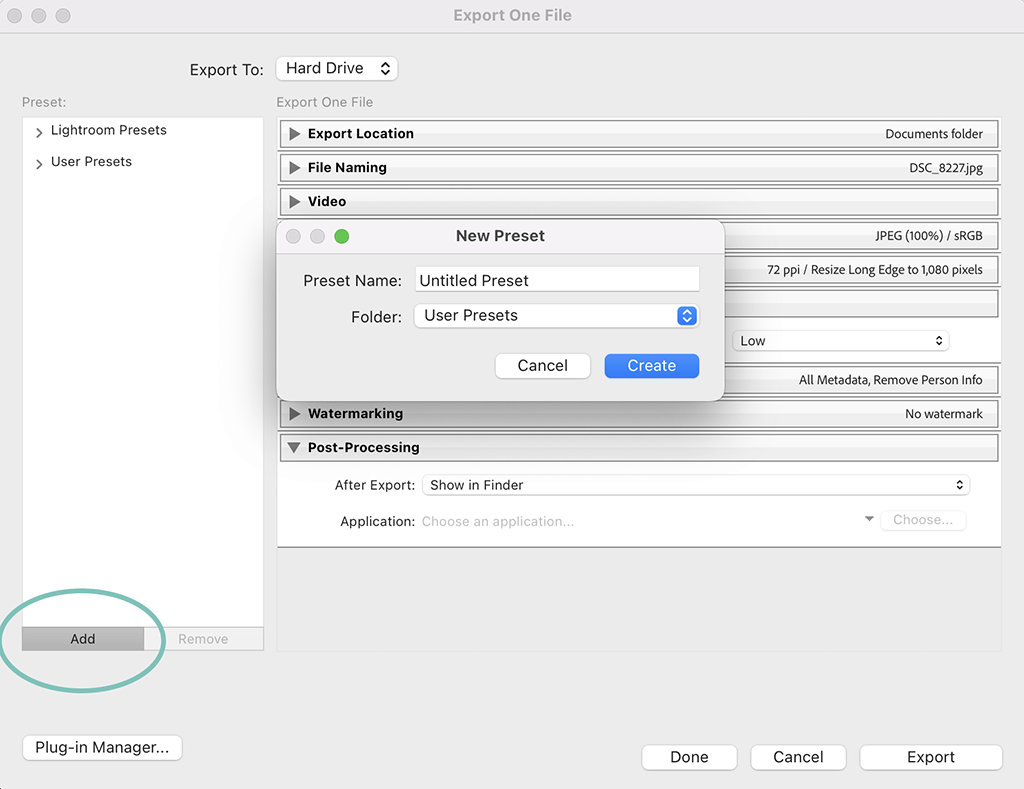
You can have as many export presets as you want, including a separate one for Facebook and Instagram (because they have slightly different settings). Once your presets are created, the export process will be VERY FAST, so make sure you do this if you want to improve your workflow speed.
In the Develop or Library module, select the image(s) you want to export and right-click on them. In the settings that open, hover over the "Export" option. All your export presets will be listed there, and you can select the one you want. Lightroom will skip the export dialog box and automatically export those photos with your preset settings. It's almost like magic.


BONUS TIP: Starting in Lightroom 9.0, a handy multi-batch export feature was added so you can now export images for multiple purposes (like print and internet) at same time. Read more about how to use Lightroom's multi-batch export feature here.
Do you have any questions or comments about the Best Lightroom Settings for Facebook and Instagram? Leave us a comment below - we would LOVE to hear from you! And PLEASE SHARE this post using the social sharing buttons (We really appreciate it)!


Comments