- Lightroom Presets
- Mobile Presets
-
Photoshop
-
Learn
-
Support
-
Install
- Best Sellers
- Blog

Retouching skin is an art form and retouching senior skin takes special skill. While teenage skin is young and vibrant it comes with its own set of challenges. There are blemishes and redness that come with teen hormones.
Retouching skin allows photographers to bring out an individual’s natural beauty and health-enhancing their features and celebrating the facial features that make them unique.
The focus of portrait retouching should be on removing the temporary blemishes of the skin, such as acne, dark circles, or redness. Once these fleeting imperfections are removed, an individual should look happier and healthier - the best version of themselves.

When retouching teenage skin, there is a fine line between enhancing a person’s beauty, and accidentally transforming them into another person altogether. To avoid this common mistake, it is best to avoid changing the individual’s facial features or underlying facial structure. Another common mistake when editing skin is softening the texture of the pores too much – resulting in the individual’s skin looking fake or airbrushed.
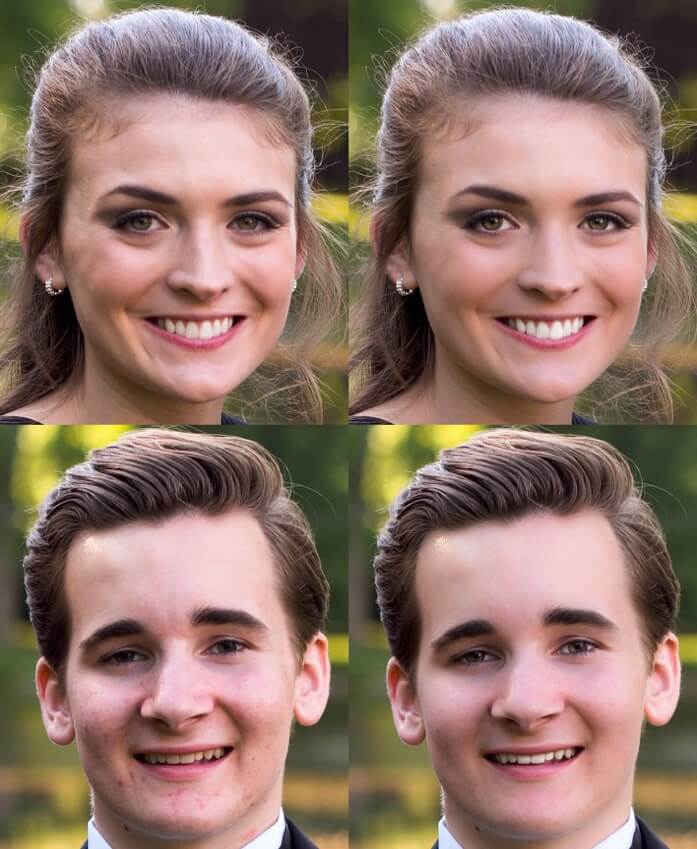
This tutorial focuses on two senior subjects to provide a thorough guide for skin retouching of different teenage individuals with varying levels of skin blemishes.
I generally prefer to edit my photos in Lightroom starting with the largest change and then moving on to the smaller, more detailed edits. With skin retouching, my first step is to soften the overall texture of the skin. By using the Lightroom brush tool, a mask can be created that will allow you just to edit the portion of the skin the mask is on.
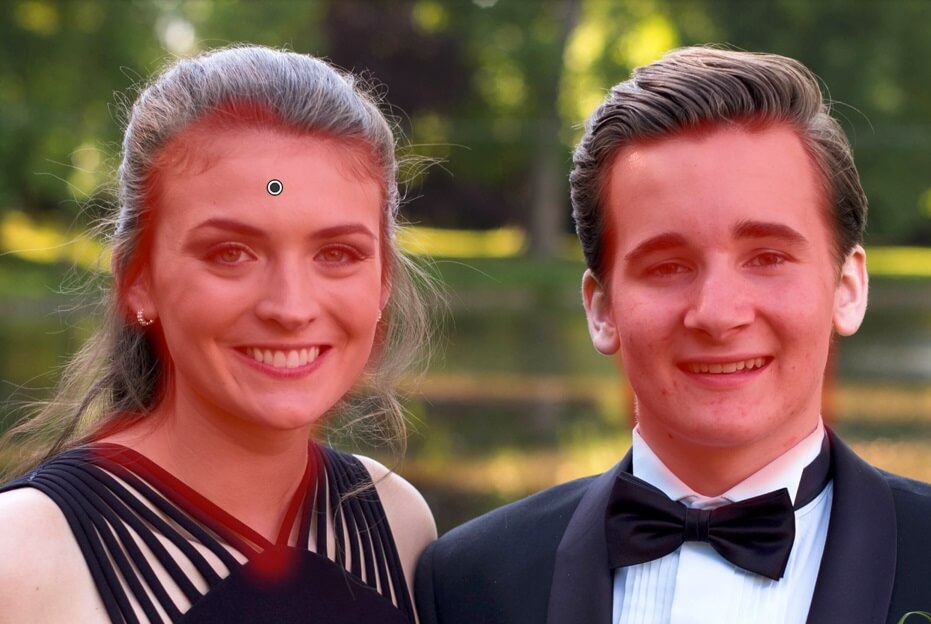
Using a large brush, I first roughly color the face and necks of the subject. Pressing “O” on the keyboard will allow you to see where you are painting. After the skin is covered in the red mask, I clean the edges of the mask for more accuracy, as well as erase the portions of the mask covering the eyebrows, eyes, nostril area, and mouth.
You can quickly erase the mask by pressing the alt/option key while you have your brush open. When you see a "-" appear inside the brush, you will know that you are erasing instead of adding more to the brush area. Because we will be using the mask to soften the texture of the skin, we want to avoid the blurring of the individual’s features.
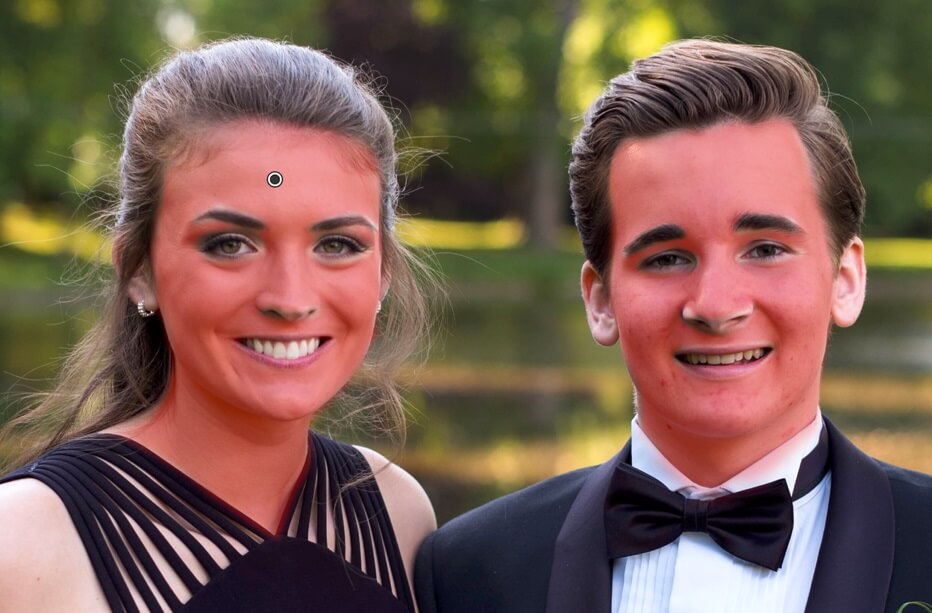
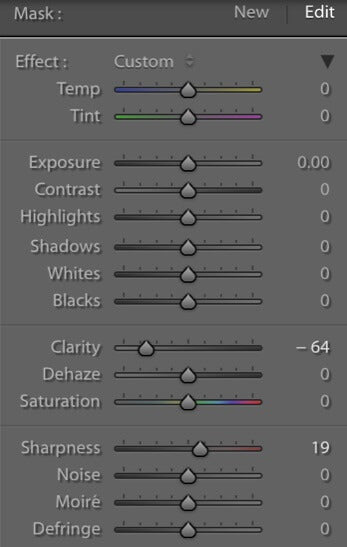
Remove the mask by pressing “O” again, and move the clarity slider towards the left to soften the skin. You can experiment to find something that is a bit softer than the original, but still looks natural. After softening, slightly increase the sharpness to regain some texture of the skin.
To save time, Pretty Presets has beautiful skin smoothing brushes included in the Clean Edit Portrait Workflow Collection and the Perfect Portrait Retouch and Makeup Brush Collection.
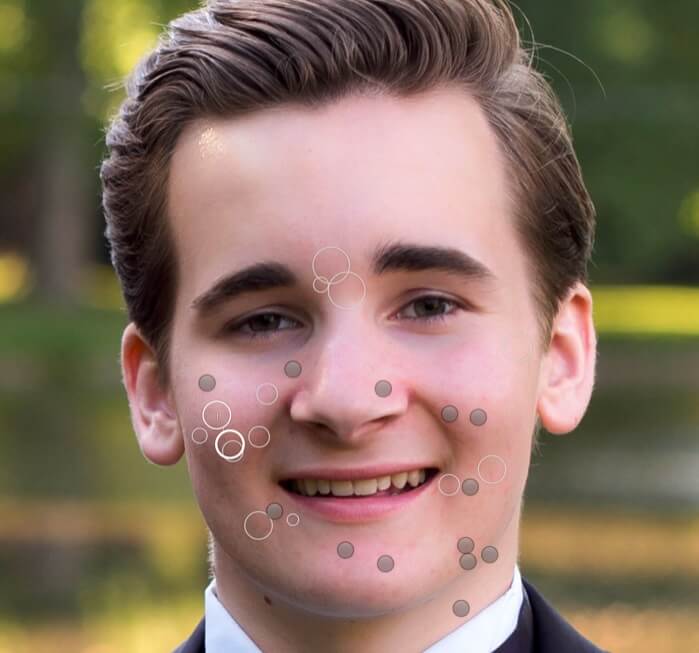
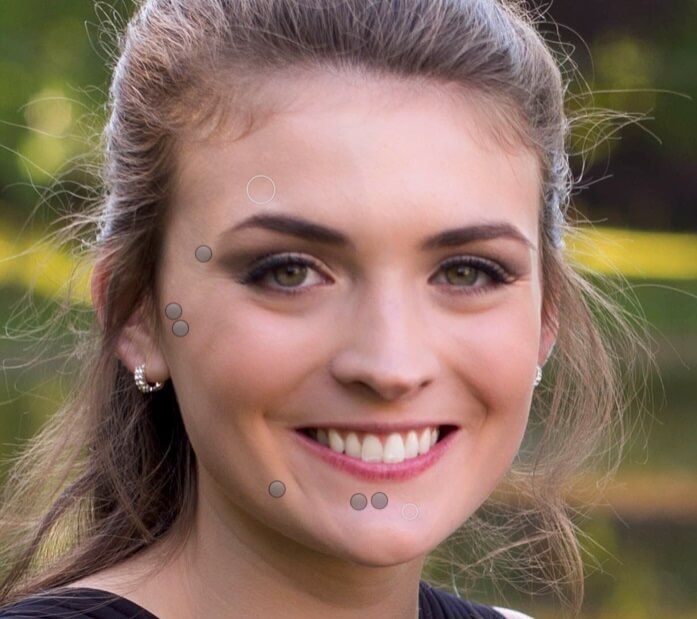
After the overall skin texture has been softened, it is now time to move on to some of the more detailed retouching - in this case, removing blemishes and acne.
Use the Lightroom heal tool and zoom in to remove any acne spots. Size the brush tool slightly larger than the blemish you are working with, and with the feathering set to 50, click on a blemish.
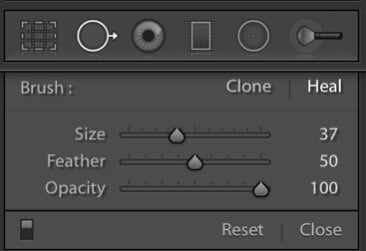
The heal tool will automatically sample another portion of the image in attempts to remove the blemish. To change the area of photo sampled from, simply click and drag the unbolded circle to the desired area. It is best to sample from a patch of skin with a similar color and saturation for seamless blending.

Repeat this process for all blemishes on the face, including acne, particles of dirt, or stray makeup. Avoid correcting beauty marks such as freckles, as these details are not temporary, and make each individual special!
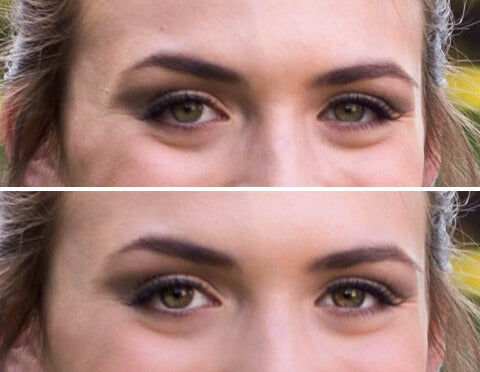
The next step that will help to soften the individual’s skin is to create a focus area on the eyes. This will draw the attention of the viewer to the center portion of the face, putting the skin in the peripheral and making it look softer in comparison.
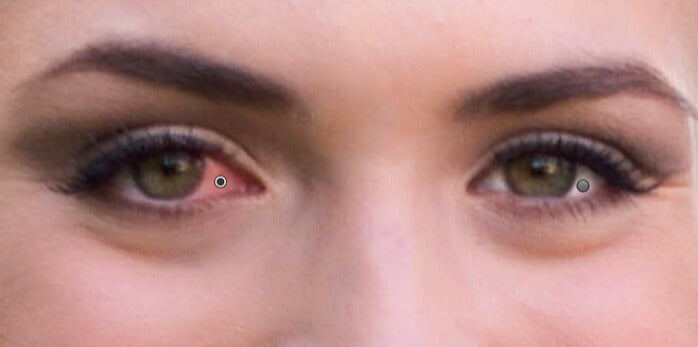
There are two parts to directing a viewer’s attention to the eyes of an individual – brightening the white sclera around the pupil, and then the actual enhancement of the pupil and iris. Both are done with the Lightroom mask tool, adjusting each setting individually to find the appropriate appearance.
A tip to for eye-brightening is to only mask areas of similar brightness. As you can see below, the left portion of the left eye is in shadow as compared to the white of the eye to the right of the same pupil. In this situation, we will work with two masks to avoid overworking or underworking a portion of her eyes.
After the whites of the eyes are brightened, mask the pupils of one individual to prepare for adjustments.
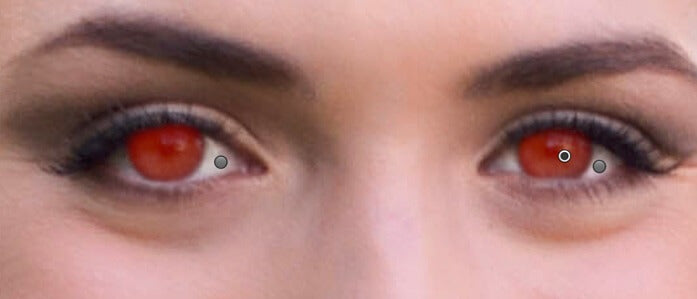
For pupil and iris brightening, I tend to experiment with several settings:
If you are struggling with what settings to choose, Pretty Presets has presets in both the Clean Edit Portrait Workflow Collection and the Perfect Portrait Retouch and Make Up Collection to help enhance and whiten eyes.
Repeat this same process with any other individuals in frame. Here is a comparison of how these small edits have a large change on the focus point of the individual.
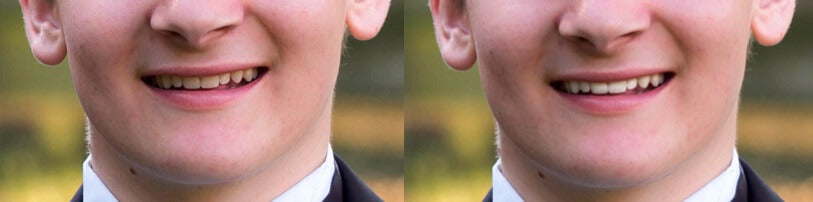
The last enhancement to help with the overall appearance of a portrait, is to whiten the teeth. You will use the mask tool once again, but for this step, there is a prebuilt effect in Lightroom called “Teeth Whitening” that you can use.
This preexisting setting increases exposure for brightness and decreases the saturation to help remove yellow tints. Like all preexisting settings, it can also be customized to your needs.
I hope this tutorial has been helpful with learning how to retouch senior skin and facial features in Lightroom!
Remember, each photo and individual is different, so it is important to pay close attention to these slight differences. While a particular series of settings may work great on one individual, a slightly different combination of settings might work better for another.
As a photographer and editor, you have a powerful ability to capture a snapshot of someone’s life in a memory they can have forever. By removing the evidence of stress or simply a bad night’s sleep, skin retouching increases an individual’s confidence and helps them remember themselves at their happiest and healthiest!
Do you have any questions or comments about Retouching Senior Portraits in Lightroom? Just leave us a comment below - we would LOVE to hear from you! And PLEASE SHARE this post using the social sharing buttons (we really appreciate it)!


Comments