60% Off Today! Shop the Enchanted Garden Retirement Sale!

  • Log in
  • Cart (0)
  • Checkout
Pretty Presets and Pretty Photoshop Actions
  • Lightroom Presets
  • Mobile Presets
  • Lightroom Brushes
  • Photoshop 
    • Photoshop Actions
    • Photoshop Overlays
    • Limited Edition Holiday Collections
  • Support 
    • About Us
    • Contact Us
    • Order Lookup
    • Lightroom 101 Workshop
    • Photoshop 101 Workshop
    • Lightroom FAQ
    • Photoshop FAQ
    • Free Lightroom Training
    • Free Photoshop Training
  • Install 
    • How to Install Lightroom Presets
    • How to Install Lightroom Brushes
    • How to Install Presets in the Free Lightroom Mobile App
    • How to Sync Lightroom Presets from CC to Mobile
    • How to Install Photoshop Actions
    • How to Install Photoshop Overlays
  • Blog
Home   /   Lightroom Tutorials   /   How to Use Lightroom's New Texture Slider

How to Use Lightroom's New Texture Slider

By Gayle Vehar on May 30, 2020 | No Comments

How to Use Lightroom's Texture Slider

How to Use Lightroom's New Texture Slider

Lightroom is constantly upgrading and adding new features to help photographers edit quickly with beautiful results.  The brand new Texture Slider is the first slider that Lightroom has added since the Dehaze tool and is a fantastic addition!

The Texture slider was created to help smooth or enhance texture in photos while being careful to preserve details and control noise. 

One of the main reasons for this addition was to give photographers a better, higher quality way to smooth skin in Lightroom.  Until now, the best way to smooth skin has been via the clarity or sharpness sliders and neither of those sliders do anything to preserve detail.

Lightroom & Photoshop Facebook Group

Using the Basic Texture Slider to Smooth Skin

The Texture slider is available in the Basic Panel.  This slider works in much the same way the other sliders in Lightroom. 

  • When you move the the slider towards the negative (down to -100) it will DECREASE the texture. 
  • When you move the slider towards the positive (up to +100) it will INCREASE the texture.

Lightroom Texture Slider

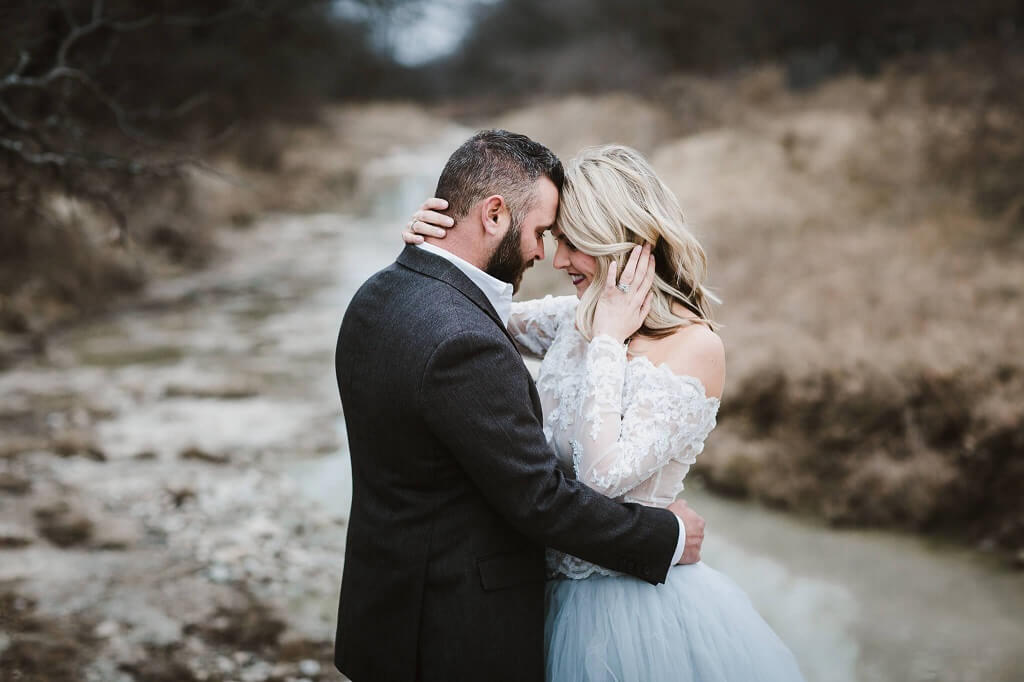
To smooth skin on a portrait using the Texture Slider in the Basic panel, I recommend keeping the slider between -5 and -20. 

  • In general, the closer the subject is to the camera, the closer the slider might be to -20. 
  • The further the subject is from the camera, the less negative texture you will need.

Using Lightroom's Texture Slider to Smooth Skin

While using the Texture slider, I have been impressed with it's ability to protect the details of a portrait (namely the eyes and lips) while still softening the skin.  I love that there is now a global option for smoothing skin that can be synced along with other adjustments over multiple photos.

Using the Basic Texture Slider to Increase Texture

While the Texture slider was mainly created to help photographers smooth skin, it can also work the opposite way and help to increase texture. 

The effect this slider gives to texture when moved towards the positive numbers is more subtle than what you would get from the Clarity slider (which is my favorite way to add texture). 

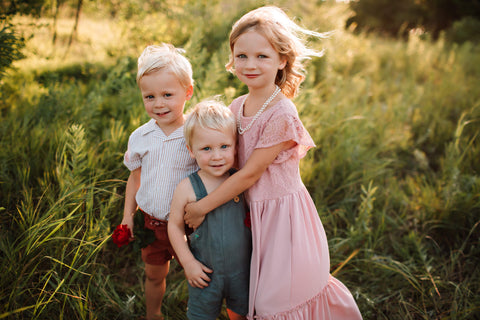
This works great if you want to add some texture to your image but have a subject in the portrait as well.  I found that I was easily able to add a little more texture to portraits where the subjects were a smaller part of the image, but it DID NOT look good on when used on close-up portraits.

Using Lightroom's Texture Slider to Add Texture

Using the Texture Slider with the Adjustment Brush

As with most of the Develop settings in Lightroom, if you want to have THE MOST CONTROL over where you are increasing and decreasing texture, you will want to add it to your image using the Adjustment Brush. 

The Texture Slider is also available in the Adjustment Brush settings, which means you can brush it on only a portion of the image instead of over the whole image.

Using Lightroom Texture Slider with Adjustment Brush

Conclusion

This new Texture Slider in Lightroom has some great possibilities when used in both the Basic Panel or as an Adjustment Brush.  Go ahead and experiment with this new feature and judge the results for yourself!

Do you have any questions or comments about How to Use Lightroom's New Texture Slider?  Leave us a comment below - we would LOVE to hear from you!  And PLEASE SHARE our camera buying guide using the social sharing buttons (we really appreciate it)!

Portrait Lightroom Presets

Related Articles

White Balance Settings & How to Get it Right in Camera
Importance of White Balance In Photography Getting your white balance right in-camera will not only save you a lot of...
Read More
Top 3 Most Downloaded Lightroom Presets
Top 3 Most Downloaded Lightroom Presets Photographers in our Pretty Presets community always ask us what our best-sel...
Read More
6 Great Photography Projects for Slow Times
6 Photography Projects to Keep You Busy During Slow Months Winter is usually a slow time for photography in the north...
Read More
Pretty Presets for Lightroom author Gayle Vehar

Gayle Vehar

Lightroom Instructor

Hi!! I am Gayle. I am a wife to my handsome husband and mom to 4 beautiful kids. In my spare time, I am a photographer and blogger at Mom and Camera. I have a passion for sharing my love of photography with others. I teach local photography classes and regularly share photography tips and tricks on my blog. I hang out there a lot—I’d love you to stop by and visit!

May 30, 2020

Comments

INFO & SUPPORT
  • Lightroom FAQ
  • Photoshop FAQ
  • Contact Us
  • Order Lookup
Sign up for great freebies and tutorials

Get notified about promotions, giveaways and webinars before they happen!

Join the pretty Community

Come join the #1 Lightroom & Photoshop Facebook Group to help you learn how to edit your photos more confidently today!


  • About Us
  • Testimonials
  • Policies
  • Terms of Service
  • Write for Pretty
  • Pretty Scholarship

© 2023 Pretty Presets for Lightroom.