- Lightroom Presets
- Best Sellers
- Mobile Presets
-
Photoshop
-
Learn
-
Support
-
Install
- Blog
By Lea Hartman on | No Comments

In my previous post, I listed my top 5 tips for taking beautiful interior photos. I talked about the importance of being detailed, cropping in camera, etc.
Following those tips should ensure a great SOOC (straight out of camera) image, and editing should be a breeze! There is no skin to touch up, no flyaway hairs to remove. In fact, I can sum up my processing workflow for interior images in just three steps:
Before you start editing, go through all the shots you took and cull ruthlessly. I mean it!
Interior photography is about the illusion of perfection. When photographing people, you may occasionally keep an image that is a little bit soft because of the emotion captured…not so here.
This is why being detail oriented and meticulous PRIOR to shooting is so important. If you have three very similar shots, keep just the best one.
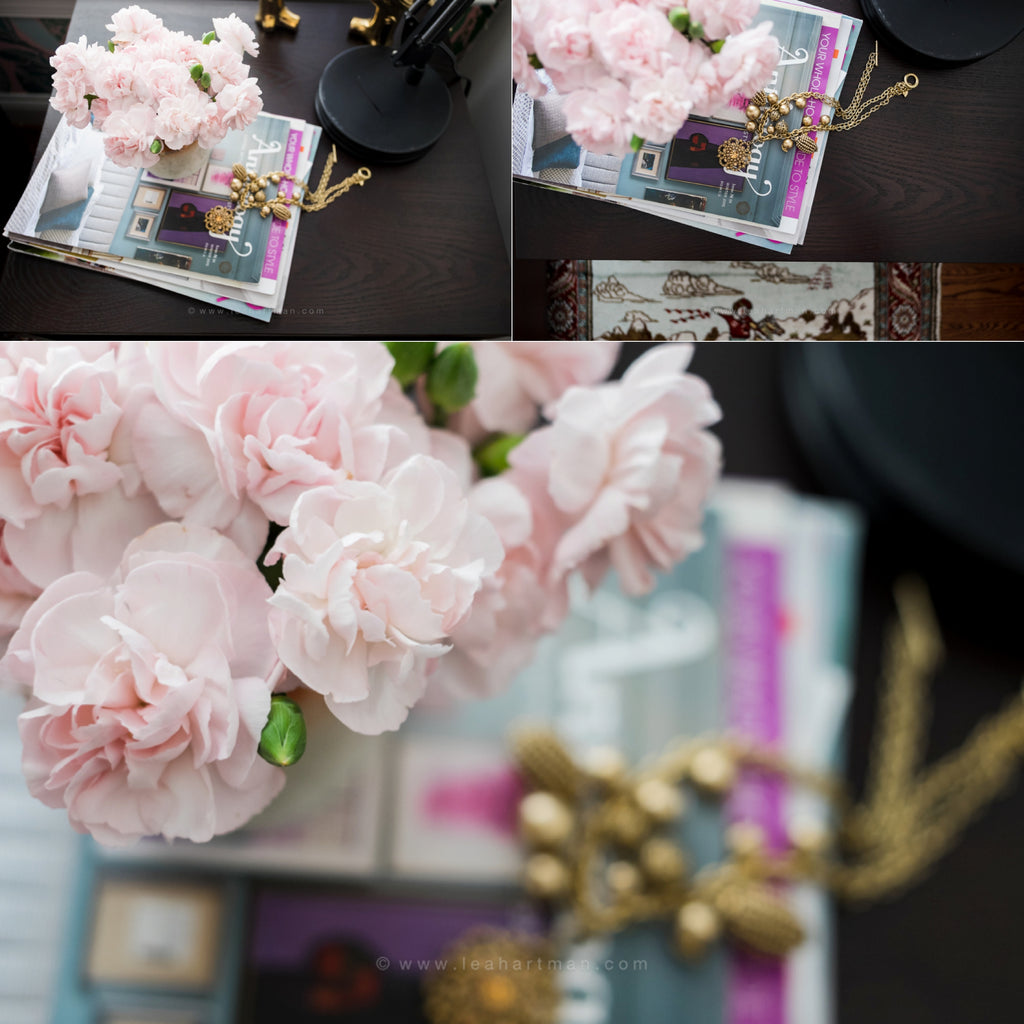
For example, in this nightstand vignette (image below), I took three different shots from various angles, with slightly different focal points. I only needed one vignette and knowing the vision the stylist had in mind, I presented her with the third image.

The very first thing that I do to each and every interior shot is ensure that it’s straight.
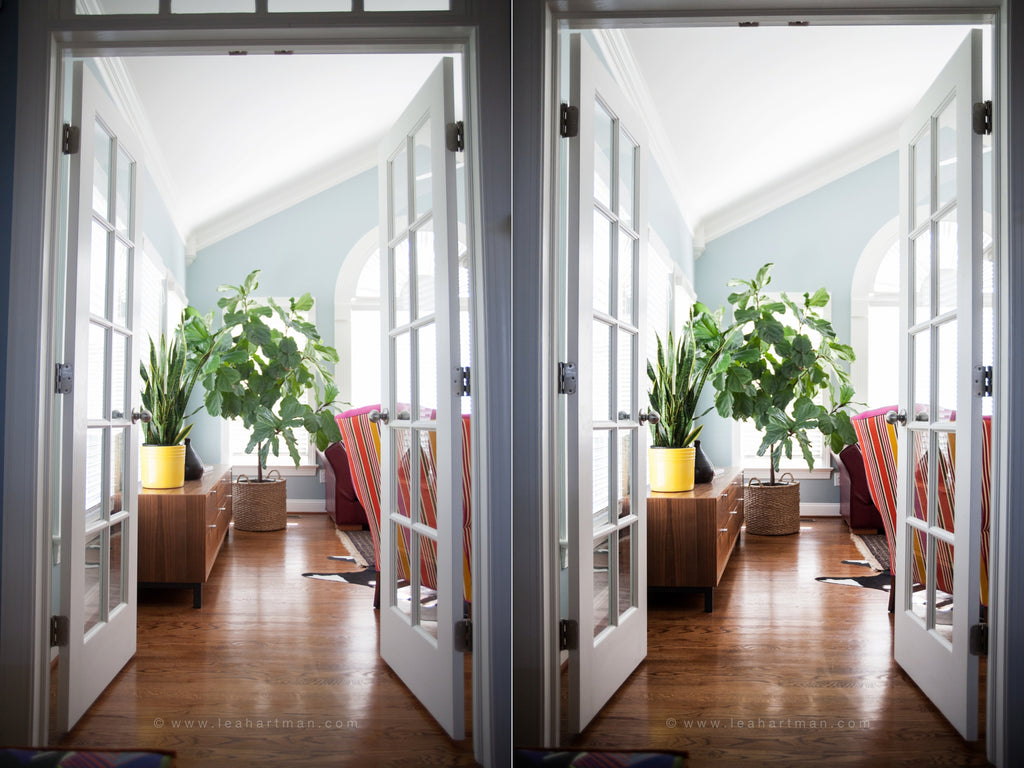
I do my best to make sure my horizon is straight when shooting, but some angles don’t lend themselves well to a tripod and may have to be shot handheld. And sometimes I have to shoot from a lower than normal angle which can cause distortion.
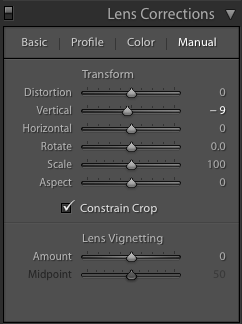
When that happens, my images usually need a bit of adjustment which can be done easily in Lightroom. As you can see in the example below, I have used the Lens Correction Tool in Lightroom to correct the lens distortion of a lower angle and a wide lens. (HINT: Be sure to select “constrain crop” in order to automatically crop the image to fit your corrections).
If you need to straighten your photo, here is a great tutorial on how to straighten images in Lightroom.


I make standard adjustments to contrast, clarity, sharpness, shadows and highlights - and nothing else. (Personally, I like to save myself lots time and apply the Clean Color preset from the Pretty Presets Clean Edit Workflow Collection - it’s been my go-to for a LONG time).
You can also clone out outlets, thermostats, etc to present a cleaner image if you like. I generally only do this if those things are distracting - like white outlets on dark walls.
Interiors aren’t the genre for creative edits, unless you’re sharing images of your own home and you’re trying to create a specific mood. In most cases, the goal is to showcase the actual space and/or the work of the stylist/designer, not the editing.
The job of an interior photographer is sort of invisible and is essentially product photography - it’s just an extremely large product to shoot!

One of my oldest clients, a style blogger, has been featured in the local newspaper, national magazines, West Elm, Home Depot, published in a home design book and most recently, HGTV.
And do you know who took all those pictures? I’ll give you one guess.
I am thrilled for her when she receives recognition for her beautiful work and I don’t expect anyone to know my name because interior photography is not about the photographer, only the space and the designer.
Your edit should be as invisible as you are. If an interior photographer is doing their job well, people will see their images and proclaim, “What a lovely space,” not “What a lovely image.”
And though the praise may not be knowingly directed toward you, it’s still high praise indeed!
Do you have any questions or comments about Interior Design Photo Editing in Lightroom? Just leave us a comment below - we would LOVE to hear from you! And PLEASE SHARE this post using the social sharing buttons (we really appreciate it)!


Lea is a self taught natural light photographer currently based out of North Carolina. Happily married for 14 years, she and her lover boy are raising three crazy kids wherever the army sends them. She's addicted to coffee, jamberry and her dog, Huxley.

Comments