- Lightroom Presets
- Best Sellers
- Mobile Presets
-
Photoshop
-
Learn
-
Support
-
Install
- Blog

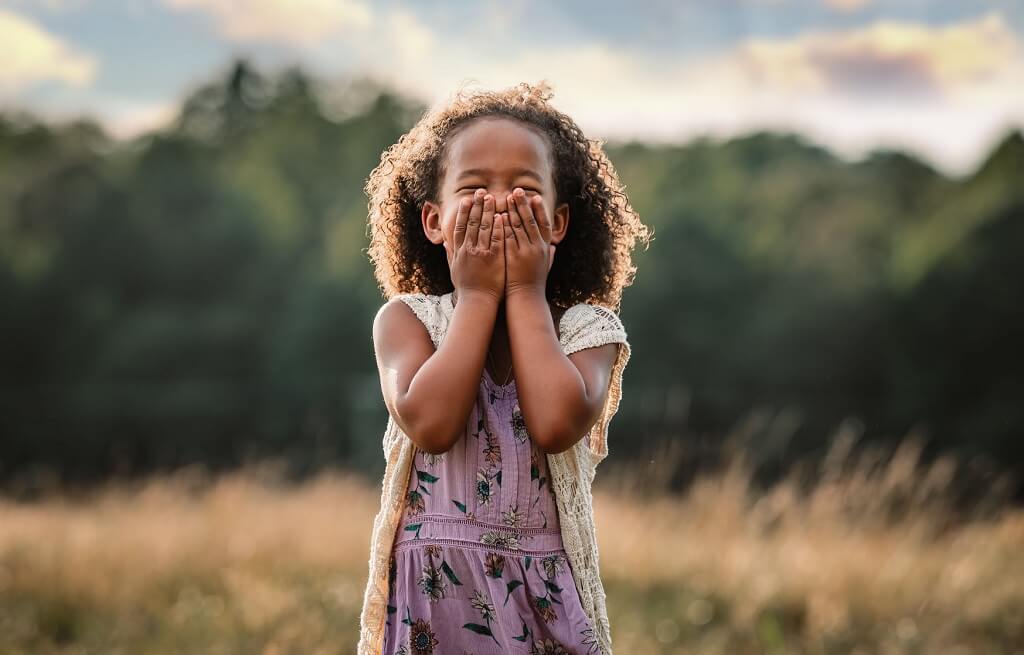
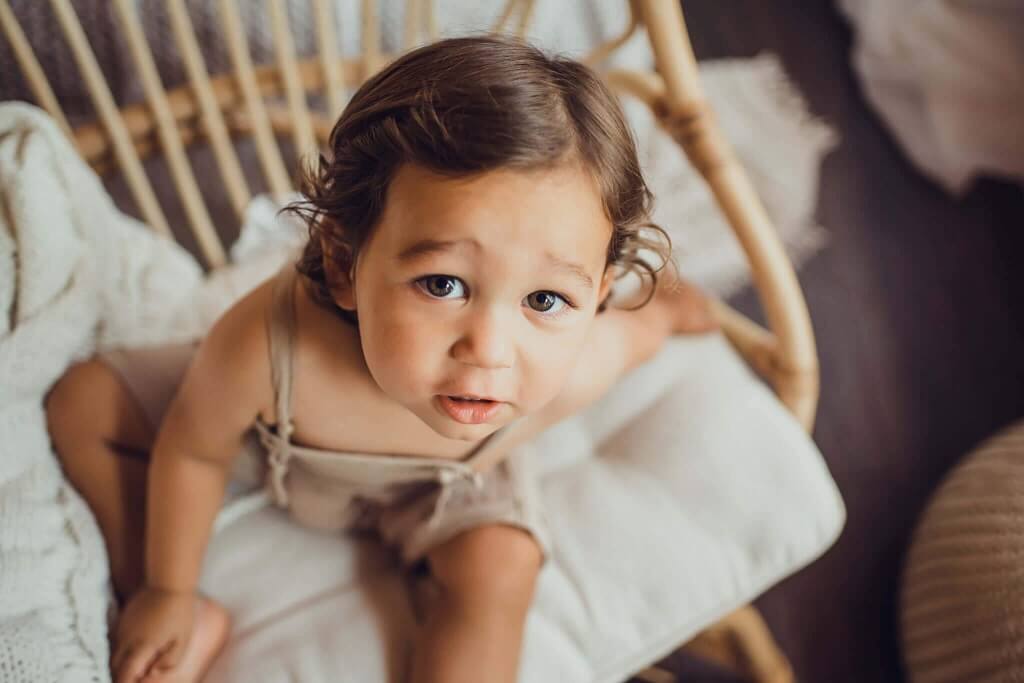
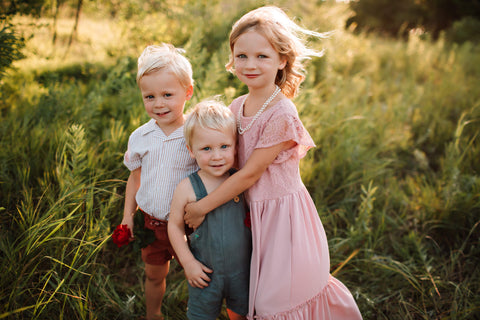
(Image courtesy by Mar Loes at PhotoFlash edited with presets from the Clean Edit Portrait Workflow Collection)
Skin tones come in such a wide variety of shades and undertones that it is almost impossible for a one-size-fits-all approach in photography. This tutorial will cover the best techniques for photographing and editing DARKER SKIN TONES.

Achieving beautiful skin tones when photographing an individual(s) with darker skin starts with your in-camera settings. In many ways, the same tips should work for ALL skin tones, but the exposure you choose may be slightly different based on the skin type you are photographing.
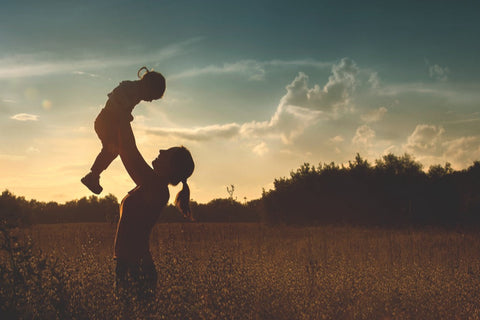
(Image courtesy Ann Griffin of Wild + Love Photography edited with Reverie preset from the Dark and Moody Millennium Collection)
Exposing for skin is a tip that applies for ALL skin tones, but it is ESPECIALLY IMPORTANT for darker skin tones!
Use spot metering on your camera, and then adjust your camera settings while taking readings from the skin tones. This will keep you from overexposing the skin. And if you properly expose for the skin, the other elements of your photograph will follow accordingly.
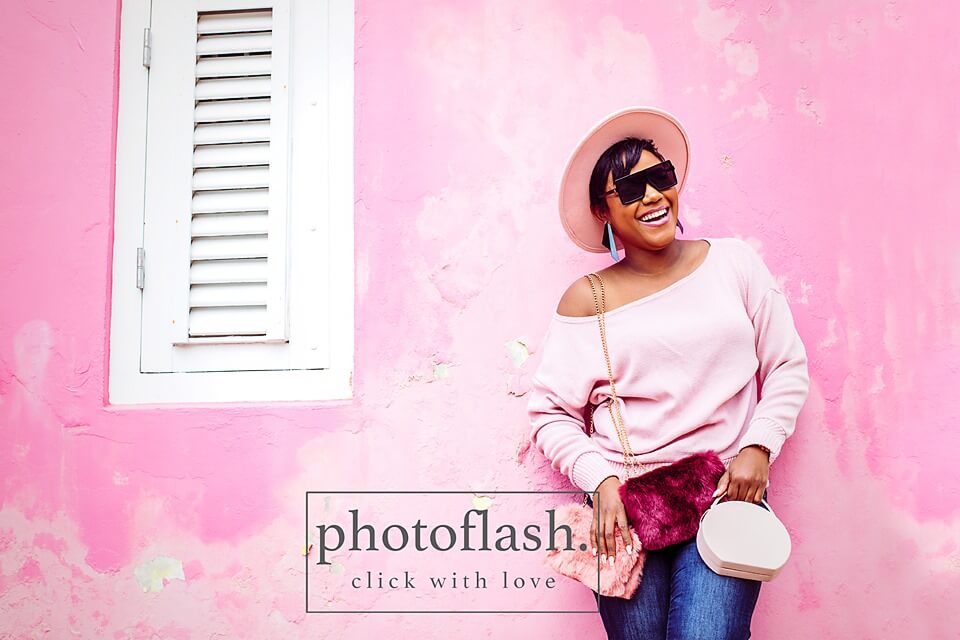
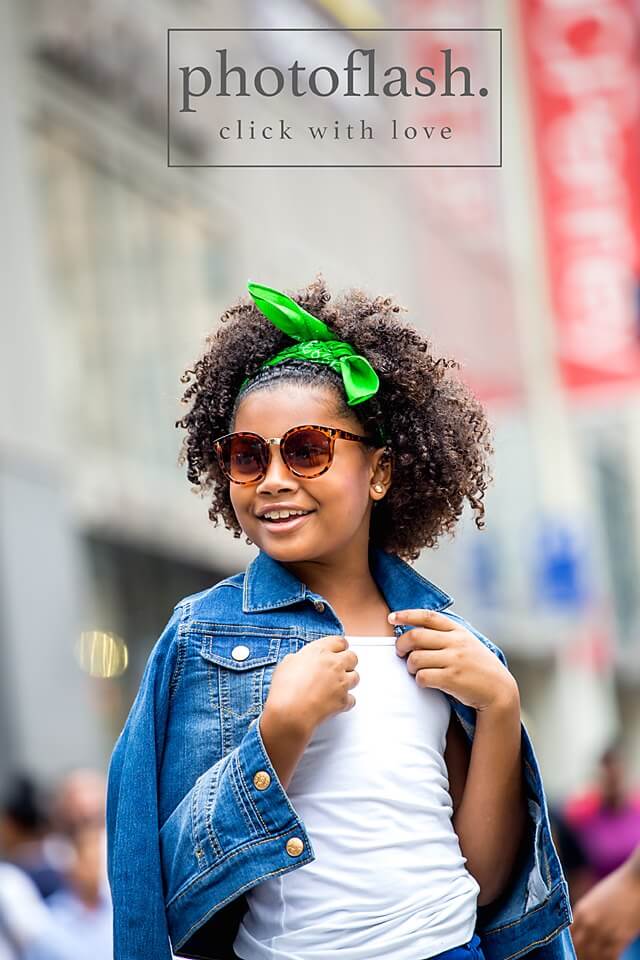
(Image courtesy by Mar Loes at PhotoFlash edited with presets from the Clean Edit Portrait Workflow Collection)
If you photograph a couple, family, or group that includes BOTH light and dark skin tones, expose for the middle ground and then adjust for any differences in post-processing.
This will keep you from over-exposing the lightest skin tones and allow you to lower the exposure as necessary for the darker skin tones.

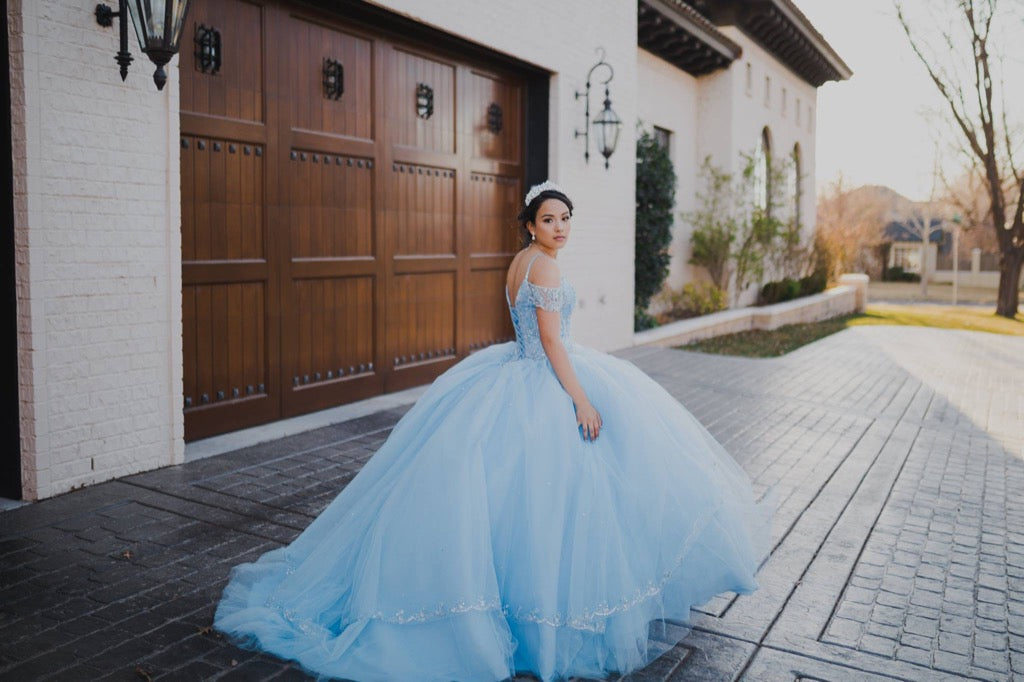
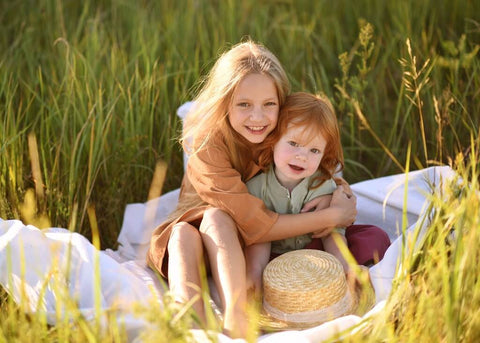
(Image courtesy of Tina Schaffer of Christina Schaffer Photography using Reverie preset from the Dark and Moody Millennium Collection)
Anytime you photograph an image with harsh contrasts, getting them both properly exposed can be a challenge, just like how wedding photos can be a challenge for the same reason - because of the contrasting black and white clothing.
You may want to consider asking clients with darker skin tones to avoid white clothing to help prevent any extreme contrast that may occur.
And when you can't avoid strong contrast, be extra aware of your exposure at ALL TIMES. Work to protect your highlights and properly expose the skin tones.

(Image courtesy Kelly-Anne Gladwin from Chick Inn Ma'am Photography and edited with Safari preset from the Dark and Moody Millennium Collection)
The next part of achieving beautiful dark skin tones is how you edit them in post-processing.
Currently, there is a popular trend toward warm, dark tones in images. This effect will show up much more strongly in the shadowed areas of an image. Dark skin has more shadow and, therefore, can be more susceptible to picking up those tones, so keep that in mind when editing in Lightroom.
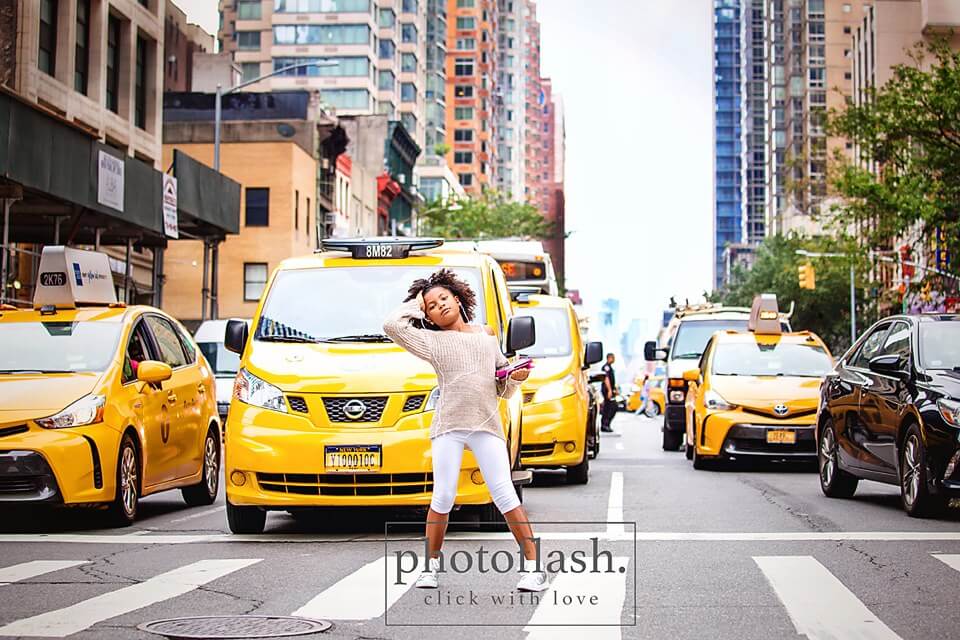
(Image courtesy by Mar Loes at PhotoFlash edited with presets from the Clean Edit Portrait Workflow Collection)
As you can see from the images in this tutorial, there are some fantastic Lightroom preset collections that work very well with darker skin tones.
The TOP favorite preset collections for darker skin are:

(Image courtesy Ann Griffin of Wild + Love Photography edited with Reverie preset from the Dark and Moody Millennium Collection)
When editing darker skin tones in Lightroom, I generally apply my favorite preset first, then set my white balance and adjust exposure.
If you have done this already and your skin tones still do not look right, you can review the values under the Histogram panel to evaluate if your skin tones fall within their acceptable range. The info below will help you do this:
All skin tones, no matter their color, can be assessed by the numbers in the Histogram Panel. To do this, place your mouse over the skin tones of your image in Lightroom. You will see the RGB values appear under the Histogram.
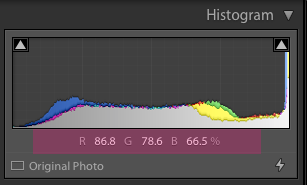
If your skin tones follow the rules above, you will know your colors are within their acceptable range.
If they don't, you can use the Temp and Tint sliders, brushes, and radial filters to make some adjustments. The Vibrance and Saturation sliders can also help you adjust the color.
(Image courtesy Adrienne Rawlings of Oak and Ember Photography using Serendipity preset from the Pretty Film Bohemian Collection)
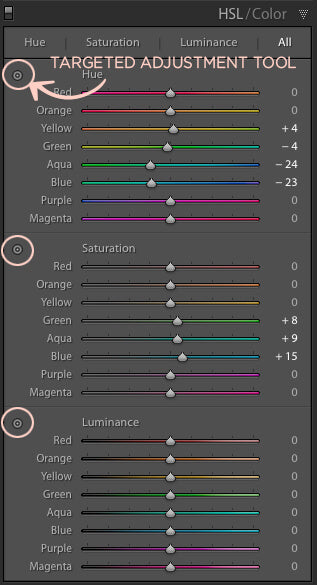
Even after making the above adjustments, you may still notice that a particular color is showing too prominently on the skin. The HSL (Hue, Saturation, Luminance)/Color Panel can help you to correct this.
Orange is one of the colors that frequently pops up as an issue with darker skin tones, and the HSL/Color Panel gives you the ability to control that specific color in an image.
(Image courtesy by Perla Salazar at P.S. Capturing Love Photography edited with presets from the Clean Edit Portrait Workflow Collection)
Hue controls the color tone in an image. For instance, hue can control whether your green values are more on the yellow or blue side of green. Hue can also control whether the orange tones lean more toward red or yellow.
The saturation sliders control how saturated a color appears in an image:
Lowering the saturation of the orange tones slightly may help eliminate an orange color cast from appearing on a subject's skin. Be aware that orange is made up of red AND yellow, so those sliders may need to be adjusted as well.
Also, keep in mind that any adjustments to the saturation sliders should be minimal to prevent the skin from looking gray and lifeless.
Luminance controls how light or dark a color appears in an image. For example:
Often, when trying to adjust color in skin tones, I PREFER using the Luminance sliders in the HSL panel to all the others.
By simply adjusting the red, orange, and yellow sliders to the right, I can lighten those tones in my image. And if those adjustments don't do enough, I move over to the Saturation part of the panel to make slight adjustments there.
(Image courtesy by Mar Loes at PhotoFlash edited with presets from the Clean Edit Portrait Workflow Collection)
I realize the above information can seem a little overwhelming. The Targeted Adjustment Tool in Lightroom can help with that. Instead of guessing which sliders need to be adjusted to reduce a particular color, this tool will read the colors and move the sliders as necessary.
To use this tool, open the HSL/Color panel and click the small circle icon in the upper left corner of the panel that you want to target (Hue, Saturation, or Luminance). When activated, you will see an arrow on the top and bottom of the circle icon.
Let's pretend we want to lighten the orange tones in an image using the Targeted Adjustment Tool in the Luminance section of the HSL panel.
Once the tool is activated, move over to the image, and click on a part of the skin tone that you think has too much color and drag upward - the color will begin to lighten.
And if you want to decrease the saturation slightly, activate the Targeted Adjustment Tool in the Saturation section and then click and drag downward on the same area of skin to reduce the saturation.

(Image courtesy Adrienne Rawlings of Oak and Ember Photography edited with Serendipity preset from the Pretty Film Bohemian Collection)
Editing dark skin can be tricky, but understanding how to expose for dark skin properly and then knowing how to best edit those images using presets and the HSL/Color panel can be super helpful in achieving beautiful skin tones in Lightroom and an amazing final image!
Do you have any questions or comments about Best Lightroom Presets for Dark Skin Tones? Leave us a comment below - we would LOVE to hear from you! And PLEASE SHARE our blog post using the social sharing buttons (we really appreciate it)!


Comments