- Lightroom Presets
- Mobile Presets
-
Photoshop
-
Learn
-
Support
-
Install
- Best Sellers
- Blog

Today, let's talk about smoothing skin in Lightroom Classic, specifically using one of my go-to Lightroom tools, the essential Skin Smooth Brush which is included in the Perfect Portrait Brush Collection. This is a must-have tool for skin smoothing and softening in Lightroom!
If you are new to Lightroom brushes, the first thing you will want to do is make sure they are installed properly.
To access the brushes now that they are installed, click on the Masking icon in the toolbar below the Histogram panel. From the options that open, choose the Brush tool.
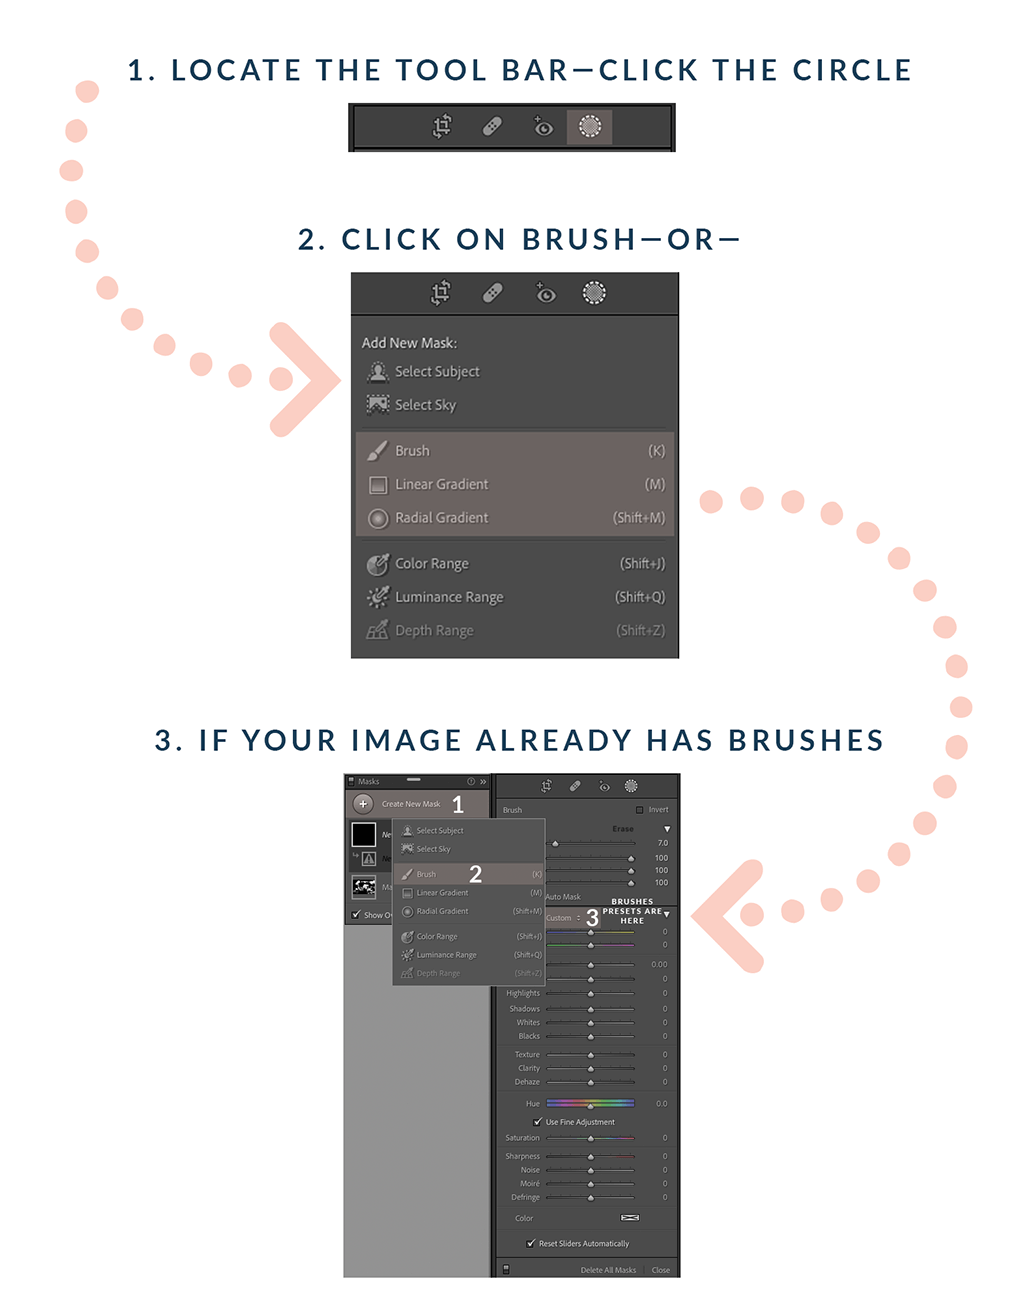
When you click on the words next to "Effect," a menu will drop down of all the brush presets you have installed. Move your mouse down the list to see all the brush options and click on "Skin Smooth" when you see it.

Before using the skin smoothing brush, you should brighten your subject first, if needed. If the skin is underexposed, blemishes, wrinkles, etc., will be much more noticeable. Tip: Exposure can be easily fixed by sliding the Exposure slider in the Basic Panel or with the "Add Light" Brush, which is also included in the Perfect Portrait Brush Collection.
Once your Skin Smooth Brush is open, you will need to set the brush flow. Flow is how much of the brush effect you see with each stroke (when you click and move the mouse over an area). When the flow is reduced, the full strength of the brush does not show through. So, if you have a brush with a strong effect, you can reduce the flow so that not as much of the effect is applied to your image.
Depending on your subject, the effect can sometimes be too strong. If you find that to be the case, just reduce the flow a bit. Tip: Don't overdo the skin smoothing. Otherwise, your subject's skin can look plastic, which is not good.

Once the flow is set, start brushing over your subject's skin. A pin will be anchored down wherever you begin brushing. Make sure to use a brush size that suits the job. That means making the brush large enough to cover a particular area quickly but small enough that you don't hit details you don't want to be softened. You can make your brush bigger or smaller using the bracket [ ] keys on your keyboard or using the scroll wheel on your mouse.
Once you are finished smoothing the skin, you can tap the same Masking icon to exit the tool or click the "Done" button in the panel below the image. You can also click the "+" at the top of the Masks Panel to add a new mask.
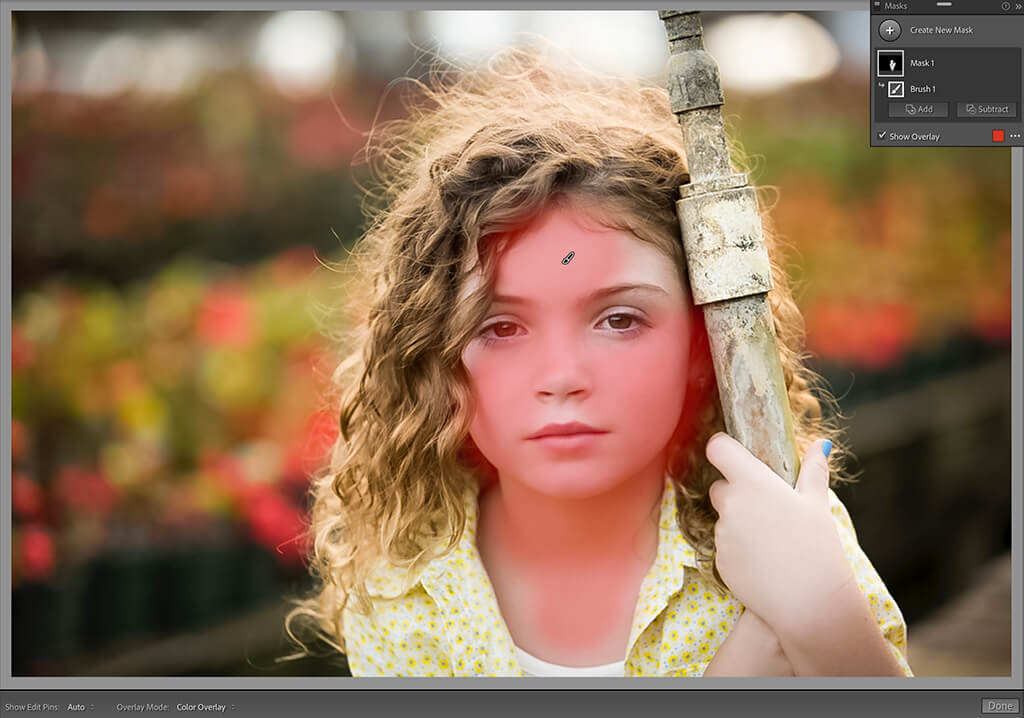
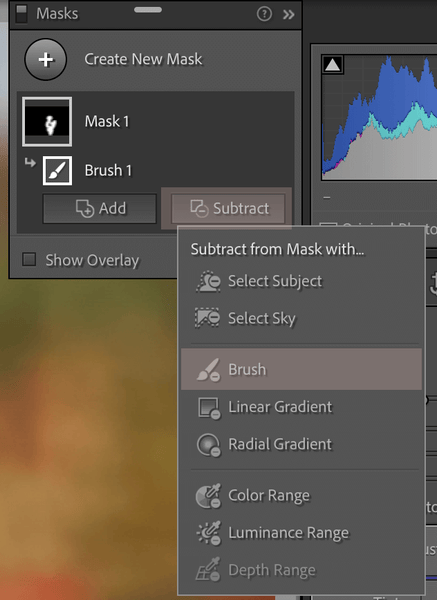
Lightroom includes a handy feature called a "mask" that will show you where you have already brushed on your image (the red areas). If you find this mask distracting, it can be turned on and off by clicking the box next to "Show Overlay" at the bottom of the Masks panel or tapping the "o" key.
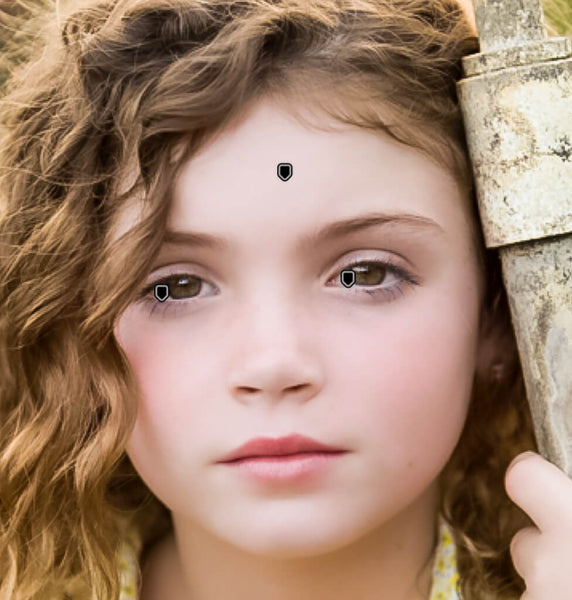
A "pin" will show up wherever you begin brushing. When it is active, the "pin" will be in the shape of a brush and when it's NOT active, it will show as a generic flag shape.
The red color that you see is the "mask" and is primarily used to show where you have brushed on your image. Don't worry; this mask will not show on the image when printed or exported. If you don't want to see the mask when you're brushing, you can turn it off and back on by tapping the "o" key.
If you brush over an area you did not mean to; you don't need to delete your edit and start over. Just click the "Subtract" button next to your mask in the Masks panel. Then choose the brush tool and re-brush over the area you don't want the mask.

Once you are happy with your skin smoothing, click "Done" in the bottom right corner, below the image. Now you can continue editing or export the image if you're finished.
Thanks to the Pretty Presets Lightroom Portrait Brushes, smoothing skin is a VERY easy change to make.
Follow along with the video below to learn how to smooth skin in Lightroom.
If you missed our previous three portrait editing tutorials, check them out now! They build on the basic but essential skills you need to know when editing portraits and using brushes in Lightroom:
And you can now Smooth Skin in Lightroom Mobile! We have a step-by-step guide right here if you want to learn how.
Do you have any questions or comments about Smoothing Skin in Lightroom? Leave us a comment below - we would LOVE to hear from you! And PLEASE SHARE our tutorial using the social sharing buttons (we really appreciate it)!


Comments