- Lightroom Presets
- Best Sellers
- Mobile Presets
-
Photoshop
-
Learn
-
Support
-
Install
- Blog

Are you wondering how to achieve a dreamy, soft edit in Lightroom?
While there are many different ways to achieve this sought-after look, one quick and easy way (and by quick, I mean you can do this in 30 seconds) is to reduce Clarity, boost Contrast, and reduce Vibrance.
Let's do a quick walk-through:

The first thing you need to do is open the Develop Module. Note: this can also be done in the Library Module, but you will have more control in the Develop Module.
We are going to be working with Clarity, Contrast, and Vibrance:

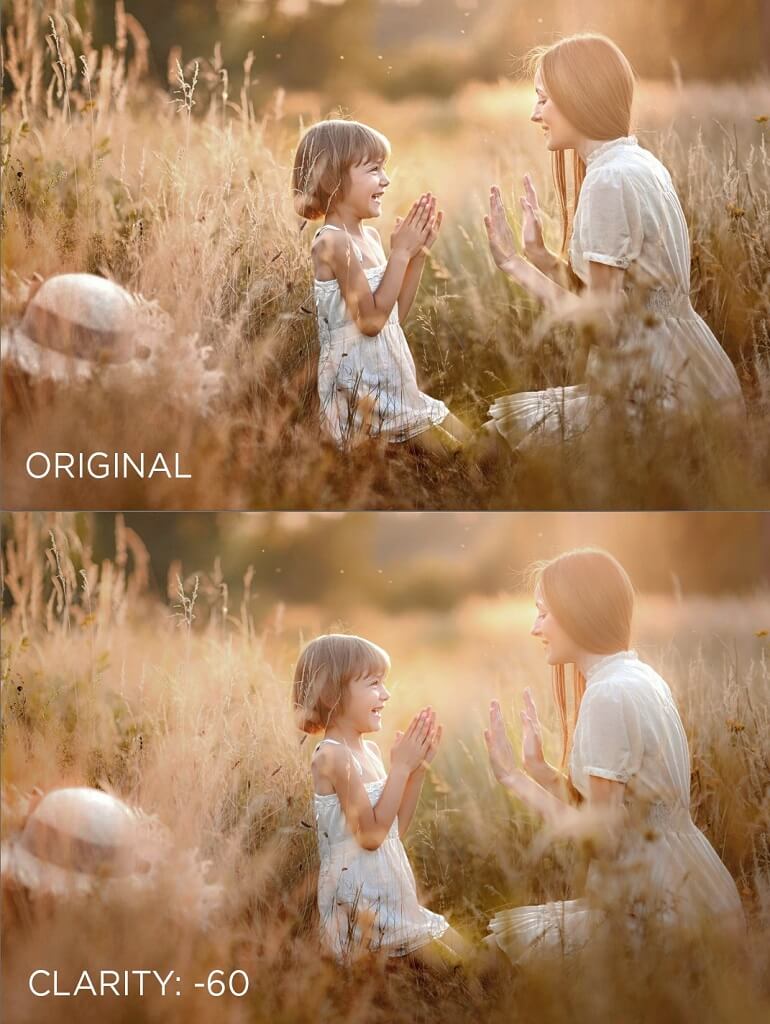
To soften the image, you will first need to reduce the Clarity. Clarity impacts the midtones of an image, so when the Clarity is decreased significantly, as in this example, you will see a drastic softening of your image:

Here is a comparison of how reducing the Clarity impacts an image:
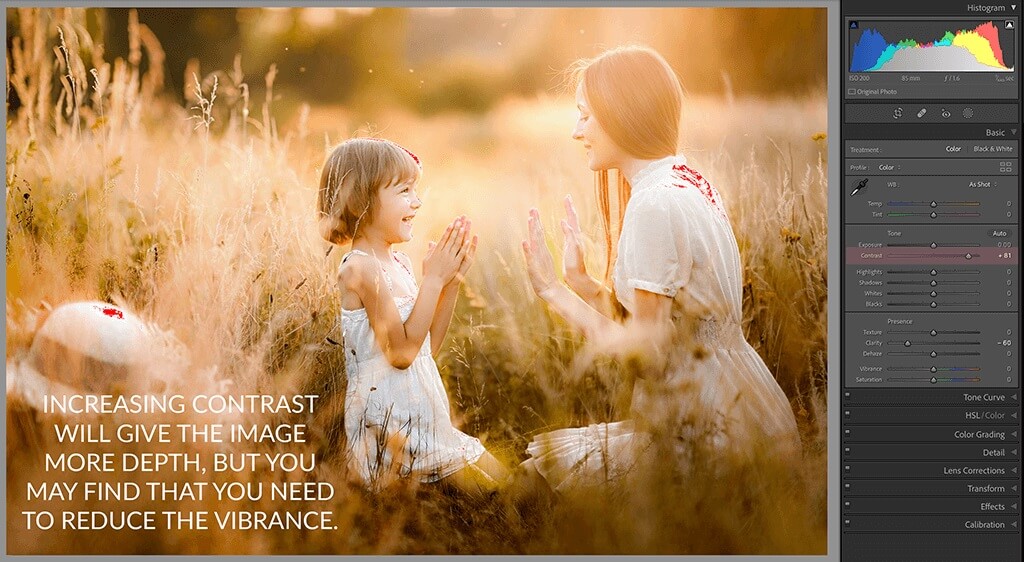
To restore a bit of the depth and edge definition that reducing the Clarity took away, we will increase the contrast.
In doing so, for this example, the image became very warm. This is because the highlights and shadows of the image were already quite warm, and boosting the contrast increases the range between highlights and shadows. Therefore, I ended up with a lot of yellow in the image:
To solve this issue, reduce the Vibrance. The reason to reduce the Vibrance instead of the Saturation is because Vibrance reduces the saturation of only the MOST saturated color values. In contrast, Saturation reduces ALL of the color values.
Reducing the Saturation would wash out most of the color in this image because, aside from the yellow/oranges, the photo doesn't have a lot of color. By reducing the Vibrance, I am only toning down the yellows and oranges while leaving the rest of the colors as they are:

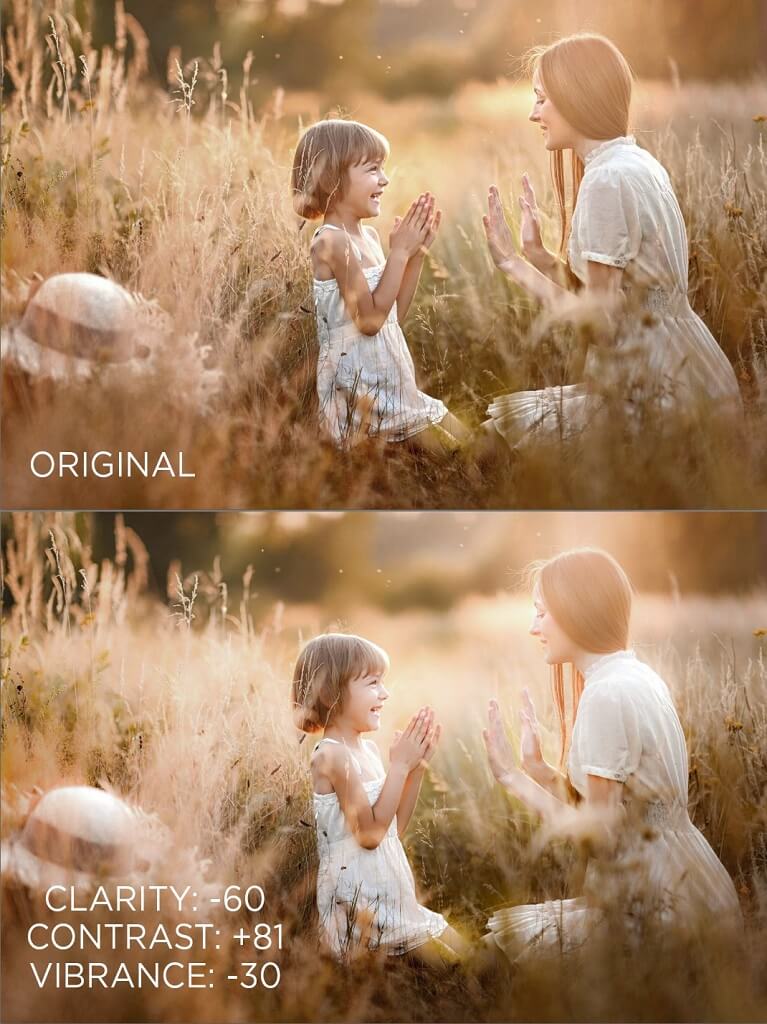
As you can see above, the edited image has a much softer and hazy feel to it while still retaining the sharpness of the subjects.
When you are using this technique, it is important not to go overboard - LESS IS MORE! Think of it as a give-and-take situation: every time you tweak the Clarity, you should then tweak the Contrast in order to keep a balance between soft and sharp.
If you want to save even more time and achieve a similar dreamy look using Lightroom presets, look no further than Pretty Presets Clean Edit Portrait Workflow Collection.
This fantastic Lightroom collection includes 35 layerable presets, 25 portrait brushes, and 51 workflow presets - EVERYTHING you need to transform your images into beautiful dreamy portraits!
Do you have any questions or comments about Achieving a Soft, Dreamy Edit in Lightroom? Leave us a comment below - we would LOVE to hear from you! And PLEASE SHARE this post using the social sharing buttons (we really appreciate it)!


Comments