- Lightroom Presets
- Best Sellers
- Mobile Presets
-
Photoshop
-
Learn
-
Support
-
Install
- Blog
By Amanda Padgett on | No Comments

Today we will be taking a look at how to make selections with the Marquee tool in Photoshop and Photoshop Elements. To illustrate the marquee tool, I am going to focus on making a Photoshop vignette (which is the darkening of an area along the edges of an image, which will put more focus on the subject).
There are other things you can do with the marquee tool in Photoshop, but this will give you a good introduction and basic understanding of you to use it.
As with the lasso tool, when you use the marquee tool, you will be selecting an area that you wish to make changes to.
Here is what the marquee tool and tool option menu looks like in Photoshop CS6 and CC (Creative Cloud).
Choose the elliptical marquee tool to make circle or oval selections.
If you want to make square or rectangular selections choose the rectangular marquee tool option.

Below is what the marquee tool option menu looks like in PSE 11. The tool and option menu also looks very similar to this in Photoshop Elements 6-10.

With both the elliptical and rectangular marquee tools, you can adjust the areas inside your selection with adjustment layers, or you can run a filter or action and it will only affect the area you selected.
Why should you feather your marquee selection?
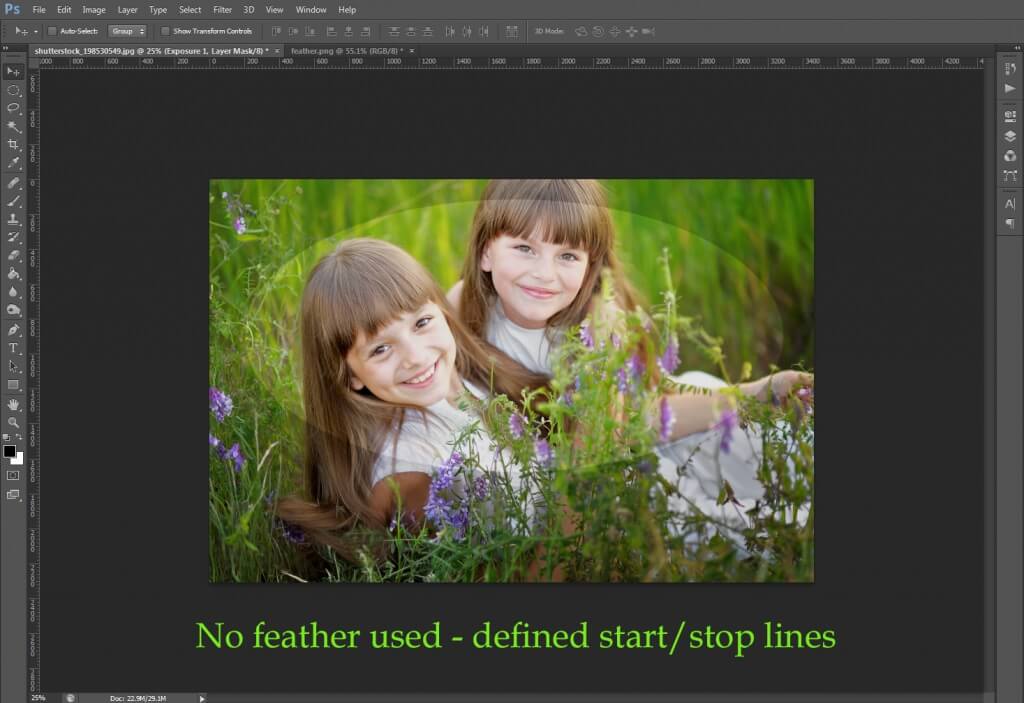
Let me show you an example. In the edit below, I made my selection using the elliptical marquee tool (with a zero feather setting), then created a brightness/contrast adjustment layer, changed the blend mode to screen and lowered the layer opacity.
As you can see in this image, when you choose a zero feather for your selection, you will be able to clearly see the start and stop points for the change. This is generally NOT a good option when editing images.

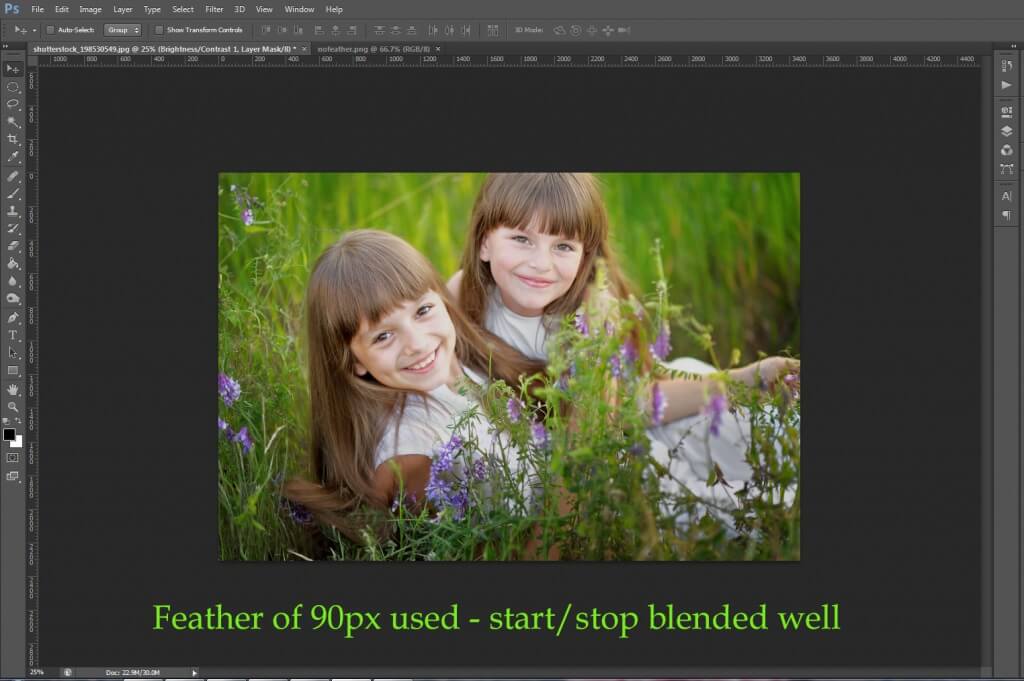
If I add a feather of 90 pixels, it will make the change blend into the neighboring pixels, and have a nice transition from change to no change. In other words, no extreme start and stop points to the change, like we see above.
The following image shows the same selection and change, but this time using a feather of 90 pixels:

As with other Photoshop selection tools, you can create just one marquee selection or you can create multiple selections. If the selections overlap, they will become one single selection.
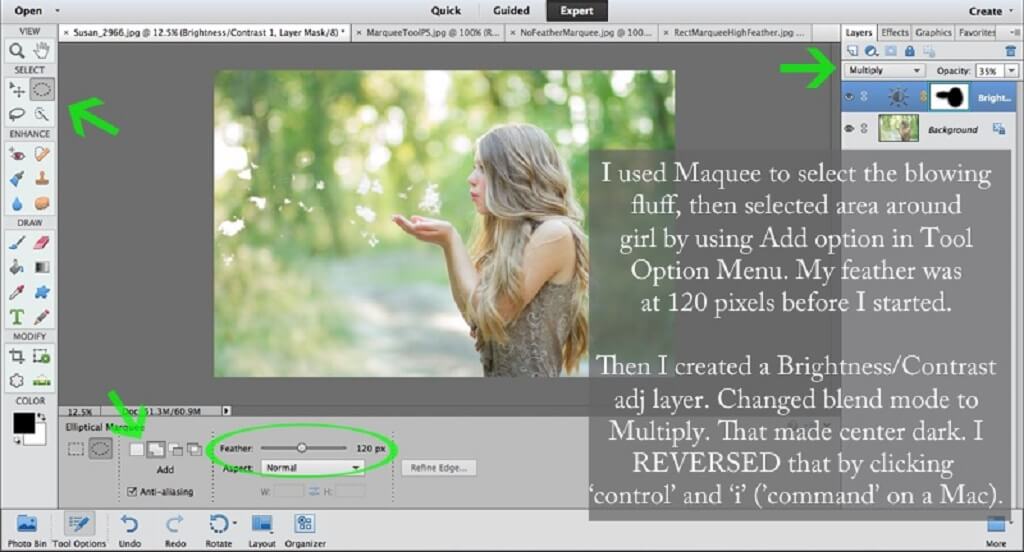
The screenshot below shows an odd-shaped selection (look at mask in layer panel). I did that by selecting one area, clicking on ADD and selecting another area. Because the two selections overlapped, they created a single larger mask.

In the edited image above, I made a custom vignette by inverting (reversing) my custom selection.
Here are the steps I took:


Hi! I'm Amanda, a homeschooling mom of four, from South Carolina. I am passionate about photography, photo editing, and helping others learn to love their camera and editing programs.

Comments