- Lightroom Presets
- Mobile Presets
-
Photoshop
-
Learn
-
Support
-
Install
- Best Sellers
- Blog

It used to be that anytime I wanted to remove an unwanted object, stray hair, or skin imperfection I had to take the image over to Photoshop. I don't know about you, but I want and NEED my workflow to be as fast and smooth as possible. This means that if it can be done in Lightroom - I want to do it in Lightroom!
Thankfully, Lightroom's Spot Removal Tool will now help you easily remove these types of unwanted distractions WITHOUT ever leaving Lightroom!
This guide and tips for using the Lightroom Spot Removal Tool will help you utilize the power of this tool to achieve the best effect and at the same time give you a much more efficient Lightroom workflow!

You will find the Lightroom spot removal tool in Develop Module, under the Histogram tab. Just click on the spot removal icon in the local adjustments tool bar (highlighted below). As a shortcut, you can also click "Q" on your keyboard to open this tool and click "Q" again to close it.

There are two settings in the Lightroom Spot Removal tool: Clone and Heal. They function differently so you should know how they both work. This will allow you to choose the best option for the job.
Cloning will replace the area you clone with an exact replica of the source spot Lightroom chooses. You should use the powerful option to remove flyaway hair, replace your subject's blurry eye with a sharp eye, or just remove other objects and distractions from the background.

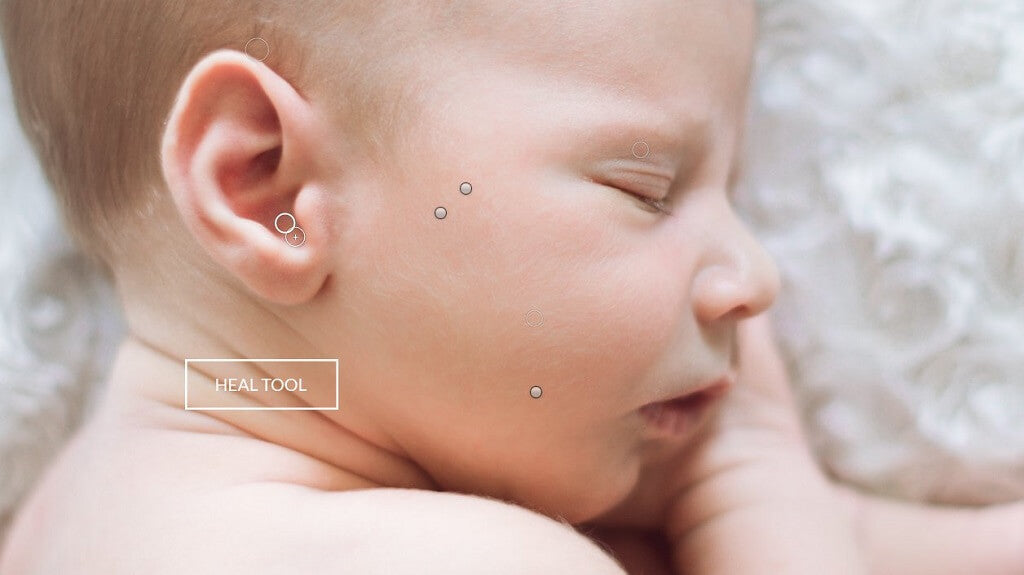
Healing on the other hand will look at all the pixels around the area you heal and then average them with what you are healing. You can use the powerful tool to remove blemishes, wrinkles, or dry flaky skin.
Important Tip: If you ever feel that you are not getting the results you want, try changing to the other tool. I have had times when I have chosen the clone tool thinking it would work best but ended up using the heal tool for better results. It can't hurt, so give it a try!
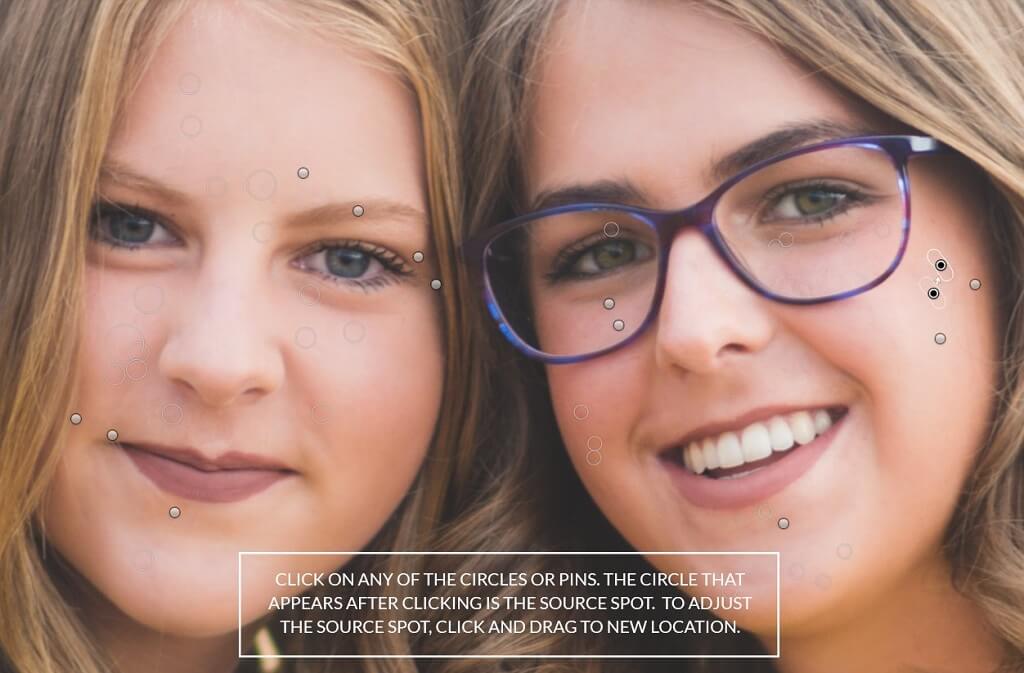
When using Lightroom's spot removal tool, Lightroom will automatically choose the source spot. However, at least half the time, I feel like the source spot that Lightroom chooses needs to be adjusted.
This is easily done, just click on the new circle created by Lightroom (the source spot) and move it to an area of your image that is similar to what you want the clone/heal spot to look like.
If you just want Lightroom to again to find a better spot, simply click the "/" (forward slash) key and it will look again for a better spot.
Don't be frustrated if after clicking the Spot Removal tool on your image it doesn't fix your image right away, the way you think it should. You can easily help Lightroom make it perfect!
In the Spot Removal tool panel there are three sliders: the size slider, feather slider, and opacity slider. Each of these sliders can enhance the results of the Spot Removal tool.
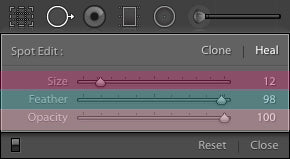
The size slider simply adjusts the size of your spot healing tool. You can also use the left and right bracket keys ( [ and ] ) to adjust the size of your brush.
This feather slider adjusts the softness or hardness of the spot removal brush. If you are cloning something right next to a hard edge of an object in your image, you will want the brush to be harder. To do this, move the slider closer to 0.
Almost every other time, you will want your brush to have as soft an edge as possible. Your brush will be softest when the slider is closest to 100.

The opacity slider will control how see-through or not your clone/heal area is. In most situations, you will want the opacity set to 100. After all, you are trying to get rid of the thing you are using the spot removal tool on. However, when cloning wrinkles or under-eye circles, completely removing them can make your subject look fake. Reducing the opacity of the spot removal tool will allow some of the area below to show through and keep a more natural result.
Whether you are trying to remove many small distractions from your image (think acne on a teen or dry skin on a baby) or a large distraction using many smaller clone/heal strokes, you are going to use this tip all the time.
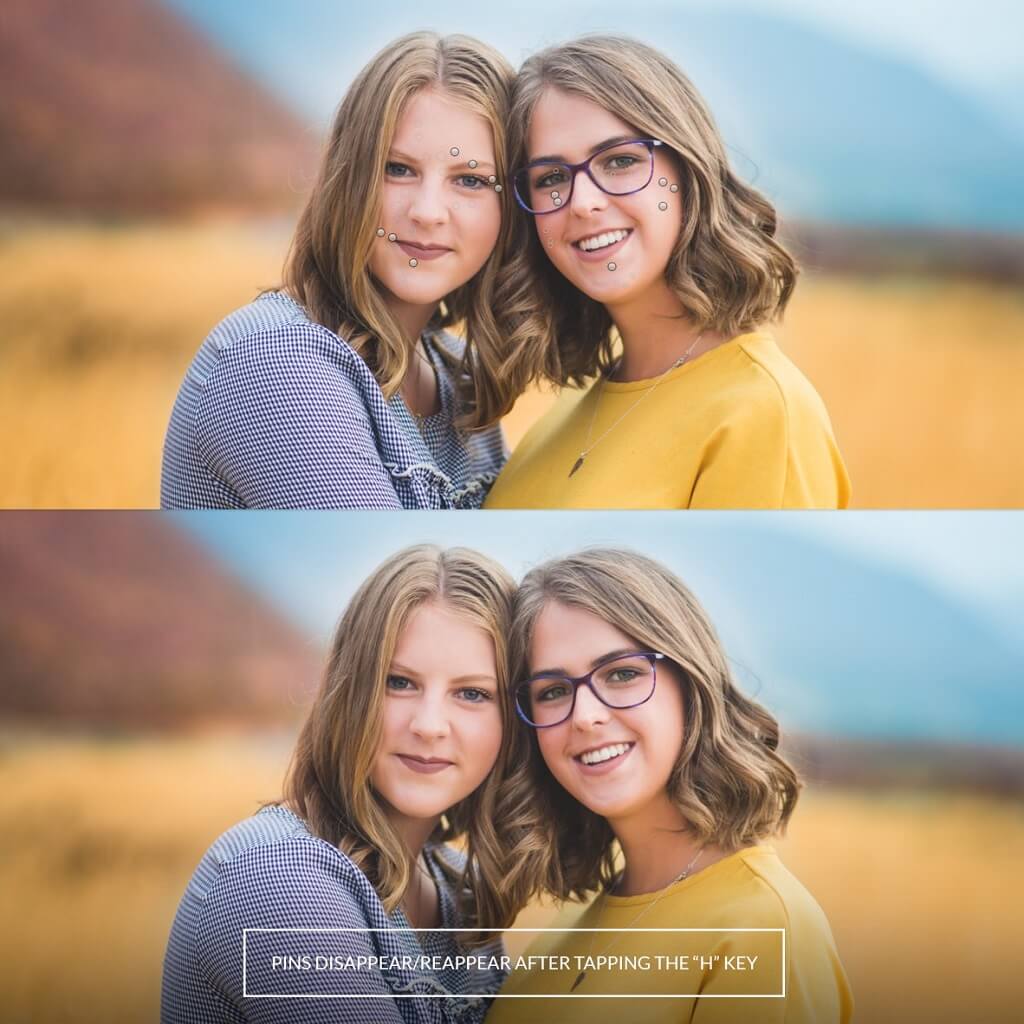
Often, previous spots of cloning or healing will get in the way of something you still need to fix. Simply by tapping the "H" key, any previous clone/heal pins or spots will disappear allowing you to clone or heal wherever needed.
Don't worry! The pins are not gone for good. Just tapping the "H" key again will bring the clone/heal pins back and allow you to further adjust them as necessary.
As always, you can just tap the delete key to delete a Clone or Healing pin. However, you can also delete many pins at once. This comes in very handy if you find yourself working on baby acne or anywhere you have many spots in a small space and want to start over.
To access this feature, just hold down the option/alt key while using the Spot Removal tool and your cursor will change to a pair of scissors. Just click once on the spots you want delete and they will disappear. You can also drag a rectangle while holding the option/alt key and everything within the rectangle you draw will disappear.
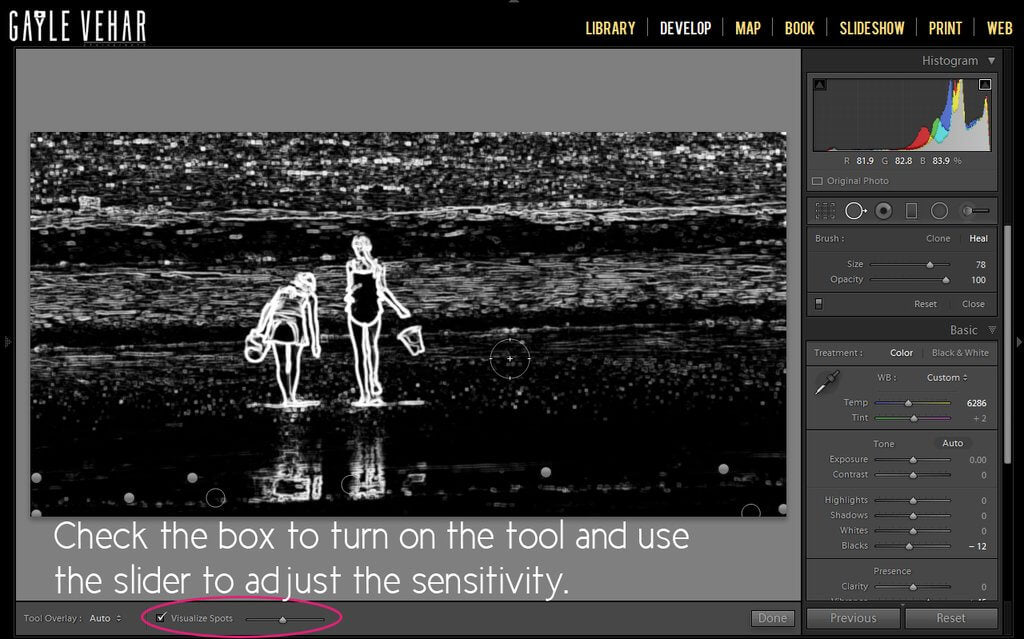
This cool feature of the Spot Removal Tool is found in the Tool Options below your photo. Just check the “Visualize Spots” box and your photo will become inverted and black and white so that it is easier to see the small spots that you sometimes miss with your eye. You can adjust the tool’s sensitivity with the slider.
When you are done fixing the spots you found, just un-check the “Visualize Spots” box and you are back to normal.
The Lightroom Spot Removal Tool is powerful and gives you the ability to make corrections and adjustments in Lightroom rather than taking your image to Photoshop! You can remove both small and large objects with this tool. And anything that saves you a trip to Photoshop will also streamline your workflow and save valuable editing time - a huge plus in my book!!
Do you have any questions or comments about Using the Lightroom Spot Removal Tool? Just leave us a comment below - we would LOVE to hear from you! And PLEASE SHARE this post using the social sharing buttons (we really appreciate it)!


Comments