MOTHER'S DAY SALE! UP TO 35% OFF - DISCOUNT APPLIES IN CART.

  • Log in
  • Cart (0)
  • Checkout
Pretty Presets and Pretty Photoshop Actions
  • Lightroom Presets
  • Mobile Presets
  • Photoshop 
    • Photoshop Actions
    • Photoshop Overlays
    • Limited Edition Holiday Collections
  • Learn 
    • Free Lightroom Training
    • Free Photoshop Training
    • Lightroom 101 Workshop
    • Photoshop 101 Workshop
    • Your Pretty Edits
  • Support 
    • About Us
    • Contact Us
    • Order Lookup
    • Lightroom FAQ
    • Photoshop FAQ
  • Install 
    • How to Install Lightroom Presets
    • How to Install Lightroom Brushes
    • How to Install Presets in the Free Lightroom Mobile App
    • How to Sync Lightroom Presets from CC to Mobile
    • How to Install Photoshop Actions
    • How to Install Photoshop Overlays
  • Best Sellers
  • Blog

How To Use Layer Masks In Photoshop

By Anna Gay on May 25, 2021 | No Comments

Layer Mask Photoshop

How to Use Layer Masks in Photoshop

Layer Masks are one of the most useful tools in Photoshop and learning how to use them will make your editing so much easier.

What is a Layer Mask? 

Essentially, a Layer Mask is a duplicate of the original image (or, in Photoshop jargon, a new "layer") where you can make edits without affecting the original ("background") image or layer.

Using a Layer Mask is considered to be a form of non-destructive editing.  It won't permanantly change your image and you can always go back in and remove it or make further adjustments.  

In other words: LAYER MASKS ARE A LIFE-SAVER!

Also, if you make a mistake, you can quickly correct your mistakes without having to completely start over.  Let me show you how:

Lightroom & Photoshop Facebook Group

Step 1. Create a New Adjustment Layer

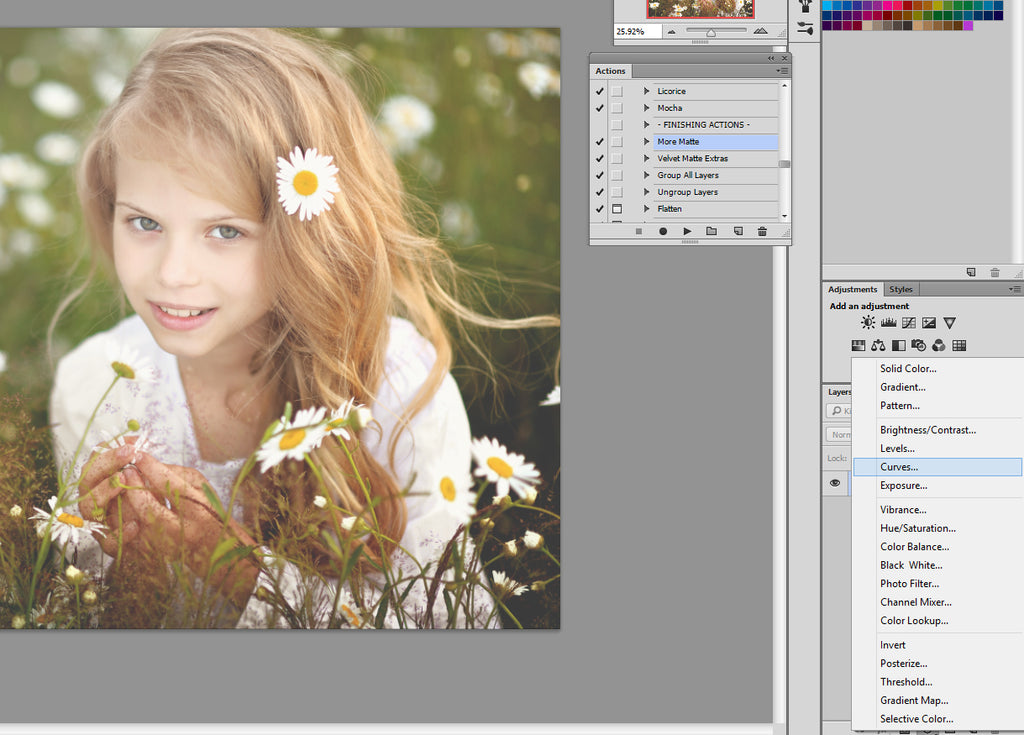
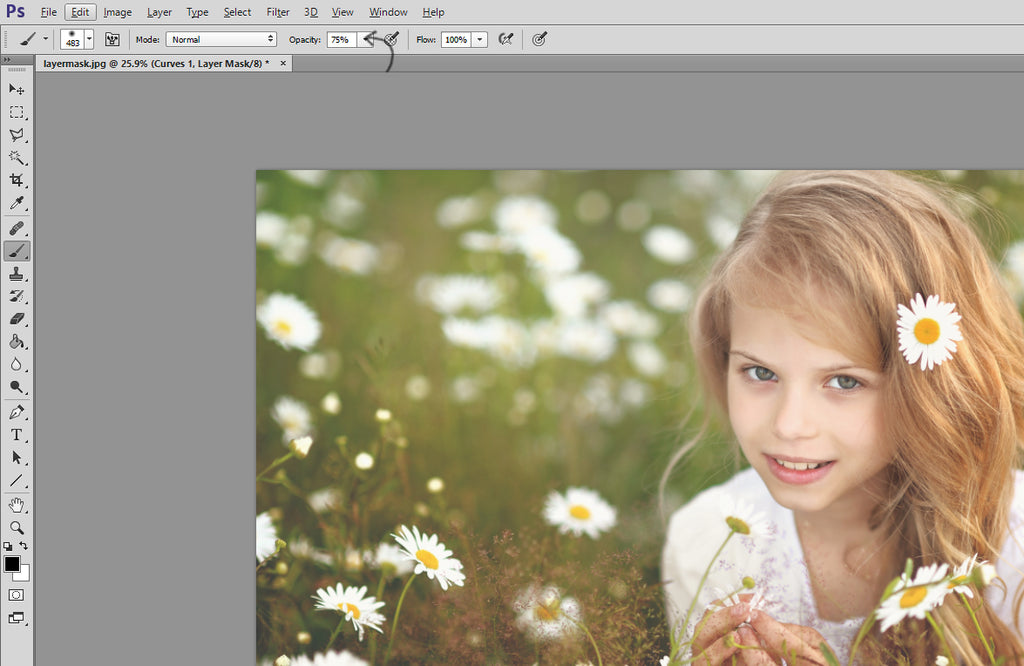
First, create a new Adjustment Layer by clicking the icon highlighted below, then selecting Curves:

Photoshop Mask

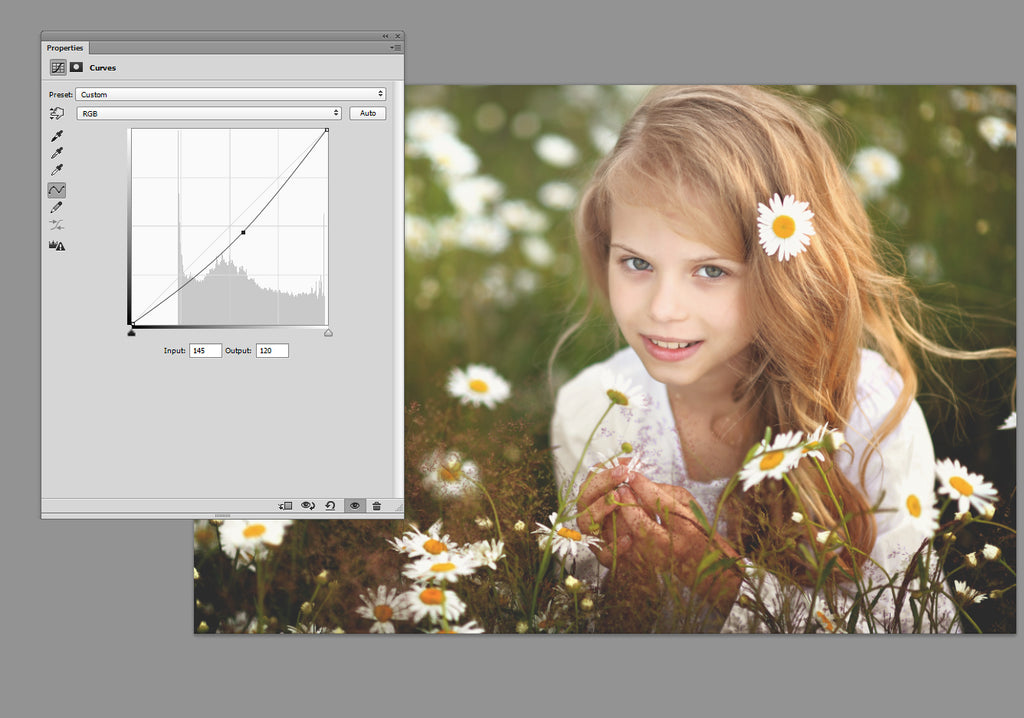
I am going to start off by lowering the curves in order to make the subject's hair stand out a bit more. Her hair, particularly the top, needs a bit more pop, so I reduced the Curves by pulling the center of the line down to the bottom right of the histogram.  This will give her hair more depth:

Add Layer Mask Photoshop

2. Create a Layer Mask

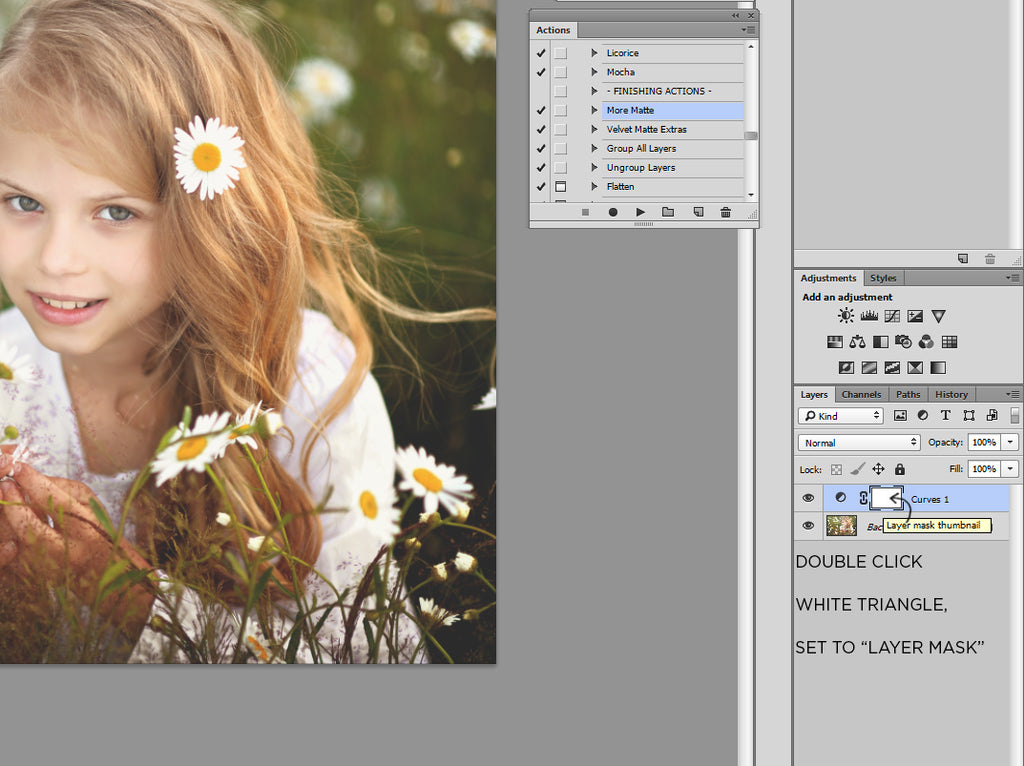
Since I only want the curves adjustment to apply to her hair, I am going to create a layer mask to erase everything except the adjustments on her hair.  Make sure that your Curves mask is set to Layer, not Vector, by double clicking the white rectangle:

How to Add Layer Mask in Photoshop

3. Brush off Adjustments Where They are Not Needed

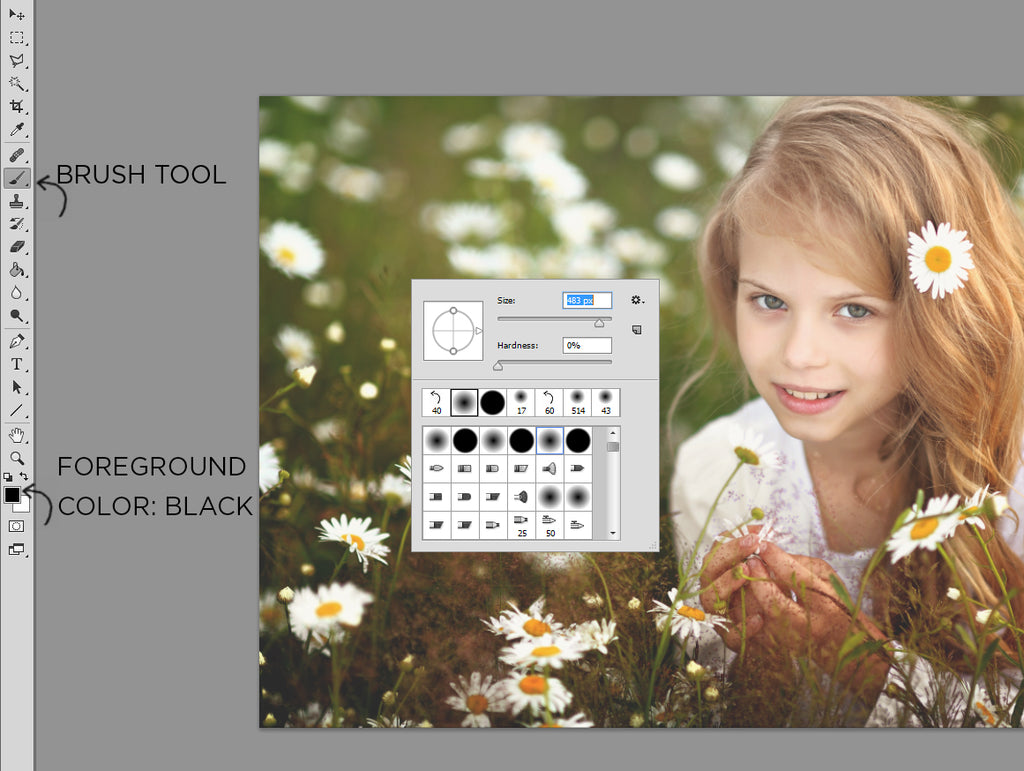
With your Curves Layer Mask selected, make sure that your foreground color is set to black. 

Note: when using layer masks, black will take away/erase the adjustments you make on that layer, while white will put the adjustments back in.

So, if you are using black to remove adjustments and remove too much, all you need to do is change your brush color to white, and brush over the area where you removed too much.

Select a brush tool with a soft, blurred edge.  For this image, I am using a fairly large brush, since I will be erasing the majority of adjustments, except for the small portion on her hair.  When you are ready to begin erasing the adjustments, simply hold down your left mouse button, just as you normally would with a brush in Photoshop:

Create Layer Mask Photoshop

4. Reduce Opacity & Flow of Your Brush as Needed

You can also adjust the Opacity and Flow of your brush in order to make the effect less noticeable.  After erasing all but her hair, I felt as though her hair was now too dark, so I reduced the opacity of my brush to 75% and brushed over her hair once:

Using Masks in Photoshop

4. Reduce Overall Opacity of Entire Layer

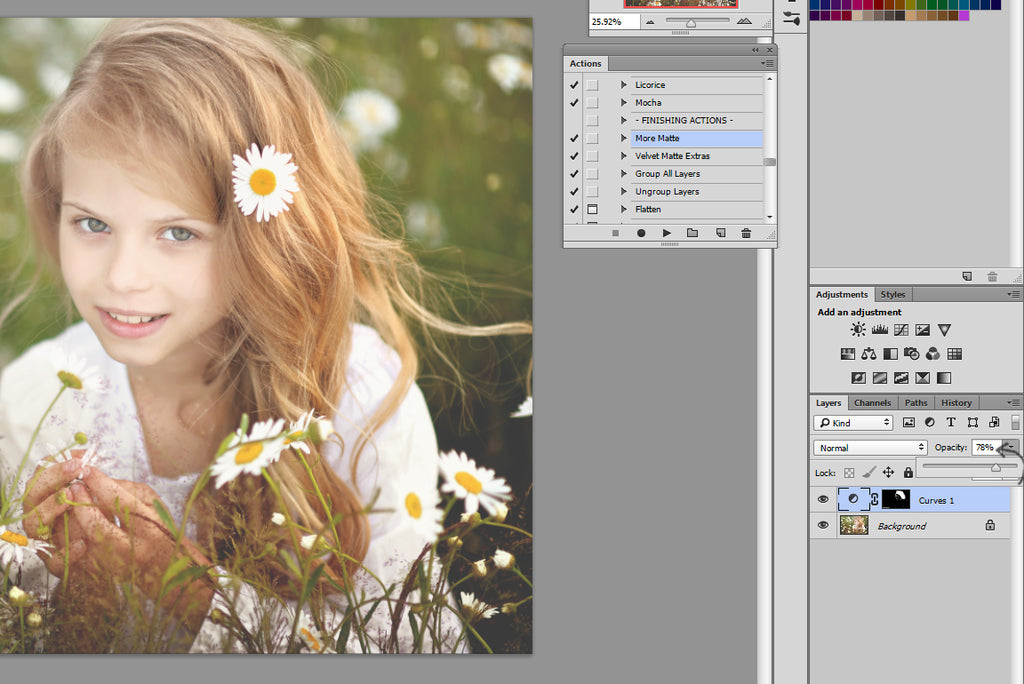
Another trick for softening the effect of an adjustment layer is to reduce the opacity of the ENTIRE LAYER.  For this image, I reduced the overall opacity to 78% which softened the Curves adjustments even further:

How to Make a Layer Mask in Photoshop

5. Create Another Adjustment Layer

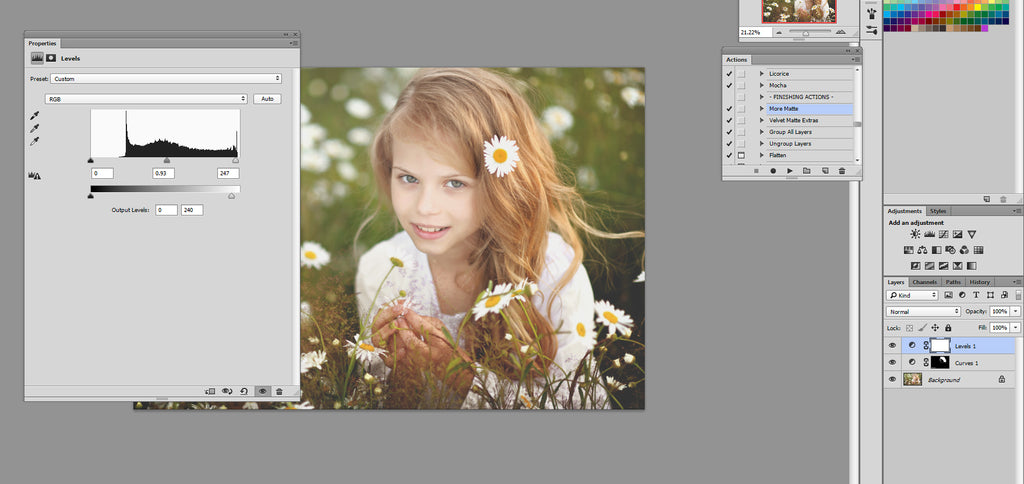
To make my subject stand out even more, I first created a new "Levels" Layer Mask (just like I did with Curves at the beginning) and moved my highlights output slider to the left.  This will darken the image overall. 

Then, to make my subject brighter, I erased the Levels adjustments on her, while leaving the rest of the image alone:

How to Mask in Photoshop

6. Review Layer Masks in Layers Panel

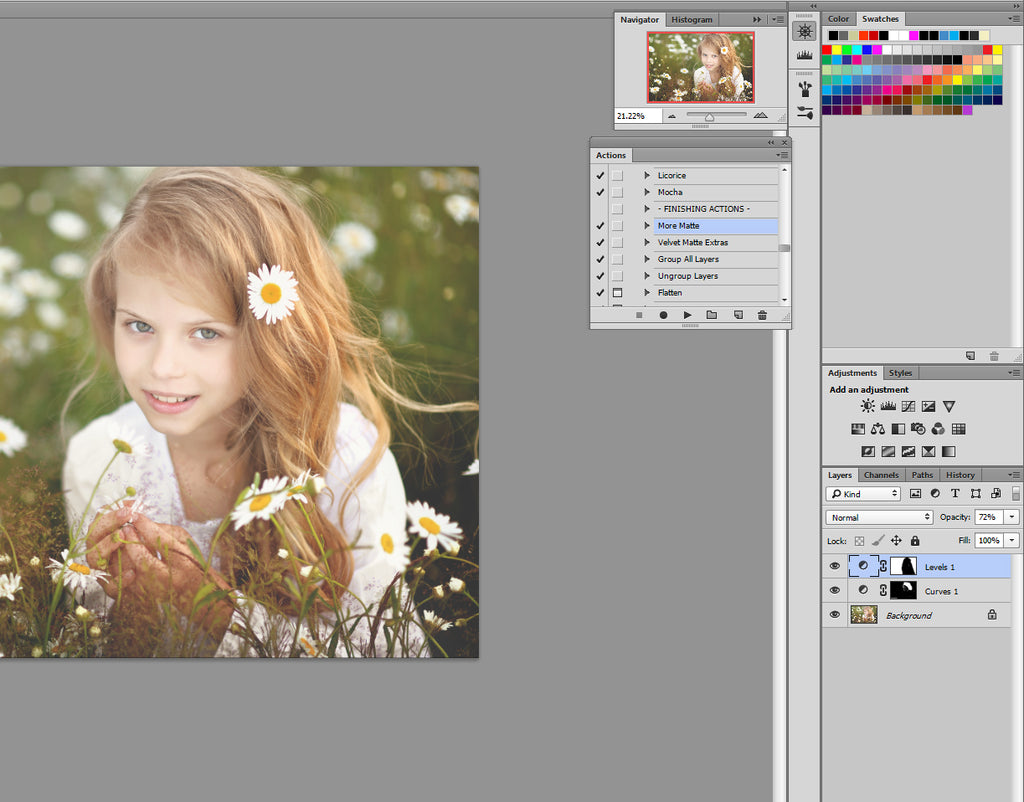
As you can see in the Layers panel, the black areas represent where I brushed over/erased the adjustments.  So, on Curves layer 1, you can see that almost the entire rectangle is black - this is because I erased my Curves adjustments everywhere except her hair in order to give it more depth. 

On Levels layer 1, you can see that only the subject is black, while the rest of the rectangle is white.  This is because I darkened everything except the subject with this adjustment:

Layer Mask Shortcut Key in Photoshop

To recap this crash course in Layer Masks:

  • Layer Masks allow you to make adjustments to specific areas of an image WITHOUT overwriting your original/background image
  • With the foreground set to black, you will be erasing adjustments and revealing the original background image
  • With the foreground set to white, you will be putting the adjustments back in that you may have erased, and correcting any mistakes you may have made while editing
  • Use a soft edge brush
  • Experiment with the Opacity and Flow of the brush
  • Experiment with the Opacity of the entire layer in your Layers Panel

Do you have any questions or comments about Layer Masks in Photoshop?  Just leave us a comment below - we would LOVE to hear from you!  And PLEASE SHARE this post using the social sharing buttons (we really appreciate it)!

Portrait Photoshop Actions

Related Articles

How to Price Your Photography For Profit
Unlock profitable Photography Pricing strategies!  Discover how to cover costs, value your craft, and grow your business
Read More
Social Media for Photographers: Proven Strategies to Attract More Clients
Master social media for photographers and attract more clients.  Discover expert tips on branding, engagement, and conte
Read More
Beginners Guide to Photoshop's Generative Fill Tool
Discover how to use Photoshop's Generative Fill Tool to effortlessly expand and enhance your images.  This step-by-step
Read More
Pretty Presets for Lightroom author Anna Gay

Anna Gay

Portrait Photographer

Anna Gay is a portrait photographer based in Athens, GA and the author of the dPS ebook The Art of Self-Portraiture. She also designs actions and textures for Photoshop. When she is not shooting or writing, she enjoys spending time with her husband, and their two cats, Elphie and Fat Cat.

May 25, 2021

Comments

INFO & SUPPORT
  • Lightroom FAQ
  • Photoshop FAQ
  • Contact Us
  • Order Lookup
  • Log Into Account
Sign up for great freebies and tutorials

Get notified about promotions, giveaways and webinars before they happen!

Join the pretty Community

Come join the #1 Lightroom & Photoshop Facebook Group to help you learn how to edit your photos more confidently today!


  • About Us
  • Testimonials
  • Policies
  • Terms of Service
  • Write for Pretty
  • Lightroom Scholarship
  • Photoshop Scholarship

© 2025 Pretty Presets for Lightroom | support@prettypresets.com (406) 298-3006

  •  
  •  
  •  
One or more of the items in your cart is a recurring or deferred purchase. By continuing, I agree to the cancellation policy and authorize you to charge my payment method at the prices, frequency and dates listed on this page until my order is fulfilled or I cancel, if permitted.