- Lightroom Presets
- Best Sellers
- Mobile Presets
-
Photoshop
-
Learn
-
Support
-
Install
- Blog
By Anna Gay on | No Comments

Because they mimic film, adding a light leak to your digital photos is an easy way of giving your photos a vintage retro vibe. They've been made popular through several different iPhone apps like Instagram, but you can totally duplicate that look with Photoshop.
In this tutorial, we will cover two separate methods of applying a film-like light leak in Photoshop through painting a light leak into your photo using a Quick Mask, as well as applying a light leak texture overlay to an image.
The first method that we're going to look at is actually painting a light leak into your photo.
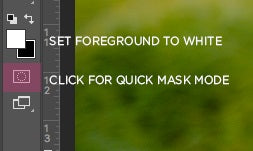
First is make sure that your foreground color is set to white. Now, you will want to apply a quick mask to your photo by pressing your quick mask button and then invert your quick mask. You can invert your quick mask on a PC by pressing ctrl+I. On Mac, I believe it is command+I.
Now select your brush tool and make sure your brush has a soft edge to it. Select one of these here, that has the soft sort of glowing edge to it and increase the master diameter depending on the size of your photo. I'm going to increase mine to about 1,000.
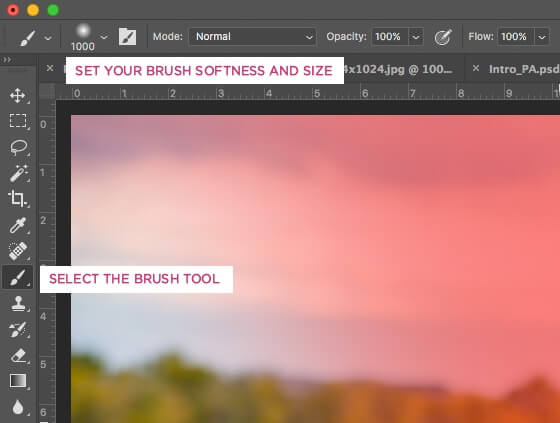
And what you are going to do next is start in the top portion of the photo and just brush away the red in the areas that you want your light leak to occur.
Keep in mind there is really no set method for this, because all light leaks are different. You are really able to tailor it to what you want it to look like in your photo.
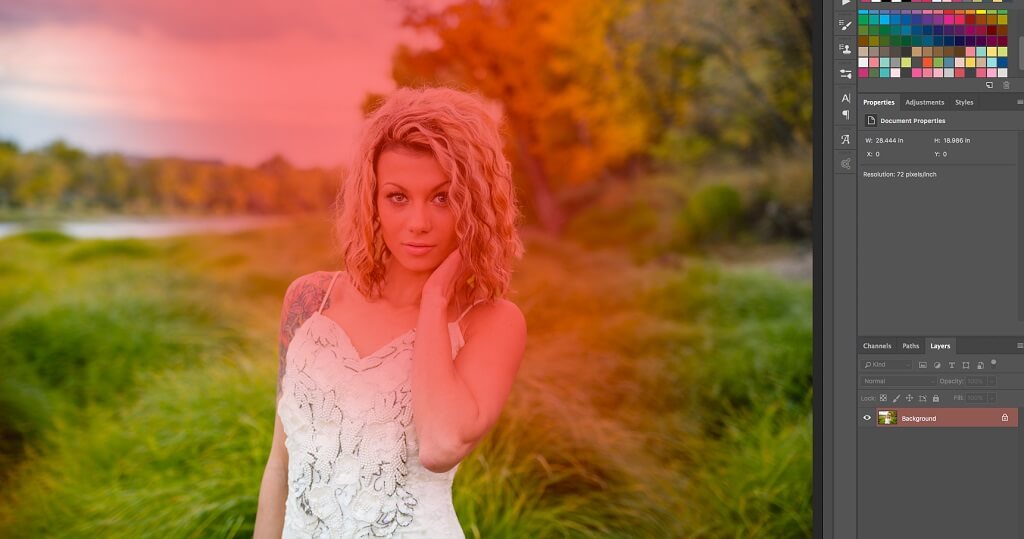
After you select the area where you want the light leak to show up, you are going to press Q and as you can see, this is, again, where the light leak will take place on your image.
Now, at this point, you will want to color the light leak, so you will need a new curves layer. Go up to layer>new adjustment layer>curves and select okay.
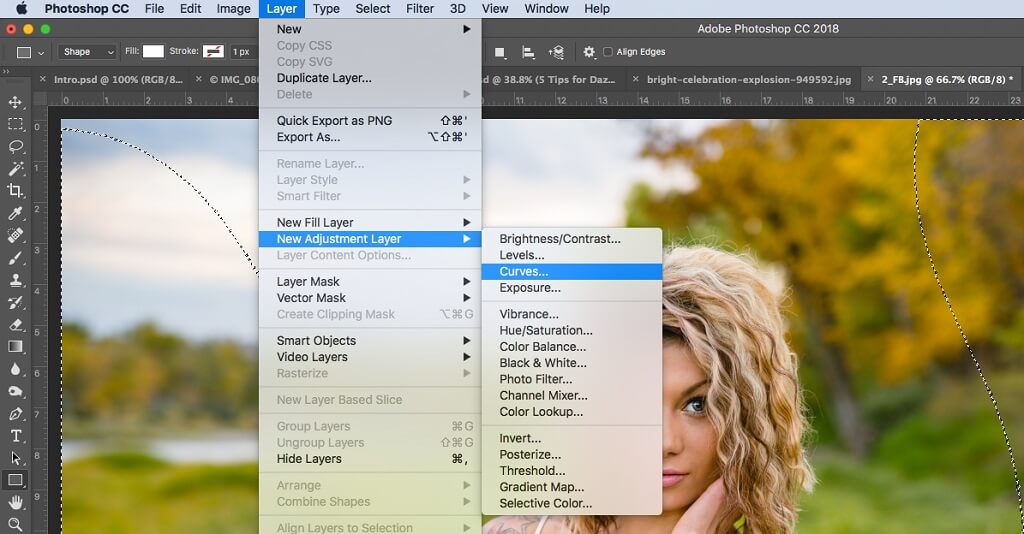
Now, on the master channel, you want to just pull it up like this to brighten this part of your photo. (The master channel is the white line in the diagram below.)
Next, let's add the color to the light leak. Keep in mind, you can play around with the channels until you are happy with the color of the light leak. For my image, I want my light leak to be a little bit more red. So I go to the red channel and pull it up. Go to the green channel and pull it down. Finally go to the blue channel and pull it down as well.
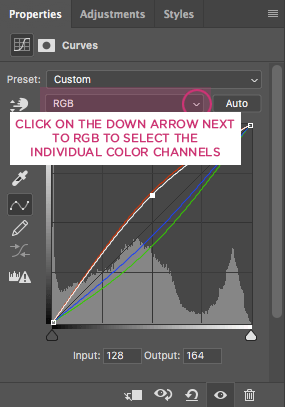
Now that I have the light leak color to my taste, I'm going to reduce the opacity of the light leak, so it is not quite so harsh. I am going to take it down to about 60%.
At this point, you can either leave the light leak as it is or you can erase some of the light leak if you want to, by selecting your eraser tool. That's the beauty of an adjustment layer. You can go back and erase what you just did, but it's not going to effect your overall photo.
You can also apply a fill layer that will just sort of blend the photo better. It will enhance the color palette and really unify all of the colors. To do that, you would go to layer>new fill layer> solid color.
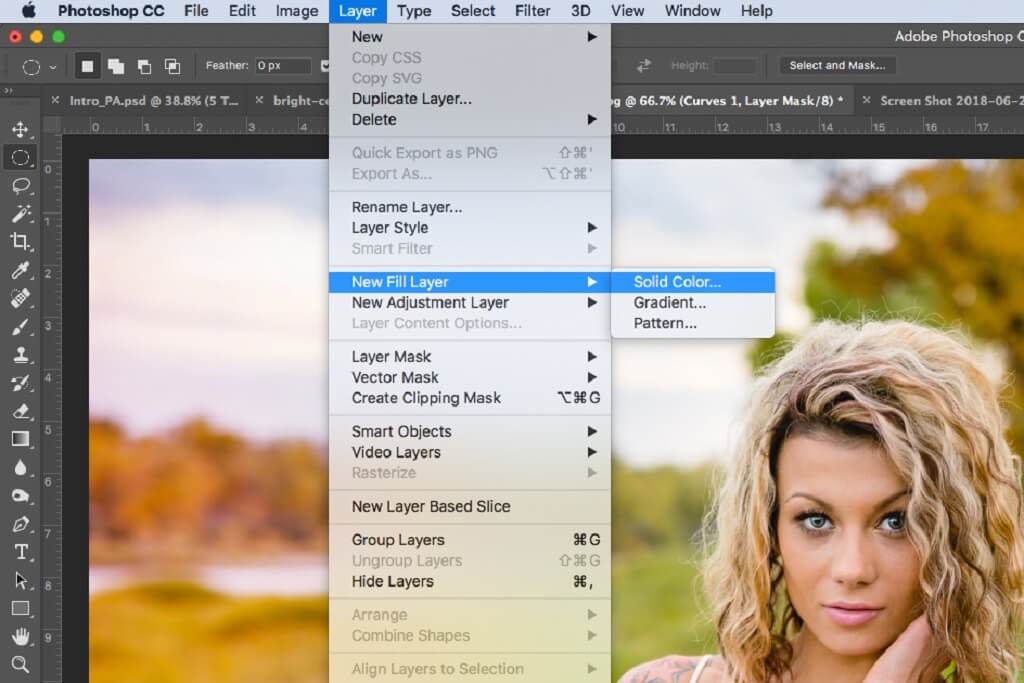
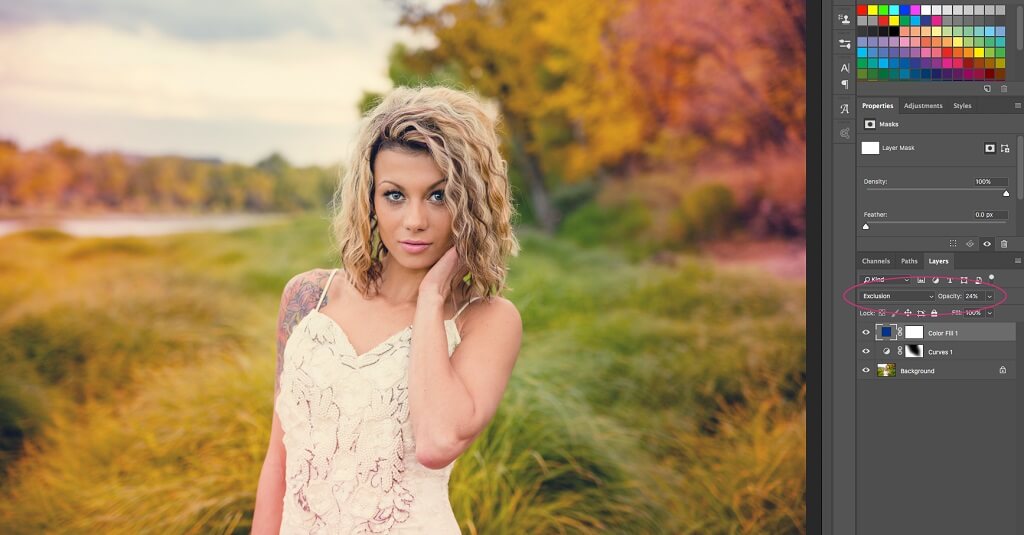
I like to use a blue fill, just kind of like a dark blue and select okay. Next, change your blending mode up here, to exclusion and then reduce the opacity.
As you can see, it unifies the color palette by adding the fill layer. This is the image with and without the fill. Adding a fill layer will give it more of that film look that we want.
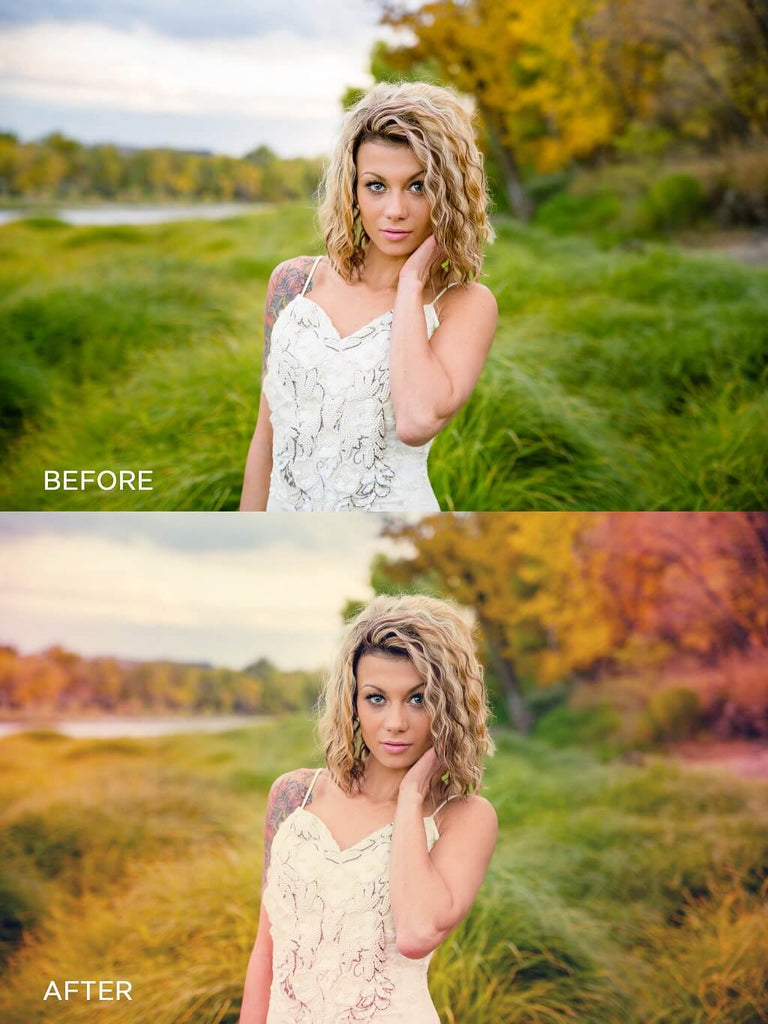
Here is the image before and after painting on our Light Leak effect.
The second method is to apply a light leak overlay to your image.
Another method you can use to add a light leak in Photoshop is to apply a light leak texture overlay - you can find these in many places on the internet. If you have the time, you can also just create your own.
To start, you are going to drag and drop your light leak onto your photo. Then you can select your Move tool and resize the light leak image to be the same size as your main image. You CAN just do a small corner of your image - like just in the corner if you want.
For this image, I am going to resize the light leak to cover the entire image with the thought that I can use a layer mask to remove parts of the light leak as needed.

When you have your light leak where you want it, press enter.
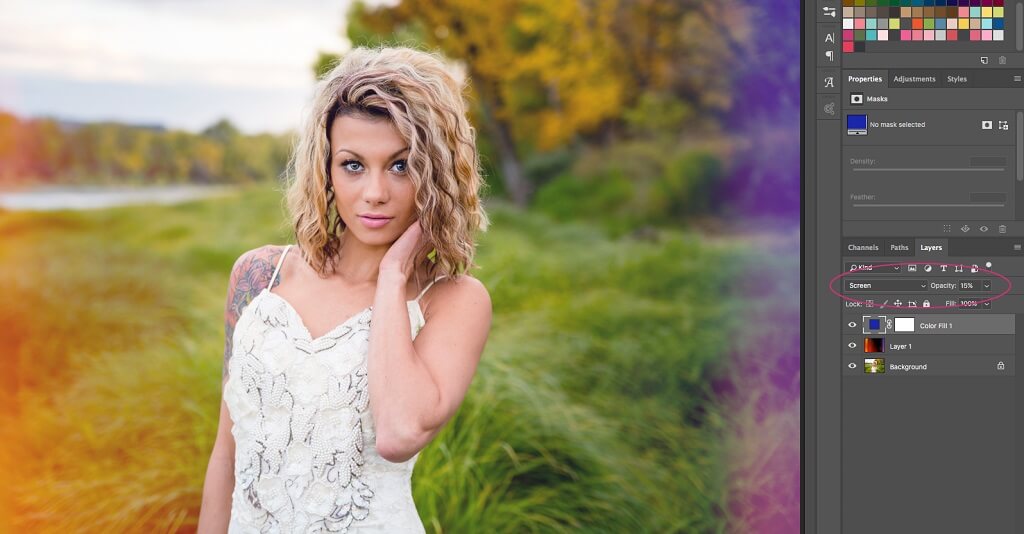
Changing the Blend Mode of this new layer will help you adjust the intensity of the light leak effect. Some of my favorite blend modes for this type of image are Lighten and Screen. Some others that also work well are Soft Light, Overlay, and Vivid Light. It will really depend on your photo and the light leak overlay you are using which overlay works best so play around with several of them.

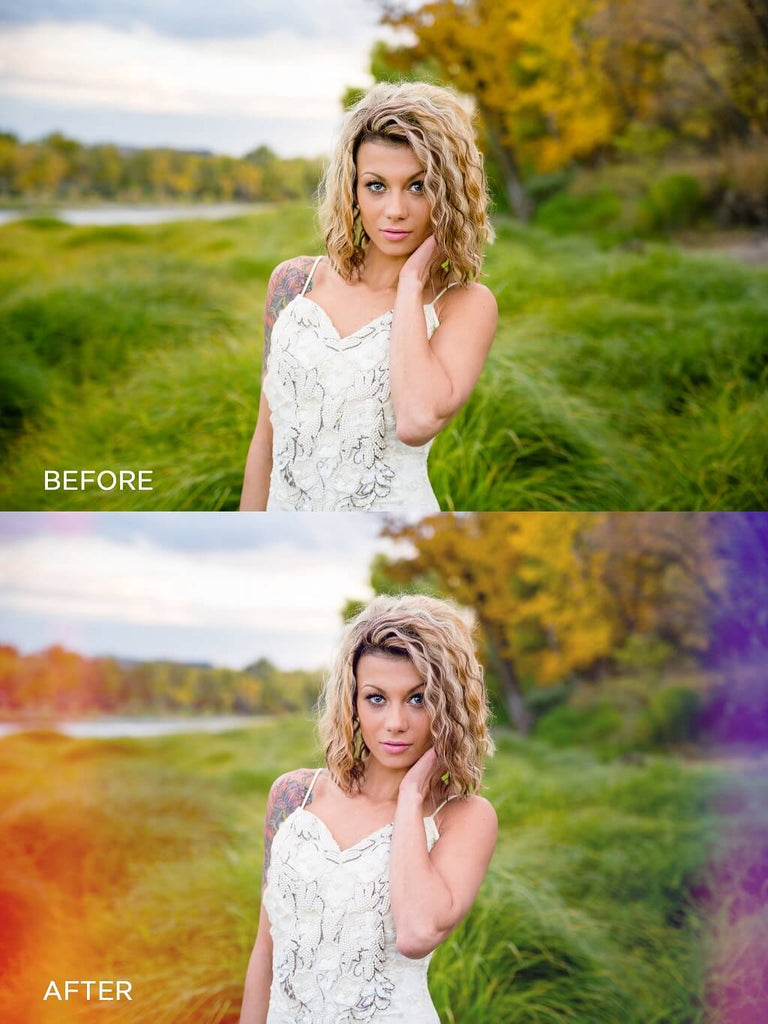
For this image, I used the Lighten blend mode. As always, you can adjust the opacity to make it not quite as strong, or you can leave it up all the way. For this image I lowered the opacity of the light leak layer to between 75-80%
If you want to, you can add a new fill layer like we did above. Go to layer>new fill layer>sold color. Let's do a lighter blue this time and instead of using the exclusion blending mode, let's try screen. It will give it that blue haze. Now, you can take the opacity down, so it will still retain some of the blue, but at the same time unifying the color palette again.
Here is the image before and after applying our Light Leak overlay.
These are two simple methods that you can use to apply light leaks to your photos, but just be sure to play around with the different blending modes and different opacities, because they will vary a great deal from photo to photo.
If you are more of a visual learner, here is a great video tutorial you can review that includes all of the light leak Photoshop editing steps discussed above.
Do you have any questions or comments about Creating a Light Leak in Photoshop? Leave us a comment below - we would LOVE to hear from you! And PLEASE SHARE our tutorial using the social sharing buttons (we really appreciate it)!


Anna Gay is a portrait photographer based in Athens, GA and the author of the dPS ebook The Art of Self-Portraiture. She also designs actions and textures for Photoshop. When she is not shooting or writing, she enjoys spending time with her husband, and their two cats, Elphie and Fat Cat.

Comments