- Lightroom Presets
- Mobile Presets
-
Photoshop
-
Learn
-
Support
-
Install
- Best Sellers
- Blog

This post is an introduction to editing RAW files in Adobe Camera Raw (often referred to as ACR), and assumes that you have a working knowledge of the difference between RAW and JPEG files.
If you don't know the difference between RAW and JPEG, please read this post first!

If you shoot in RAW, you will need to first convert your RAW files in order to edit them in Photoshop since RAW files are not directly editable there.
On its most basic level, ACR allows you to open and view your RAW files, make adjustments, and then save your RAW files as a TIFF, DNG, JPEG, etc.
After saving your image and then opening it as a TIFF (or whatever file type you choose to edit) you will then have the option to apply actions, overlays, and/or more advanced hand edits.
Photoshop CS and CC come with Adobe Camera Raw. If you have Photoshop Elements, you will need to download ACR separately in order to convert your RAW files. This tutorial is geared towards CC and CS users, but for PSE users, the steps will be similar, so you can still follow along.
If you are using Photoshop CC or CS and you want to open your RAW file in ACR:
At first glance ACR may seem extremely basic, especially when compared to Photoshop, but I guarantee you that ACR does not get nearly enough credit! You can make so many adjustments and quickly fine-tune your images in ACR, which will help you get even more out of things like actions and overlays.
If you are at all familiar with Adobe Lightroom, you will see that Lightroom and ACR share quite a few similarities and are nearly identical in many ways.
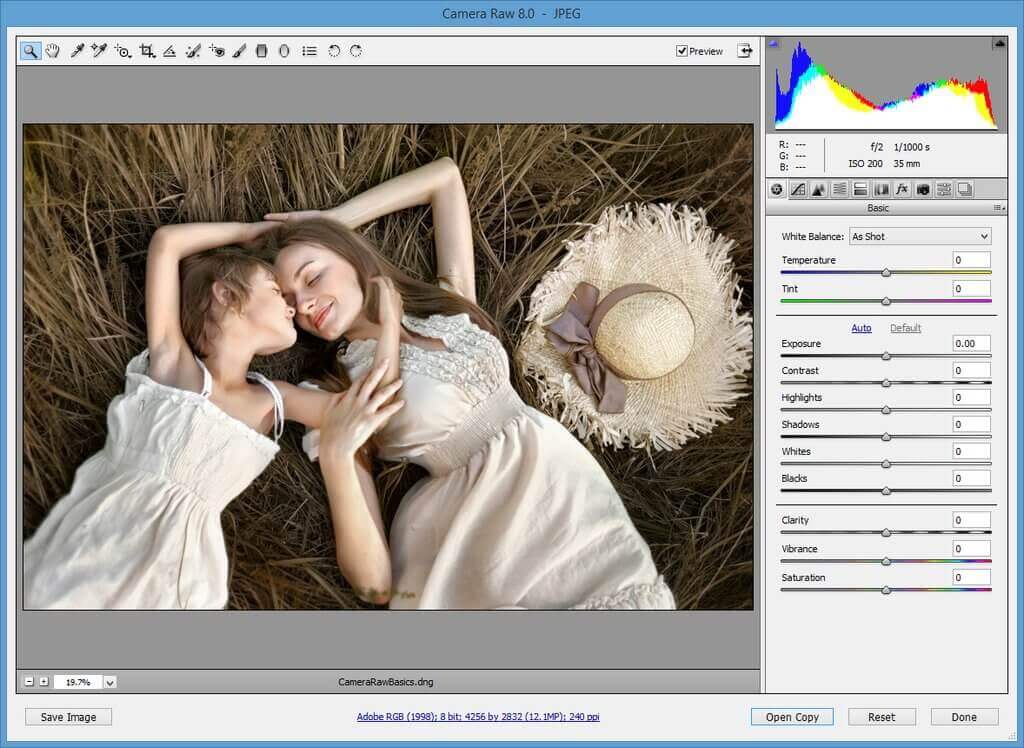
At the top of the Adobe Canera Raw screen, you will see a toolbar with some basic adjustment tools:
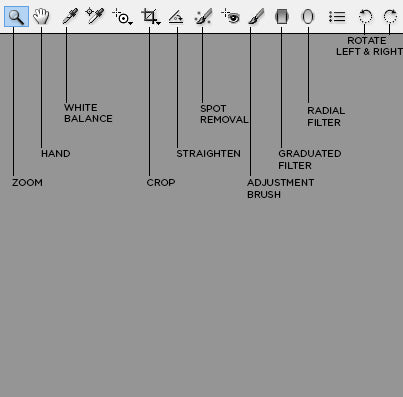
Here is a list of some of the most commonly used tools in this panel, along with their keyboard shortcuts:
Zoom Tool - Z: allows you to zoom in close on an image for editing details
Hand Tool - H: lets you move the image around on your screen using your mouse or track pad, rather than using the scroll bars
White Balance Tool - I: use the dropper to select a neutral gray to automatically set the white balance
Crop Tool - C: crops the entire image
Straighten Tool - A: for leveling your image
Spot Removal Tool - B: handy for removing sensor dust and minor blemishes
Adjustment Brush - K: allows you to create a brush to make local adjustments to exposure, contrast, saturation, etc.
Graduated Filter - G: creates a graduated, horizontal or vertical filter
Radial Filter - J: creates a round filter
Rotate Image 90 degrees left - L
Rotate Image 90 degrees right - R
In order to view your adjustments as you are making them, make sure the box beside Preview is checked:

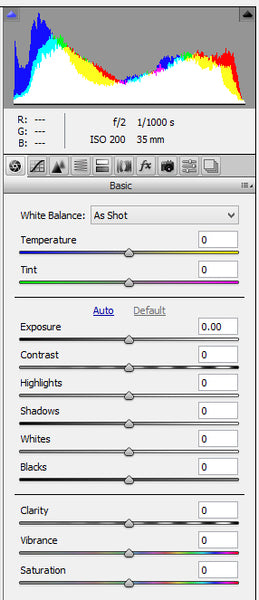
On the right side of the ACR screen, under the histogram, you will see the adjustments panel, with an icon/tab indicating each separate sub-panel. Here is a brief explanation of how you can use each of these sub-panels to edit your image:
Use this panel to adjust white balance and make other basic adjustments. For white balance, you can either adjust the white balance automatically, or you can move the temperature/tint sliders. You can also manually adjust exposure, contrast, highlights, shadows, etc in this panel:
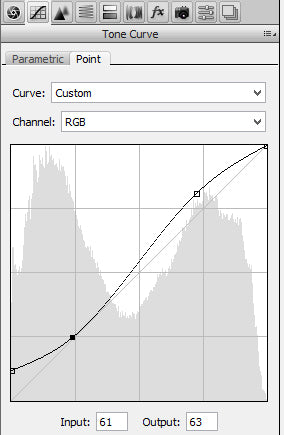
The tone curve panel allows you to manually and specifically adjust the overall tonal values of the image. Here I have applied an S-curve to bring up the contrast, as well as flatten out the blacks:
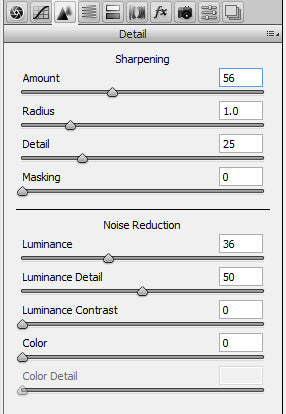
The detail panel allows you to sharpen your image, as well as reduce digital noise by adjusting the luminance:
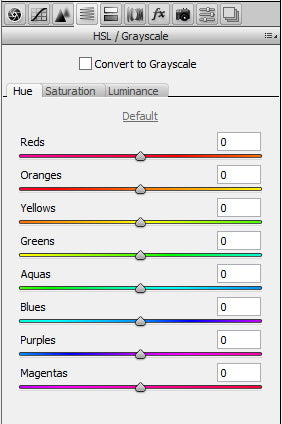
You can use the HSL (Hue/Saturation/Lightness)/Grayscale panel to adjust each color channel individually, or you can convert to Grayscale and adjust the channels for your black and white images:
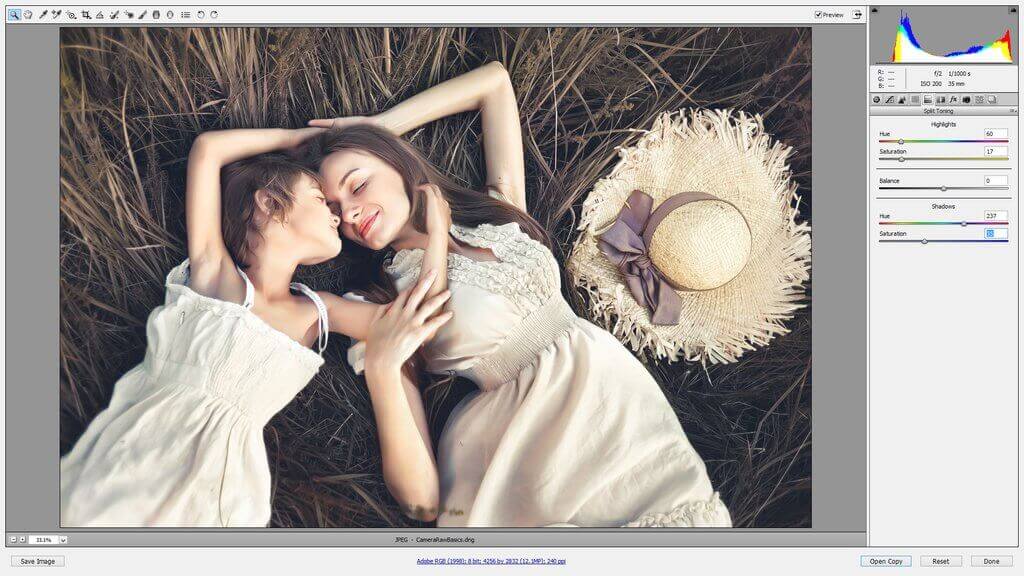
Split-Toning allows you to assign different color values to the highlights and shadows. For this image, I have applied a yellow hue to the highlights and a blue hue to the shadows:
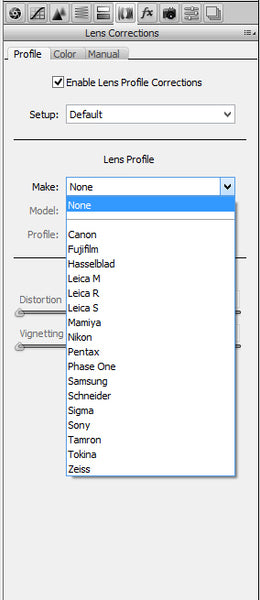
If you experience fall-off (heavy vignetting and shadows at the edges of your image) with your lens, you can correct this in the Lens Corrections panel. Simply select your lens manufacturer and the type of lens you are using, and ACR will correct the distortion. You can also fix chromatic abberation in this panel by clicking on and making adjustments in the color tab.
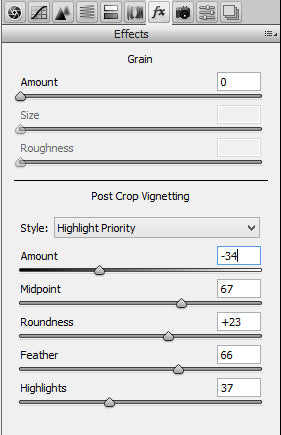
Use the effect panel to add grain to your image, or add a subtle vignette:
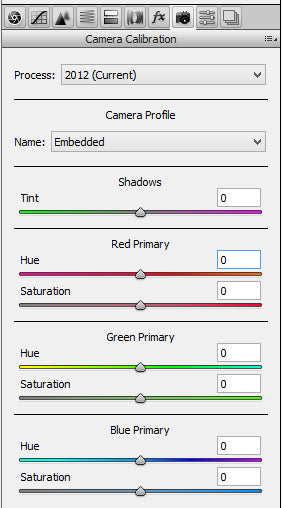
Similar to the Lens Corrections panel, the Camera Calibration panel allows you to adjust the colors in your image based on the type of camera you are using. You can also manually adjust the Shadows, Red, Green and Blue primary channels here.
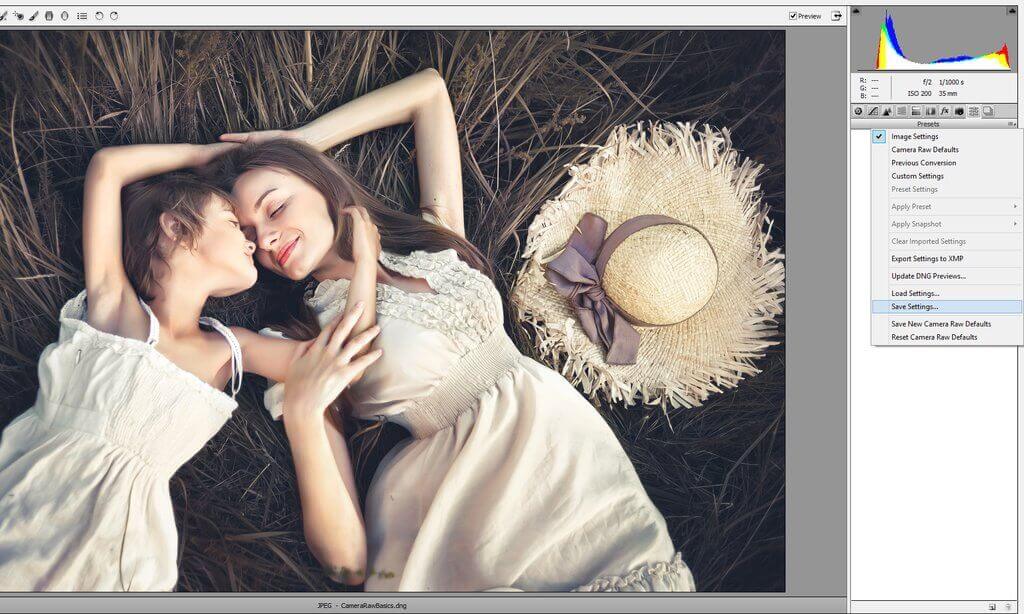
If you make a set of adjustments that you are happy with and would like to use them again later, you can do that here by selecting "Save Settings" and following the prompts to save the settings as an .xmp preset.
To apply the preset to an image, select "Load Settings", and choose the .xmp preset you just created.
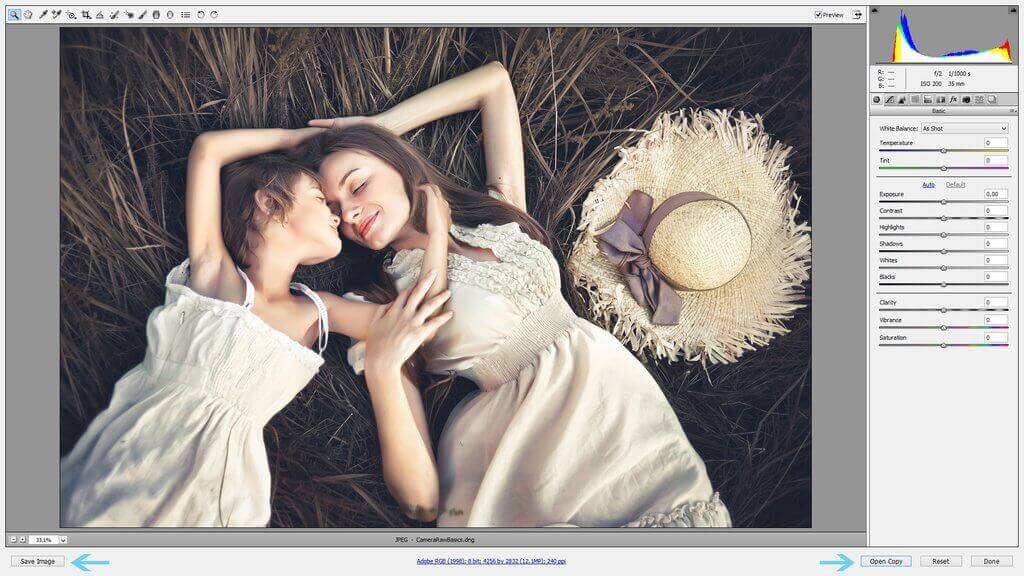
When you have applied all of the adjustments you wish to make in ACR, you can either save your image as a TIFF, JPEG, etc. (Save Image), or close ACR and open your image and edit in the Photoshop workspace (Open Copy).
By selecting Done, ACR will close and any adjustments you made will be saved, but your RAW file will not be converted.
Do you have any questions or comments about Using Adobe Camera RAW (ACR)? Leave us a comment below - we would LOVE to hear from you! And PLEASE SHARE our tutorial using the social sharing buttons (we really appreciate it!)


Comments