- Lightroom Presets
- Best Sellers
- Mobile Presets
-
Photoshop
-
Learn
-
Support
-
Install
- Blog

Have you ever had time to look back through old photos, or gotten some new editing tips or products and want to go back and re-edit some of your past work? As you’re scrolling through year by year, you start to wonder “what on earth was I thinking”? It can be quite funny to see what you chose “back then” and what you would do with the same image today.
Doing this myself has made me really question, what makes a photo “classic”? What is it about certain images that seem to be timeless? And, yet, others you can laugh out loud and name the exact year it was taken? Now, I don’t believe that every photo should be edited or shot using the same rules, but that being said I think there are some general guide lines we could use to achieve a look that can stand the test of time.
First lets take a look back on a few of the editing trends and pitfalls from past years. One of the first editing choices that came to mind for me, was one that I used to do, or should I say over-do!
Now I don’t mean a nice soft and subtle shadow at the edge of your photo to bring the attention to the lighter parts of your image, I mean a ridiculous nearly black or white ring around the sides of a photo! I am completely guilty of adding the over-dark vignette. This still makes me laugh to think about it. Not only did I use a black oval vignette, but I added texture and color to it as well.
Now I am certain we are all guilty of this one… especially in your first year of photography when trying to really get the hang of post processing and using Lr or Ps. You think to yourself “oh I just can’t decide between and B/W edit or a color edit” so you settle for both. It starts simple with a flower left in color, and eventually you start leaving eyes blazing blue and green peering out of monotone backgrounds. It’s a trap we can’t avoid, but thankfully we all seem to pull out of this phase alive, and move on to stunning, natural edits.
If a little smoothing is good, a lot of smoothing must be better! Right? No. All of our clients do not need to look like mannequins fresh from the factory. Now yes, luminance has it’s rightful place removing noise and grain from our photos, but a little bit goes a long way. This can be particularly tricky with newborns and babies. They can have very dry blotchy skin and can easily fall victim to the plastic allure of over smoothing.
This happens when we are gazing longingly at someones beautiful backlit, summer sun filled portrait and we are desperately trying to recreate that warm glow in our own lackluster shot. Only problem is, our photo was taken in the middle of winter in a dead field. So we crank up the saturation and the vibrancy and end up with the grass blindingly green, and the sun a fake red ball in the sky. Not to mention the other strange color changes to lips, eyes and clothing. Luckily we quickly learned the importance of shooting in RAW being able to change our white balance for a lovely natural warm glow.
Now that we have giggled over our past editing faux pas, lets get to what we can do to avoid looking back and regretting our post processing choices.
There is something very timeless about a nice black & white image. I do find the very standard version of black and white to be best. Try to stay away from the sepia or brown tones when trying to achieve a timeless look for a black and white image. Also, try to maintain good balance in the light and shadows, not a high contrast or overly shadowed version.
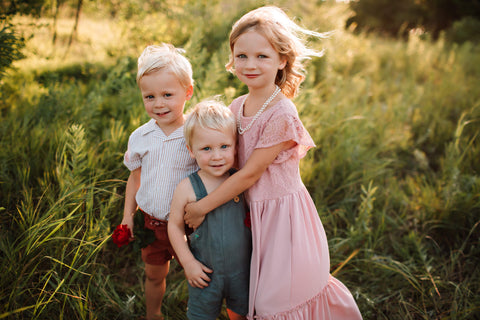
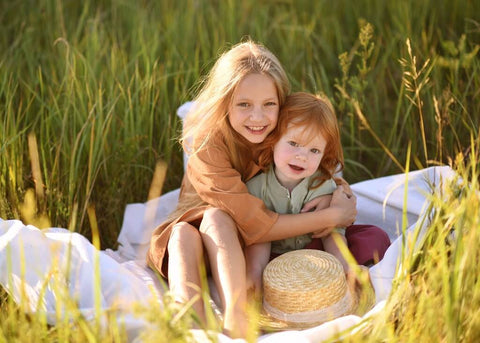
A clean color edit is my first choice when really trying to think ahead. More of an enhancement of what was naturally in the photo. Remove distractions and try to subtly bring out the best. Generally speaking, none of your sliders should be all the way right or left. Instead, they should be slightly to one side or the other of center. You want to slightly adjust settings for small changes, that make a big impact on the overall look of the image.
This has a lot to do with the overall feel and look of the photo. in fact, it can make or break an image. It is really important for you to guide your client into the right wardrobe choices. I always let my clients know not to wear clothes with writing, or characters on them. Hair is best left falling natural than pulled up into a tight hair style that can easily be dated.
I do want to add that photography is an art, and not all photos need to follow these rules, or any rules for that matter! But, you do need to be able to recognize what type of shoot you and your client are wanting, and be able to deliver images that fit the profile. If your client wants a stylized shoot, or a creative shoot, go for it! Your goal should always be to highlight the subject, not the editing.
Often when we go back and look at the older photos, the problem really was our edit, not the actual SOOC image. We can date the photo with the overuse of important editing tools, that used properly and in the right amounts can create stunning images that stand the test of time.
If you are really struggling with an image you have been looking at too long, just take a quick break and walk away. When you come back to the image really try to hone in on your first impression. It’s too dark, it’s too light, it looks fake, what area of the photo does your eye go to first? It just takes some practice to give yourself CC, that is when you can really begin get the editing “right”.
I have put together a little before and after collage from some of our very own contributing photographers from back when they were still learning the do’s and do not’s of editing. The before is our original edit from the past, and the after is the same SOOC image edited in a more timeless natural way that will suit the photo for years to come.


Comments