- Lightroom Presets
- Best Sellers
- Mobile Presets
-
Photoshop
-
Learn
-
Support
-
Install
- Blog
By Gayle Vehar on | No Comments

I love a good black and white photo! And the last couple of months I have been in a black and white mood. Nice black and white photographs are fun and easy to make in Lightroom.
I'll share with you how I change an image to black and white in Lightroom, tweak it just the way I want it, and then I'll share with you my FAVORITE black and white Pretty Presets that do the job in just one click!
First, before I even begin, I create a snapshot of any previous edits I have done OR create a new virtual copy of the image that I want to turn black and white. Creating a virtual copy doesn't actually COPY the photo on your hard drive. It just tells Lightroom that you have more than one set of edits that you want to apply to this photo.
In Lightroom it is treated as a separate photo. To make a virtual copy, right-click on the photo and select "Create Virtual Copy" from the pop-up of choices.
The easiest way to start this change is to just click on "Black & White" at the top of the Basic Panel.
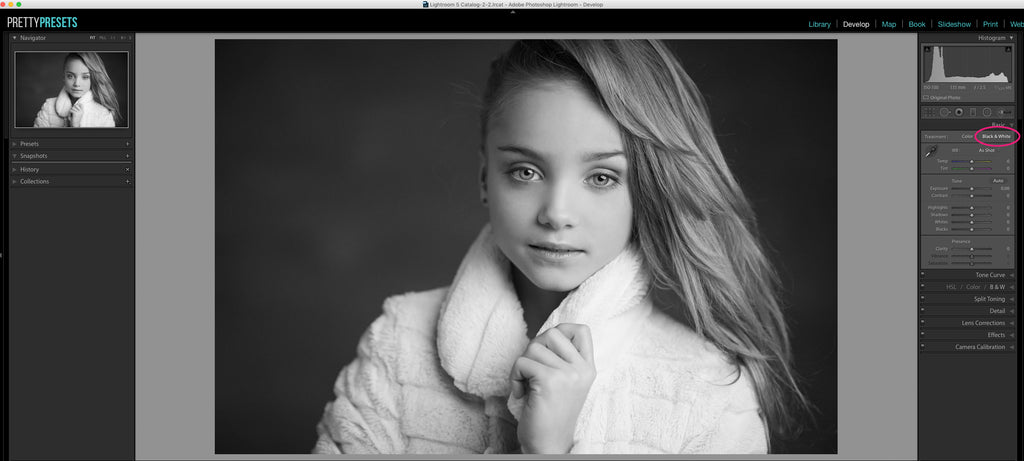
Generally, images will look a little flat when you first change them to black and white in Lightroom. My next steps are to help fix that.
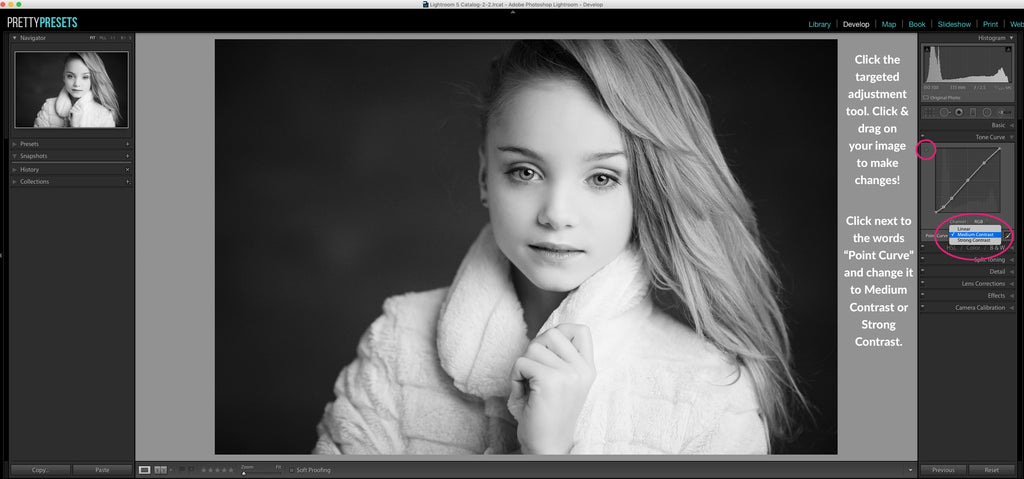
I generally start by going to the Tone Curve panel and clicking on the words "Medium Contrast" at the bottom of the panel. I change this to medium contrast or strong contrast and see if I like the change. Sometimes this is perfect and I stop here!
If that doesn't work or maybe I need even more contrast, then I select the Targeted Adjustment Tool. Once I have it selected, I click and drag on areas of my photo that I want either lighter or darker. To lighten the area, I click and drag upwards. To darken the area, I click and drag downwards.
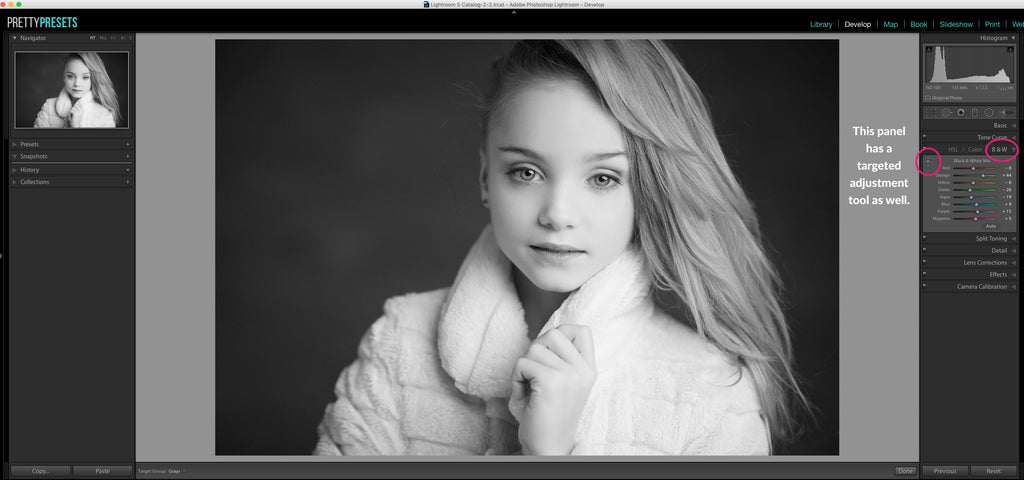
Sometimes I don't get the results that I want from using the Tone Curve Panel. That is when I try the HSL/Color/B&W Panel. Click on the B&W section. This panel has a Targeted Adjustment Tool just like the Tone Curve Panel and it works in much the same way. This panel uses the color information that was originally part of the photo. Lightroom keeps that information "under" the black and white that is now there.
Click on the Targeted Adjustment Tool and then click on an area of your photo that you want to be darker - click and drag downward to see the changes. Or click and drag upward on an area of your photo that you want to make lighter.
The color sliders will move as you do this. Keep in mind that it is using the color information under your B&W photo, so if you try to lighten your skin tones (oranges and reds) other parts of your photo that fall in those same color shades will lighten as well. The same goes with other colors and areas that you try to darken.
The wonderful thing about using presets to change your photos to black and white is that you can get gorgeous results with just one-click!! One-click edits are a huge time savings.
All these images below were one-click edits!
One of my favorite black and white presets is in the Dark and Moody Millennium Collection. Lava BW is a gorgeous, high-contrast black and white that add perfect contrast and depth!
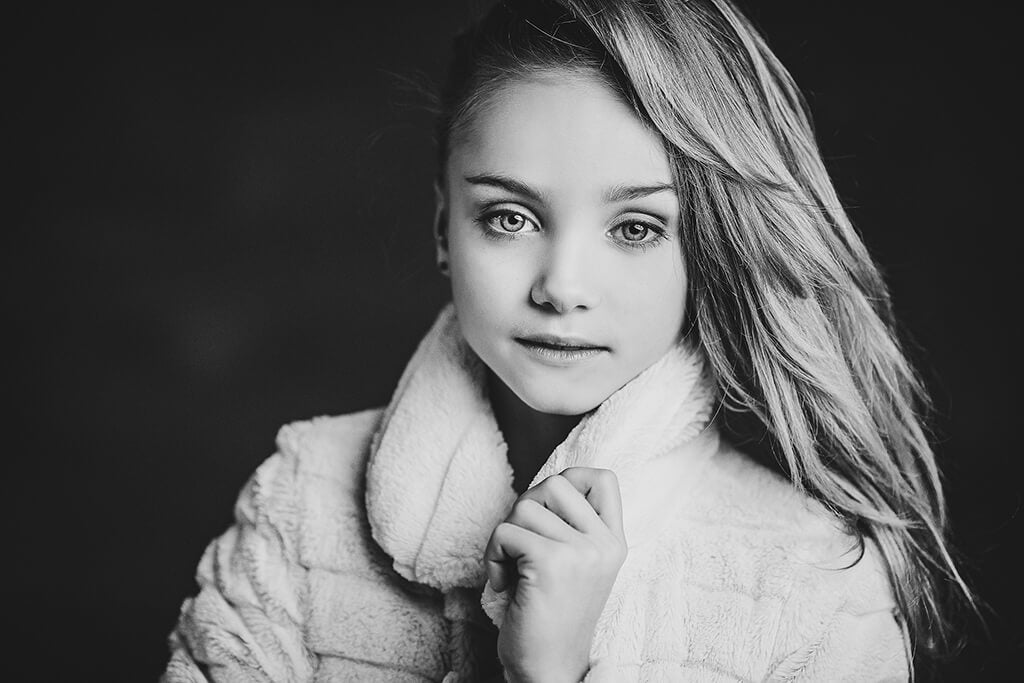
Another favorite black and white preset is in the Sugar and Spice Collection. With a gorgeous matte finish that looks wonderful on so many different images!

Black Thorn from the Enchanted Garden Collection, and has quickly become one of my go-to presets for black and white edits. With it's high contrast formula, clarity, and a touch of grain it gives images a lovely film-look!
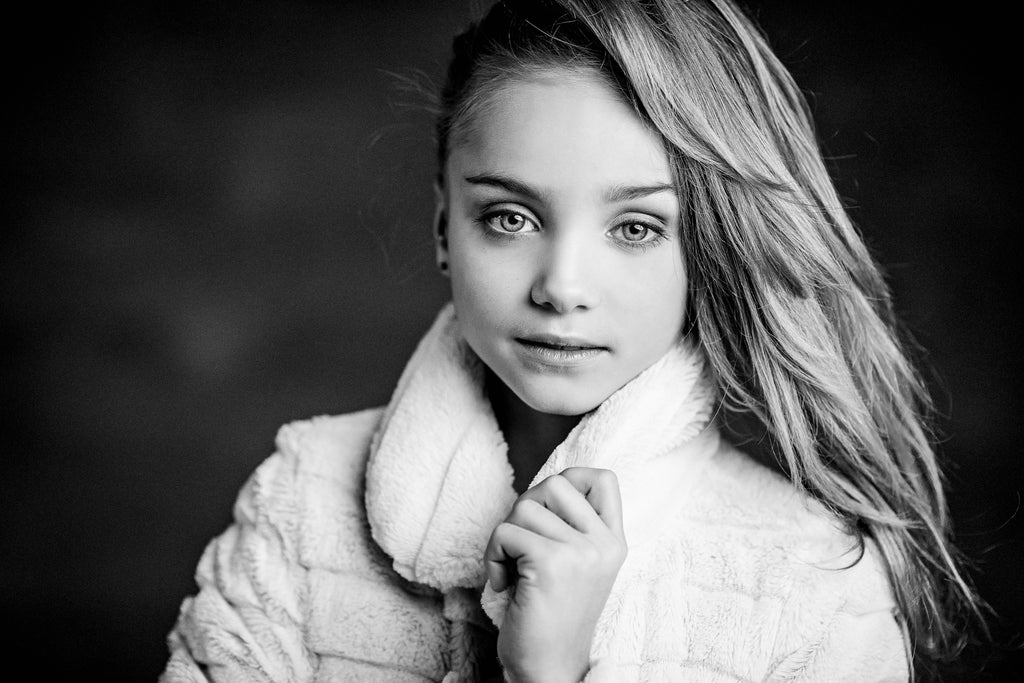
If endless possibilities are what you are after when editing black and whites, then the Film Noir Preset Collection is the perfect collection for you. As one of our film collections, it contains layerable presets to help you customize your black and white edit to your photo! Just simple choose one of the base presets to begin and then layer on other presets to get the perfect black and white to fit your style!


Do you have any questions or comments about Turning Your Photos to Black & White in Lightroom? Just leave us a comment below - we would love to hear from you! And PLEASE SHARE this post using the social sharing buttons (we really appreciate it)!


Hi!! I am Gayle. I am a wife to my handsome husband and mom to 4 beautiful kids. In my spare time, I am a photographer and blogger at Mom and Camera. I have a passion for sharing my love of photography with others. I teach local photography classes and regularly share photography tips and tricks on my blog. I hang out there a lot—I’d love you to stop by and visit!

Comments