- Lightroom Presets
- Best Sellers
- Mobile Presets
-
Photoshop
-
Learn
-
Support
-
Install
- Blog

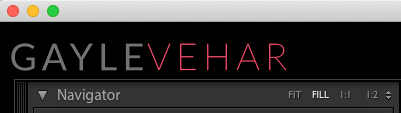
You may have seen people working in Lightroom that have switched out the typical Lightroom logo found in the upper left of the side of the screen for their VERY OWN logo or text.
Adding your own graphic logo or text is super easy to do and it is actually quite fun to see your own name or logo grace the corner of Lightroom.
To add your own logo or styled text in Lightroom to make it your own, just follow the steps below or watch the video at the bottom of this post - whichever is easier for you!

Personalizing Lightroom and making it your own is as simple as creating an identity plate. You may have created an identity plate before if you like to add your logo to photos that you export. This is the same process, but it will be used for to replace the graphic in upper corner of Lightroom instead.

First I will show you how to create a styled text identity plate and then I will show you how to create a graphical identity plate using a logo:
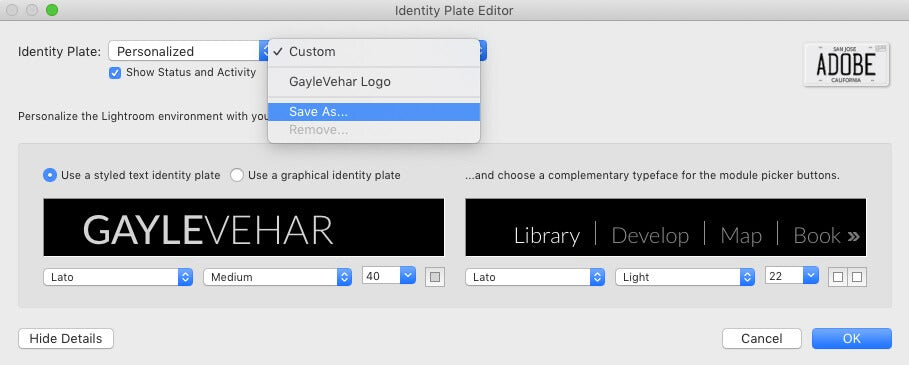
Open Lightroom. Choose Identity Plate Setup from the Lightroom Menu on a Mac or the Edit Menu on a PC.
In the box that opens, make sure that you have chosen “Personalized” from the drop-down menu next to Identity Plate.
Select “Use a Styled Text Identity Plate”.
In the black box below, type the text you want to have appear in Lightroom.
Customize the text by selecting your favorite font, changing the size, or adding a color. Hint: To change the color, you’ll need to know the RGB value of the color you want. That is easy to find in Photoshop by clicking on the foreground or background color swatches and playing to find your color. Then note the RGB values for later.
To save your Identity Plate, click the double arrow next to "Custom". Select "Save As" and give it a name that lets you know what you are using this for.
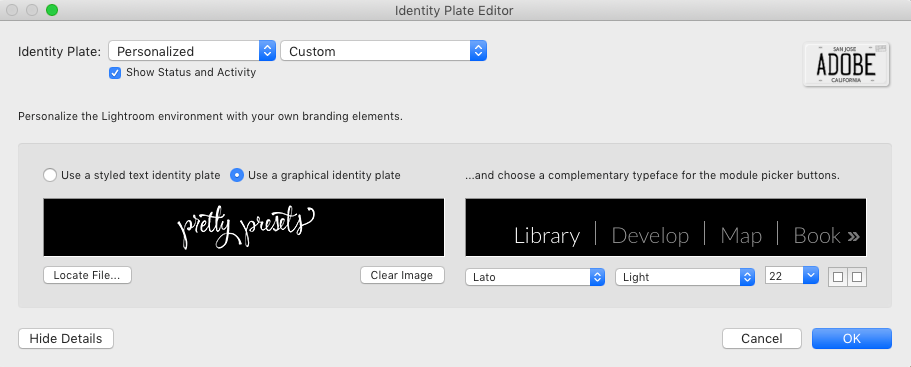
Open Lightroom. Choose Identity Plate Setup from the Lightroom Menu on a Mac or the Edit Menu on a PC.
In the box that opens, make sure that you have chosen “Personalized” from the drop-down menu next to Identity Plate.
Select “Use a graphical identity plate". Hint: In order to use this feature you will need to have your logo in PNG format on a transparent background. You may have received your logo in that form or you can save it that way in Lightroom.
Now, open your logo in Photoshop or Photoshop Elements and resize it to no more than 50 to 52 pixels high. The width does not matter. To do this in Photoshop, click on Image>Image Size. To do this in Photoshop Elements, click on Image>Resize>Image Size. Type 52 in the in the Height box and make sure you choose Pixels in the box to the right.
Choose SAVE AS from the File menu and give it a different name. I like to add Lightroom to the end so that I know this is the small logo that I use in Lightroom.
Move back over to Lightroom and click on “Locate File”. Now navigate to the file you just saved and select it. It should now appear in the black box.
To save your Identity Plate, click the double arrow next to "Custom". Select Save As and give it a name that lets you know what you are using this for.
If you are more of a visual learner, just watch our easy to follow video tutorial below.
Using an Identity Plate to personalize Lightroom is a fun opportunity to make Lightroom look like its your very own!
Do you have any questions or comments about Personalizing Lightroom Using an Identity Plate? Leave us a comment below - we would LOVE to hear from you! And PLEASE SHARE this post using the social sharing buttons (we really appreciate it)!


Comments