- Lightroom Presets
- Best Sellers
- Mobile Presets
-
Photoshop
-
Learn
-
Support
-
Install
- Blog

As a photographer, Photoshop has always been one of the most powerful tools in my creative workflow. Over the years, it has helped me transform ordinary images into polished, scroll-stopping final pieces. With the introduction of Photoshop’s new Generative Fill, Generative Remove, and other AI-powered editing tools, creators can now replace backgrounds, enhance skies, and build cinematic edits faster than ever before.
In this tutorial, I’ll walk you step-by-step through a complete transformation using Photoshop’s latest AI features. We’ll take a simple, unedited photo and turn it into a dramatic, artistic final image — all using Photoshop Generative Fill, the Remove Tool, precise masking, and a bit of color grading.

Photoshop’s Generative Fill is an AI-powered tool that lets you add, remove, or completely replace elements in your image simply by typing a text prompt. It uses Adobe’s Firefly AI model to generate new background details, sky replacements, objects, textures, or environmental changes that blend seamlessly with your original photo.
With Generative Fill, you can:
For photographers and digital artists, Generative Fill dramatically accelerates the compositing process—what used to take hours can now be completed in seconds.
Photoshop’s Generative Fill and Remove tools represent one of the biggest workflow leaps in modern editing. What used to take hours of masking, cloning, blending, and manual retouching can now be done in seconds with far more accuracy. For photographers, this means faster turnaround times, cleaner composites, and more creative freedom on every project.
Whether you're replacing a dull sky, expanding your canvas for social formats, removing distractions, or building full cinematic environments, these AI-powered tools help you focus less on technical hurdles and more on your artistic vision. In short, Generative Fill allows you to work smarter, not harder — and produce professional-quality edits with dramatically less effort.
Here's the original photo, taken this past summer, of a gorgeous, heavily modified Lamborghini Huracan Performante. The image was taken with a Sony ZV-E10 camera.
It's a great subject, but not yet Instagram-worthy. Let's fix that.

Original unedited image before applying Photoshop Generative Fill and AI editing tools.
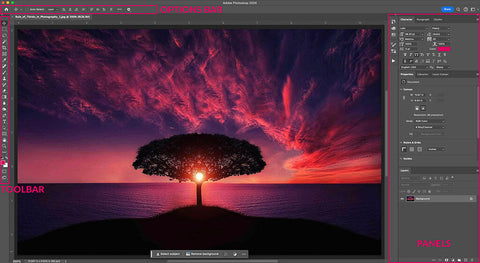
Open Photoshop (I'm using the desktop version) and import your image. The interface may look slightly different on mobile, but the tools are mostly the same.
The next step was to create a new layer and extend the canvas to a 5:7 aspect ratio, leaving space at the top and bottom for some creative elements.

Starting the edit by opening the photo in Photoshop before using Generative Fill.
Our first goal is to cleanly isolate the car by creating a precise mask around it and a portion of the ground beneath.
For this, we'll use the Selection Brush Tool.
Here's how to find it:
Look at the left toolbar.
Find the third icon from the top.
Right-click and select Selection Brush Tool.

Once selected, you'll see brush settings appear at the top of your screen. For this project:
Start with a small brush to outline the car. Then switch to a larger brush to fill in the entire vehicle and some of the ground. Masking a bit of the ground helps the AI blend the new background more realistically.

Using Photoshop’s Selection Brush Tool to mask the car for AI background replacement.
When you're done, your subject mask should look clean and solid.

Final Photoshop mask prepared for Generative Fill sky replacement and compositing.
The grey contextual task bar will appear near your selection-this is where the magic begins.
Click Remove to remove the background automatically.

Zoom in. If you notice rough or jagged edges around your subject, select the Spot Healing Brush Tool, and gently brush along the edges to smooth them.
PRO TIP: Don't skip this step since this is what helps your final composite look far more realistic.

Photoshop Remove Tool isolating the car on a transparent background.
Now it's time to build a new environment around the car.
Use the Magic Wand Tool to quickly select the empty background area. This tool is perfect for large, uniform sections. To access the Magic Wand Tool, right-click on the fourth tool from the top on the left-hand side and choose Magic Wand Tool.

Once you have everything selected, click Generative Fill and type in a prompt. For this photo, I used the prompt: "long winding road through mountain landscape."

Click Generate, and Photoshop will create three variations. Choose your favorite-or generate more until you find one that fits your vision. I chose the third option because it complemented the car beautifully.

Photoshop Generative Fill created a mountain landscape behind the masked Lamborghini.
The sky from the previous generation looks plain, so let's enhance it.

You can use Generative Fill multiple times on a single image, so feel free to experiment with different moods!

Sky upgraded using Photoshop Generative Fill to add a dramatic sunset look.
To convey that the car is in motion, I also used Generative Fill on the ground. Repeat the same process used for the sky:
With the correct settings, the entire scene becomes dynamic and cinematic.

It's a massive transformation!

Motion effect added to the ground using Photoshop AI and Generative Fill.
With the major compositing done, it's time for one of the most impactful steps: color grading.
Color dictates the mood of an image: warm or cool, bright or dark, high-contrast or soft. Photoshop gives you complete control.
On the right side of your screen, click the Adjustments tab. This area is the color-grading powerhouse of Photoshop.
For this image, I chose a preset from the Photo Repair section: "Strong Contrast."

Applying Photoshop color grading adjustments to finalize the tone of the composite.
Every image will react differently to each preset, so feel free to experiment until the colors match your vision.
Generative Fill gives you total freedom to add artistic elements. In my case, I added a hot-air balloon to the background. There was no deep meaning behind this addition, just something fun to elevate the composition.
Little touches like this can make your final piece feel more alive.

Generative Fill adds a hot-air balloon to enhance the final cinematic look.
Here's the image we started with:
And here's the final edited image:
All of this-from background replacement to sky design to color grading-was done in just a few steps using Photoshop's powerful AI tools.
Completed Photoshop composite using Generative Fill, Remove Tool, and color grading.
Photoshop’s Generative Fill and Remove tools represent a major shift in how photographers and creators approach editing. Instead of spending hours manually masking, blending, or rebuilding scenes, you can now shape an entire environment with just a few prompts and precise selections. It’s not about replacing creativity — it’s about giving yourself more room to explore it.
What makes these AI tools so powerful is their flexibility. You can enhance a sky, extend your canvas for social media crops, build cinematic backgrounds, or add artistic elements that elevate your composition beyond what the camera captured. Whether you’re editing cars, portraits, landscapes, or styled shoots, Generative Fill opens the door to faster, more intuitive, and more imaginative photo editing.
And the best part? You’ve only scratched the surface. The more you experiment with Photoshop’s AI features, the more confident and creative you’ll become. So take what you learned here, open one of your favorite images, and see how far you can push the transformation!
Do you have any questions or comments about Using Photoshop's Generative Fill? Just leave us a comment below - we would LOVE to hear from you. And PLEASE SHARE this post using the social sharing buttons (we really appreciate it)!


Comments