- Lightroom Presets
- Mobile Presets
-
Photoshop
-
Learn
-
Support
-
Install
- Best Sellers
- Blog

When venturing into photography, there are many who say that the job of the photographer extends far beyond the realm of capturing the perfect picture. The work of editing photos is equally important as scouting locations or outfitting models. Being able to manipulate an image is a powerful tool to actualizing your vision. Whether as a hobby or a profession, understanding the foundations of photo editing is necessary in order to freely make creative decisions.
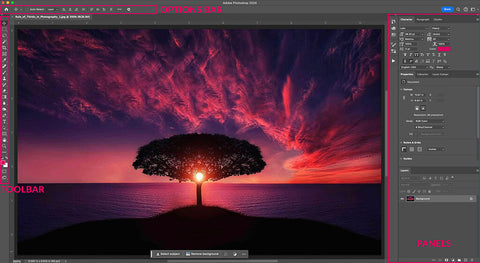
To begin, no one will argue that the role of a photographer takes dedication. It could be waiting for the exact moment of sunlight or having an eye to visualize people and places. What many do not know is what happens “behind the scenes”. Sometimes, the image simply needs a nudge in the right direction to make an impact. So here presented are some essential tips when editing in Photoshop.

The concept of contrast, in this case, is to juxtapose colors that will bring out their strengths. For example, darker colors look bolder next to lighter colors and vice versa. To demonstrate contrast, let us start with a seascape filled with sweeping blues that at the moment appear somewhat dull.

In the top tab bar, (Image > Adjustments > Levels) Photoshop has a Levels window that will allow the user to see the exact values of shadows and highlights. Just as well, the user can also find out how much Reds, Greens, and Blues that the image contains through channels. This function will be revisited later on.


By sliding the left dial in towards the right, the black values will become darker. Likewise, by sliding the right dial in towards the left the white values will become lighter. The trick is to move the dial at the start of the information indicated by the rise and fall on the Levels graph. That way, the image can focus on giving its colors more saturation. This will instantly give your image the needed contrast.

Although, that’s not the only method. Go to the top tab bar and select the Curves window (Image > Adjustments > Curves).

At first glance, Photoshop offers auto correcting contrast presets.

However, you may want to be able to control this function to a greater degree. Therefore, direct manipulation is a valid technique and can be done by adjusting the curve into a relative “S” shape. The points made will increase the amount of shadows and highlights effectively building up the contrast.


In addition, since this image is composed of varying shades of blues, access the Blue Channel by clicking on the Channel dropdown menu and slide the middle dial until the colors appear more vivid according to the user’s liking. This trick can add a magical quality to an image.

Working with complementary colors is a skill that many artists use. Whether it’s painting or photography, in theory complementary colors bring about the best of the opposite color on the color wheel. This can be controlled through the Curves panel as shown prior. Here is a photo of a subway staircase with relatively red and green values.

Instead of adding contrast, switch to the Red Channel. From there the user can increase the amount of red in the image. Most of the adjustments are done in the example are through experimentation and rely on what the photographer feels as the “right amount”. The most important tip is staying within the information as indicated from the graph. This will add greater amounts of the color pre-set on the channel.

Now switching to the Green Channel, which is the complementary color of red, increase the saturation next. Look at the difference of the image that utilizes complementary colors in comparison to the original photo.


The final tip for color enhancement is gradient mapping. What this means is that Photoshop will break down the colors in an image into monochrome. From there on, the user can add their choice of color to substitute giving the overall image a “filter” quality reminiscent of photo sharing apps. To start, here’s another image of a subway staircase.

This time open up the Gradient Map window (Layers > New Adjustment Layer > Gradient Map).

Click “OK” for the dialogue box.

Photoshop will now render the image into grayscale. There will be a bar that transitions from one color to another. This is called a gradient as it blends two or more colors into each other. Click on the bar and the Gradient Editor window will prompt.

There are presets of gradients to choose from and for demonstration purposes, the yellow to orange gradient is chosen.


Instantly, the grayscale has been replaced with yellows and oranges. However, this effect can be overwhelming. Close the Gradient Editor to access the Layers panel to the right of the image. Lower the opacity in order to soften the colors.

Immediately, the image has a vintage 70s vibe just from using gradients. But it doesn’t have to end there. Customizing any color combination is part of the creative process. In turn, gradient maps compliment any skin tone and can completely change the mood of the photograph.

In the end, there is no “right” way to edit. What matters most is knowing the basic Photoshop tools to utilize. This is so important, as it will help you become more confident with your creative decisions. Being able to stand by one’s art can only be done once the artist hones their craft.
I truly hope these small tips can give you some creative inspiration and help ignite your passion for photography.
1. 3 Best Ways to Enhance Color in Photoshop


Comments