- Lightroom Presets
- Mobile Presets
-
Photoshop
-
Learn
-
Support
-
Install
- Best Sellers
- Blog

There are many tools you can use to retouch skin in Photoshop. Two of my favorites are the Patch Tool and the Smart Blur Filter that will not only speed up your workflow, but also offer you more finely turned and natural skin retouching results.

While the Clone Stamp tool is a go-to favorite for skin retouching in Photoshop, its often overlooked but totally amazing Patch Stamp Tool that can really speed up your workflow, because it eliminates the Alt + Click action.
The Patch Tool operates in a similar way to the Clone Stamp, but there are a few differences, let me show you...
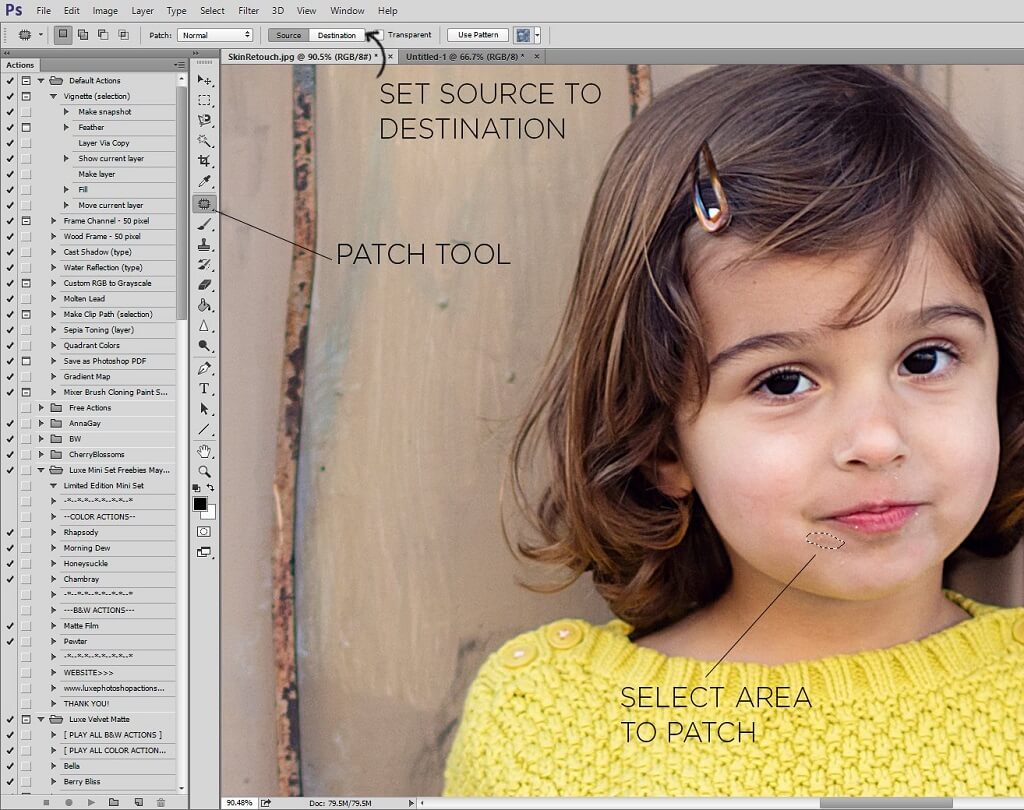
In the image below, you can see the Patch Tool in the toolbar (keyboard shortcut on Mac and PC: J). If its not showing up, right click in the same spot (the Healing Brush Tool could be showing by default) and scroll down to Patch Tool.
Then make sure that next to the word "Source", you select "Destination". I will explain why below.
Before you begin editing, create a Background Copy in your layers panel by duplicating the first layer.
Use your mouse to draw a selection in the area you would like to clean up:
Now take that area (the area you would like to touch up), and drag the selection to an area of your image with fewer imperfections.
Keep in mind the area needs to be similar in color and tone to the area of concern, so try not to drag the selection too far:
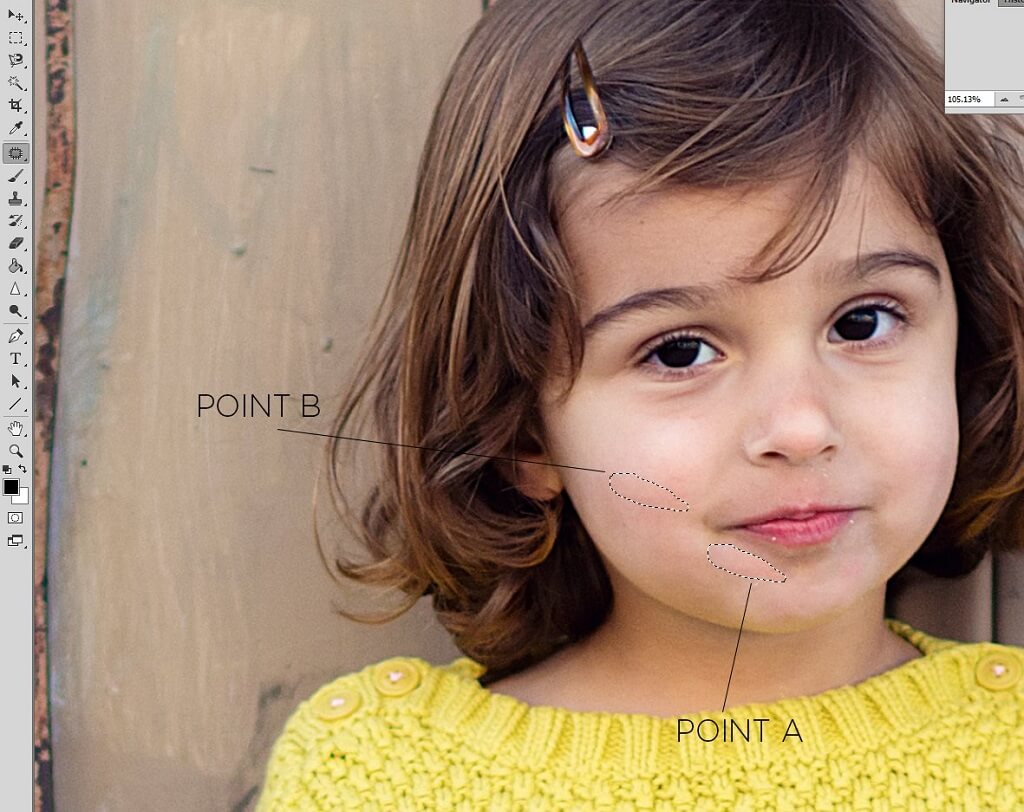
Dragging the selection from point A to point B will replace point A with what is in point B. Point B is our "Destination Source" that we selected earlier.
Wherever you drag your selection, it will be replaced with that area. In this case, the source destination is her cheek area where the skin is more clear.
I repeated the same steps on the entire mouth area. To patch another area, you will need to right-click and scroll to Deselect in order to draw a new selection.
Next, let's look at one way to use the Patch Tool around eye areas:
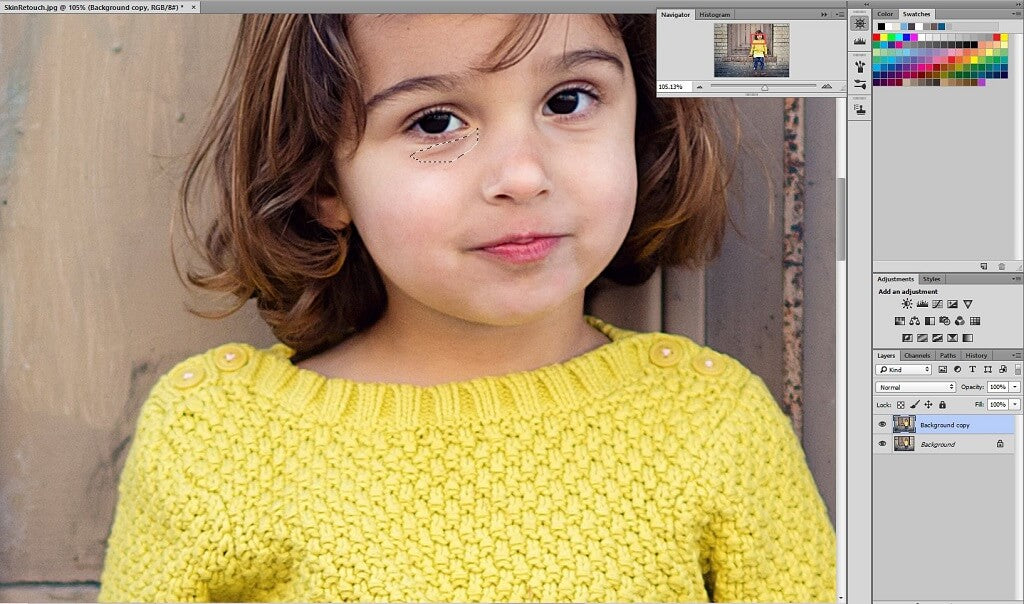
Everyone has SOME lines and shadows under their eyes that occur naturally from the shadows cast by their brow bone. In most cases, there is no need to completely erase those lines and shadows - it wouldn't look natural and it would also defy the laws of light! However, those areas can be softened just a bit.
Above, I have selected an area around an under eye line that I would like to soften. I will drag it to an area just a little bit further down below her eyes.
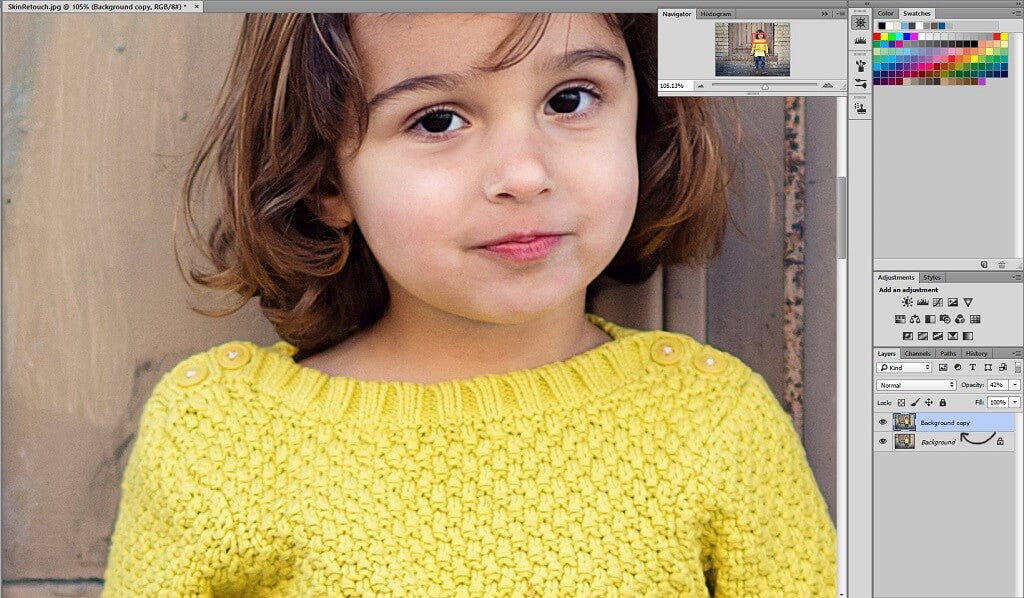
Then, I reduced the opacity of the background copy, which is the layer with this particular skin adjustment, in order to soften the effect so that we are still left with a more subtle line below her eye:
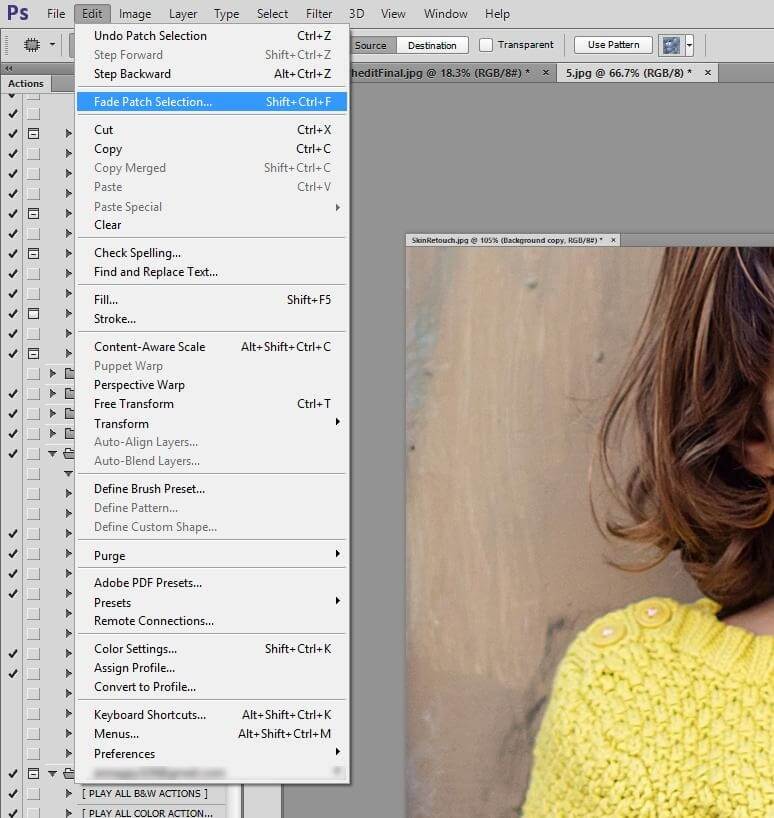
Another way to soften this effect is to Fade Patch Selection. You will need to do this before you deselect, though:
Photoshop has a variety of blur filters, but when it comes to skin retouching, the Smart Blur Filter is a bit more fine-tuned than some of the other filters (such as Gaussian blur) and can give you more natural and polished results.
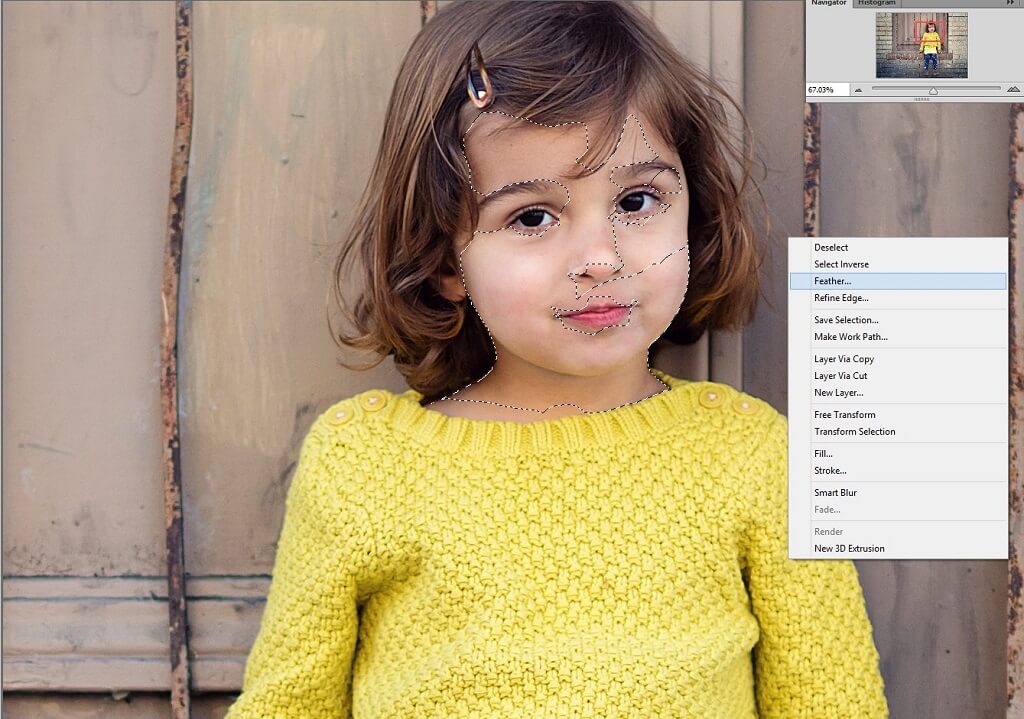
On a duplicated background layer, select the area to be blurred using either the Polygonal or Magnetic Lasso. In this case, I have selected everything on the subject's face and neck, making sure to leave out her eyes, mouth, and the base of her nose, since I do not want to blur those areas (those are areas I want to remain as sharp as possible).
Right click and select "Feather", which will prevent any obvious lines from occurring between the blurred and non-blurred areas of of the image:
Select Filter>Blur>Smart Blur:

Start with a low Radius and Threshold, and work your way up - as you can see here, both Radius and Threshold are set to a very low value (only 4.1 and 6.5 pixels, respectively). Use your preview image as a guide, and press OK when you are satisfied:

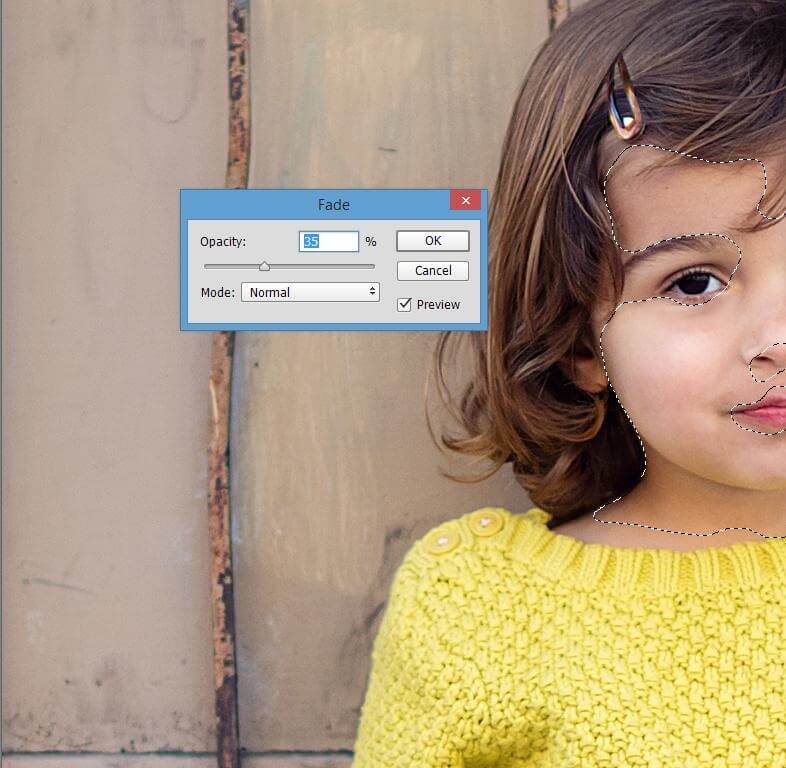
In the same way that we faded the Patch Stamp above, you can also fade the effect of the Smart Blur to soften this effect even further:
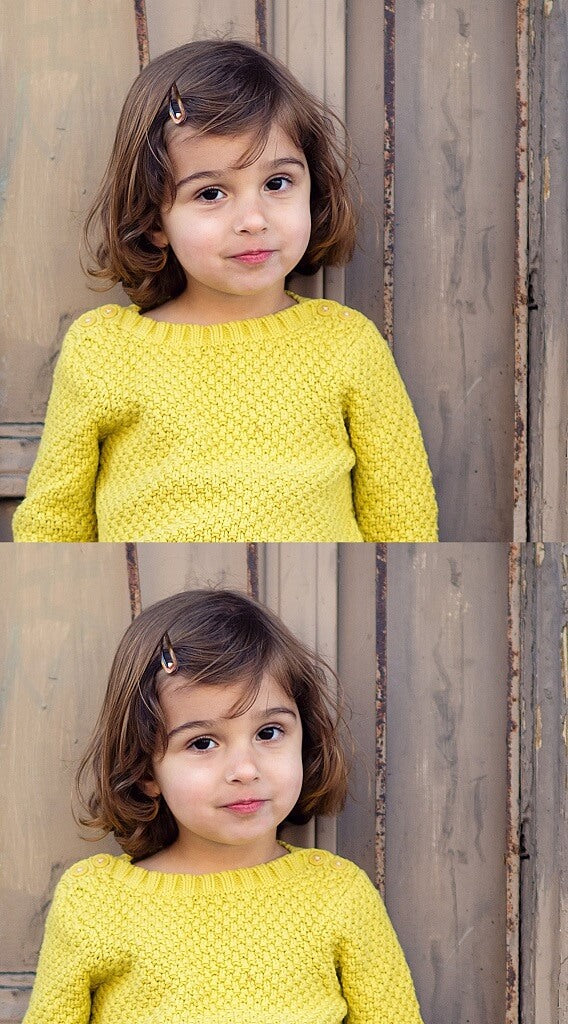
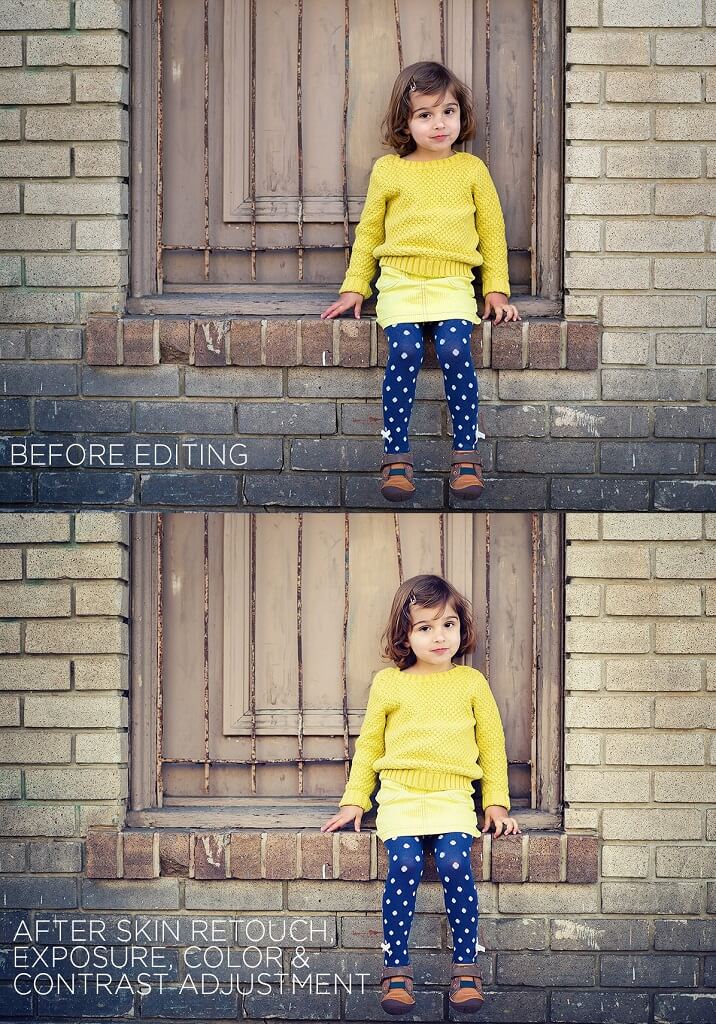
Below is a closeup of the before (top) and after (bottom) of our edit using the Patch Stamp Tool and Smart Blur Filter. As you can see, the effect is very subtle, which is generally the desired effect for most portraits, especially when editing children. The goal is natural, not over-processed.
Note: If you will be making adjustments to exposure, color and contrast, be sure to make adjustments to skin first. By making skin adjustments first and then applying the rest of your post-processing work, the skin adjustments will become even more blended into the final image!
If you want to automate the skin retouching process and speed up your workflow even more, check out the powerful skin retouching and frequency separation actions included in the Pretty Actions Retouch & Makeup Collection!
With one click and a little brushing you can smooth skin that looks beautiful and natural. This amazing collection can easily automate all your retouching needs and leave your images perfectly polished!
Do you have any questions or comments about using the Photoshop Patch Tool or Smart Blur Filter? Leave us a comment below - we would love to hear from you! And PLEASE SHARE our tutorial using the social sharing buttons (we really appreciate it)!


Comments