- Lightroom Presets
- Mobile Presets
-
Photoshop
-
Learn
-
Support
-
Install
- Best Sellers
- Blog

With the Holidays quickly approaching, many of us are making our lists for gift-giving. A really sentimental and unique gift for your family members is restoring and printing old family photos! Whether you give them to your children, parents or grandparents, they are wonderful way of preserving your family’s history.
In this tutorial, I will show you how to restore photos in Lightroom & Photoshop. If you use Photoshop and are looking for additional restoration examples you can review this old photo restoration post here.
Restoring a photo is much like editing a digital photo in that you will need to adjust the white balance, exposure, and remove any dust or dirt that has accumulated on the photo over time.
Each photo that you restore will be unique and require certain steps to clean it up, so these are just a few tips to help you get started. You’ll need to experiment just as you would with editing a digital photo!
Now, if you do not own a scanner, you can easily have your photos scanned elsewhere, since most photo labs have scanners where you can have your photos scanned to disks. When scanning older photos, scan them at the highest possible resolution to ensure that you can print a high quality image once you are done editing.
Let’s get started!

As you can see, this photo has faded, and a lot of the detail has been lost. It also has a lot of dirt and dust in the top part of the frame, and on the face of the woman on the far right.

Create a Levels Adjustment Layer by selecting Layer, New Adjustment Layer, Levels. At this point, you can either adjust the levels manually, or you can select Auto, which usually does a good job of recovering the shadows, midtones and highlights.
When I ran Auto Levels on this photo, it also converted it to straight black and white, which is fine, but I really like the sepia tint to this photo. To recover the sepia tones, select Layer, New Adjustment Layer, Hue/Saturation. Make sure that Colorize is checked, then select a sepia hue (53 is really close) and reduce the Saturation until the colors are more muted.

As you can see here, there is a lot of grit on the photo! Instead of trying to clone out all of it and lose the lovely texture of the original photo paper, we our going to use our Patch Tool, pictured here:
![]()
Once you have selected the Patch Tool, check your top tool bar on make sure that Source is checked next to the word Patch. Now, left-click and hold down as you circle the small spots that you want to remove, and drag the spots into an area of the photo that has similar tones, but a cleaner background. This is similar to your Clone Stamp, but much less destructive. Repeat these steps until your photo is clean, but don’t worry if you still have a little bit of noise in the photo. Part of the beauty of old photos is that they were printed on textured paper, so leaving some of the texture in your edit will lend an antique quality to your photo, even after you print it.

As you can see, we recovered the shadows and midtones, and cleaned up some of the spots on the photo, but it still retains that old-timey quality!
For our next example, let’s use Lightroom, and look mainly at adjusting color and reducing noise.

A lot of color photos tend to fade to red over time, which can easily be adjusted in Lightroom.
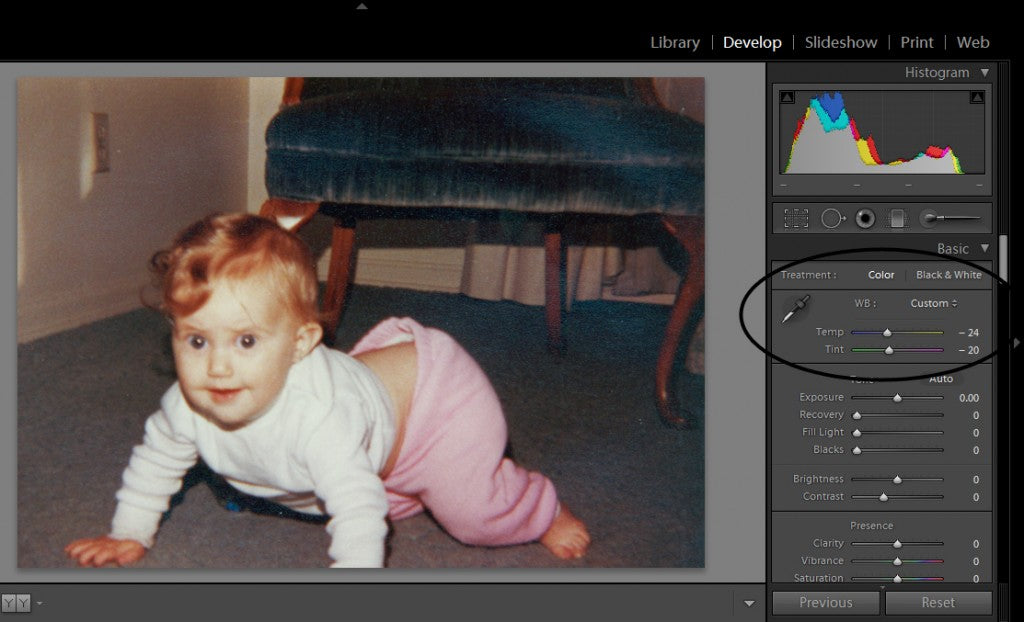
You can either use the White Balance Selector (dropper tool) to find your Target Neutral to adjust the white balance, or you can move the sliders manually. I moved the Temp more towards blue, and the Tint towards green, both of which will remove the reds and purples from the photo.
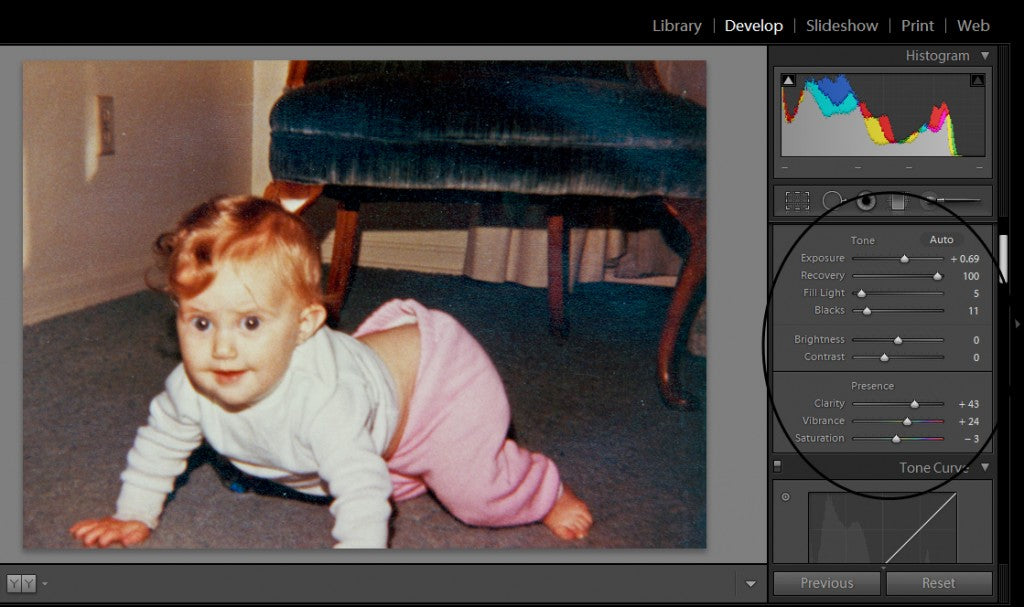
Since this photo was obviously taken indoors with a flash, we need to adjust the Exposure, Recovery, Fill Light and Blacks. The adjustments on each of these will vary from photo to photo, so play around with the sliders until you find what works best for your photo. Also, the photo has faded some, so I adjusted the Clarity, Vibrance and Saturation to liven things up a bit.

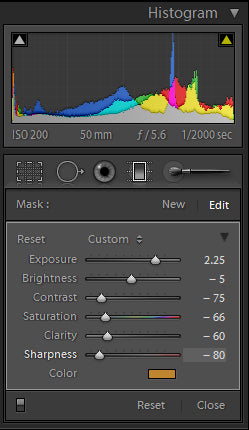
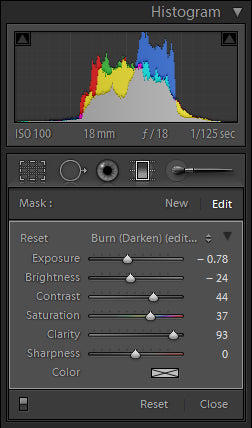
This photo has a lot of dust and noise on it, especially around the chair, and a lot probably can’t be removed without destroying the look of the photo or making it look too edited. However, we can remove some of the bigger spots by selecting the Spot Removal tool which is the second icon from the left just below your Histogram – the circle with the arrow on the side of it.
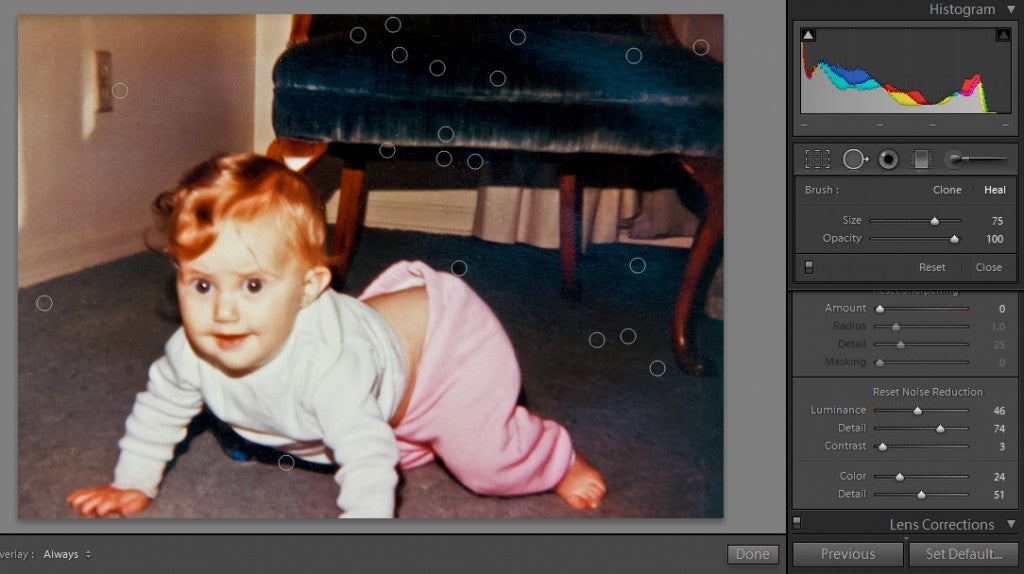
You can adjust the size and opacity of your brush depend on how large of an area you need to cover, but since these were tiny dots, I just set my brush the 75, and left the opacity at 100, with Heal selected instead of Clone.
Just remember to edit an older photo similar to how you would edit a digital photo. Be sure to check the white balance, exposure, saturation, and remove and noise/dirt. You can also get creative and at your Lightroom presets or Photoshop actions after you have cleaned up your photos - the choice is yours, so have fun!


Comments