- Lightroom Presets
- Mobile Presets
-
Photoshop
-
Learn
-
Support
-
Install
- Best Sellers
- Blog

When shooting in RAW, you may find that your images tend to look sharp in the LCD preview on your camera, but soft when you bring them in to Lightroom.
This is because your camera's software is generating a JPEG preview, since RAW images are not viewable, and need to be converted to a viewable file format.
In order to replicate what you saw on your camera's LCD screen, you will need to apply a bit of sharpening in Lightroom.
**NOTE: You can’t make an out-of-focus image instantly sharp in Lightroom. Sharpening a blurry photo in Lightroom will do nothing except for sharpen the blurry pixels. This isn’t a fix for a badly out-of-focus image.**

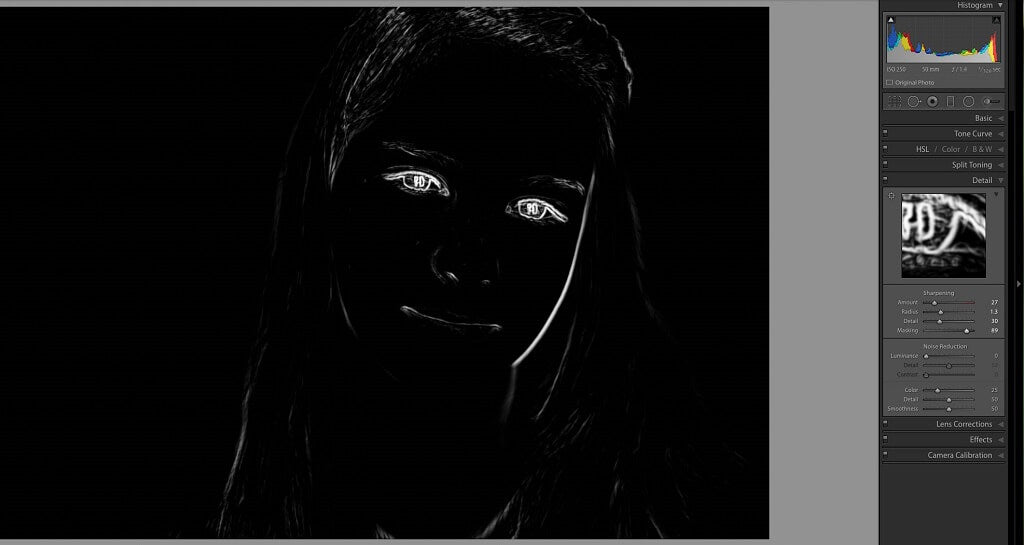
As you begin to move each slider in the Detail panel, hold down the ALT/OPTION key while adjusting each. As you do this you will see the image in black and white or shades of gray. Since sharpening is difficult to see, using the ALT/OPTION key will help you to see what is actually happening. The view that opens while the ALT key is pressed will also help you to focus on exactly what NEEDS to be sharpened.
Sharpening in Lightroom is done in the Detail Panel which is found on the right-side of the Develop Module and is bundled with Noise Reduction.
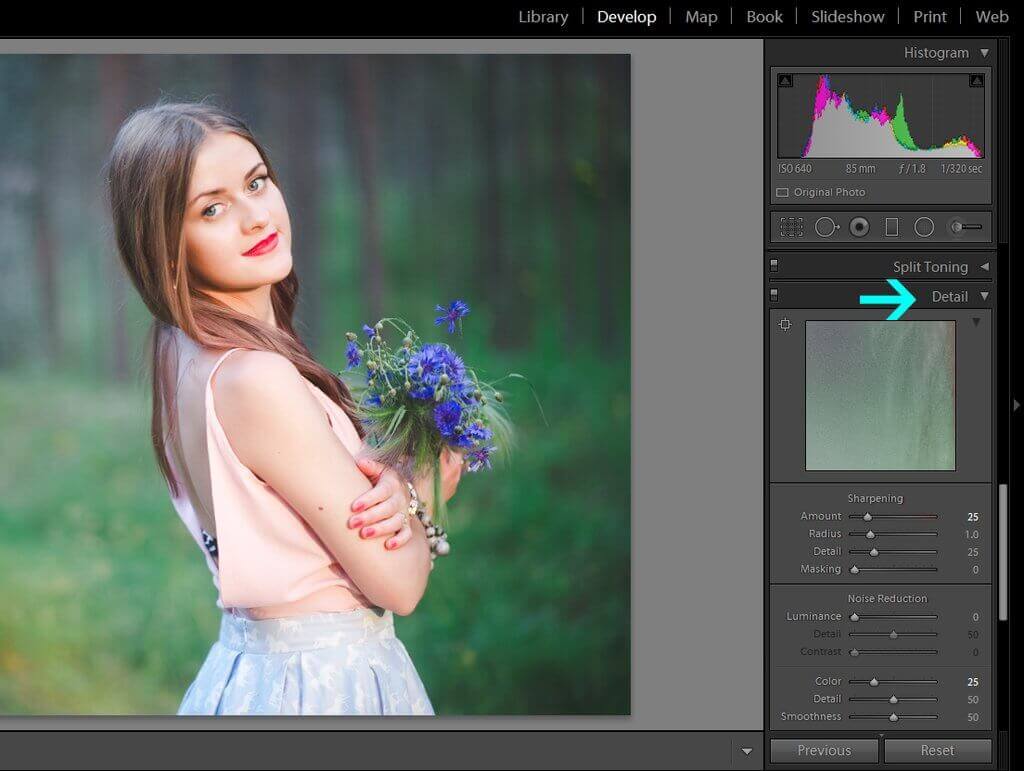
Using the little preview window at the top of the Detail Panel, choose what you’d like to see sharpened and make sure you can see that in the window. You may need to open the preview area with the little disclosure triangle in the upper-right of the panel. You can use the square in the upper-left to choose what you’d like to see in the window. Because that preview is very small, I also choose to zoom in on my image to make sure the sharpening is happening in the right places.

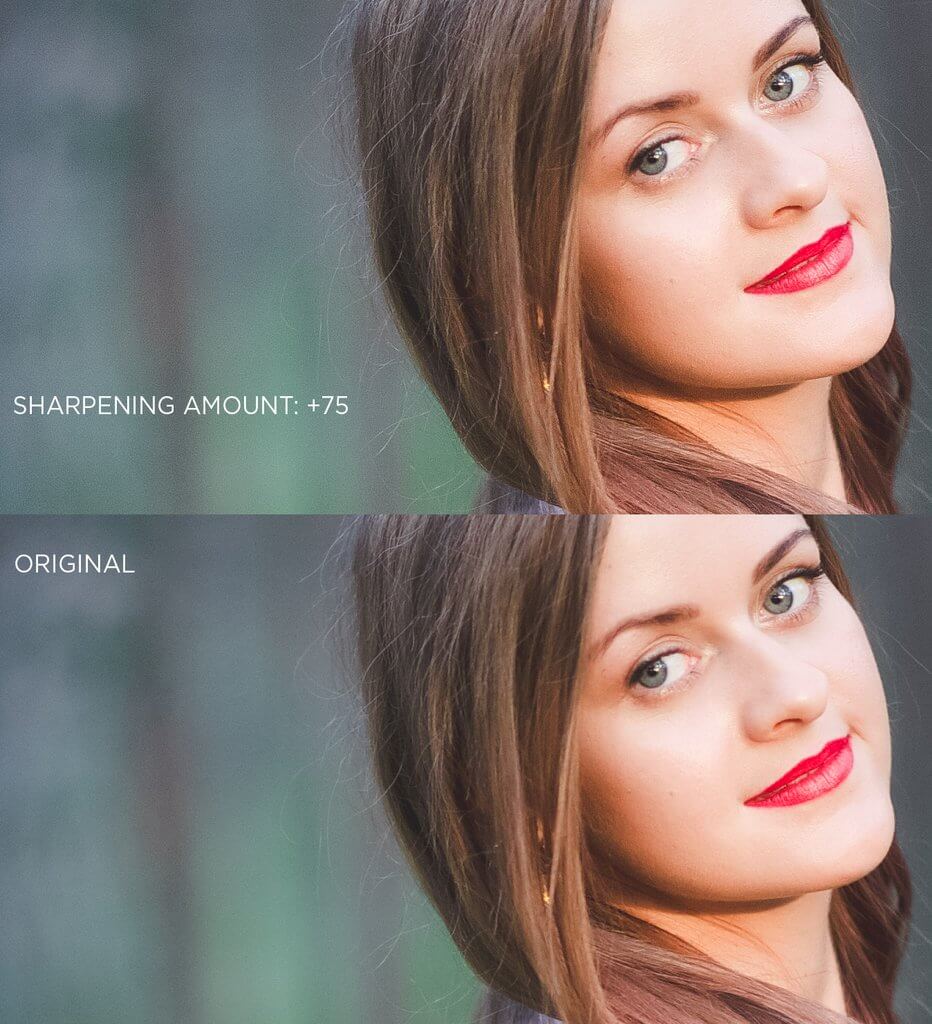
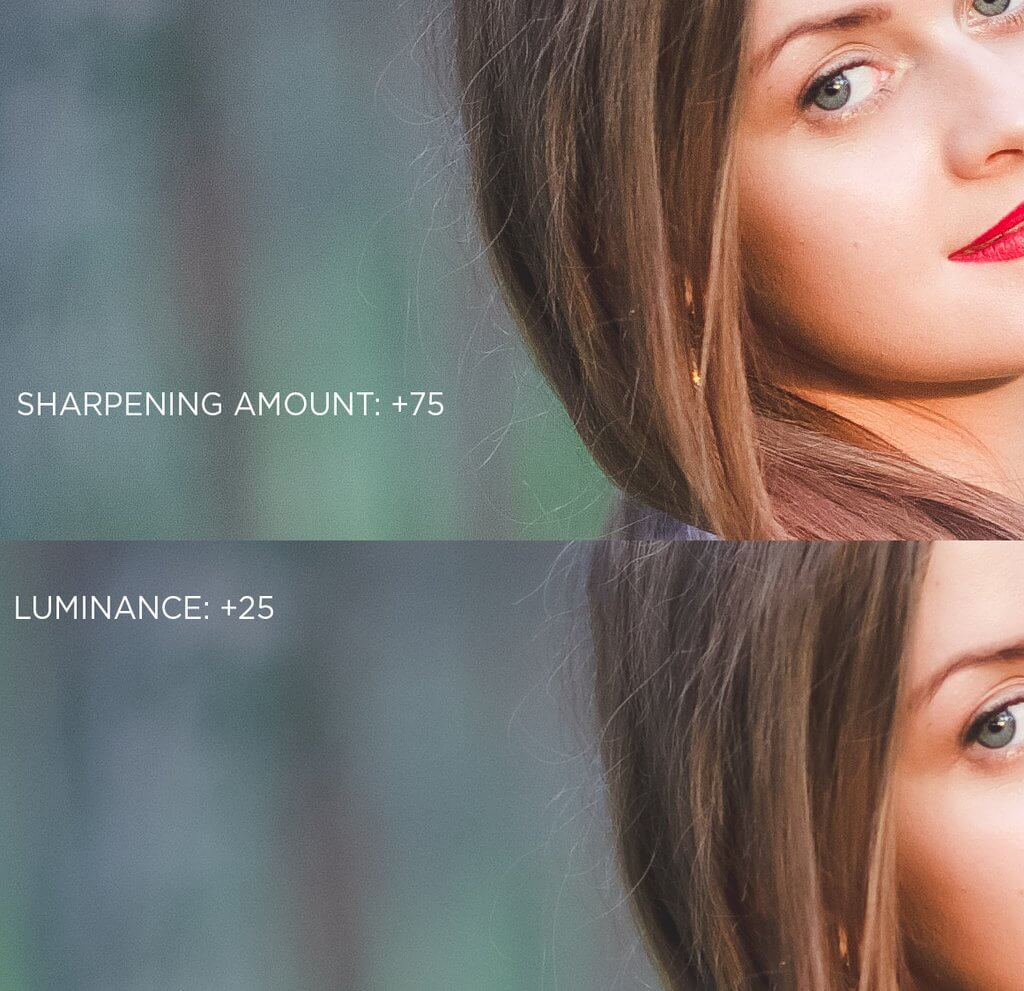
The "Amount" slider will adjust the intensity of the sharpening. Depending on the image you are editing, you may want more sharpening than others. For instance, a landscape image or an image of most anything but faces and skin can tolerate more sharpening. But a portrait of someone -- especially a close up will tolerate much less sharpening.
Remember to hold down the ALT/OPTION key to see more precisely how much sharpening is being applied and where it is being applied.
Think "edges" when adjusting the "Radius" slider for sharpening. This slider is going to determine how far out from the edges the sharpening will be applied. As a general rule, images with small details or images with a lot of skin should have a fairly low number. Images with larger details can tolerate a higher number.
The radius slider is best adjusted while holding down the ALT key. Your photo will go black/gray and you should consider adjusting it until you can see just the main edges of your photo.
The "Detail" slider brings back a little detail after sharpening has been applied. The Detail slider is often used when editing people, but it is even more frequently used with landscape photography because it will dramatically sharpens edgesbecause you will see a more noticeable effect on trees, structures, etc. than you will on a person.
This slider is also best adjusted by holding down the ALT key and dragging the slider until you can start to see some detail from your image.

The "Masking" slider is really a magic slider. It will look for solid or smooth areas and try to mask off the sharpening from those areas and keep it to just the edges. With the other sliders we already talked about above, I typically apply small amounts. However, with this slider I am VERY generous and generally have a very high amount.
Artifacting happens during sharpening. It is those little pixels or blurriness that you see in an image that has been oversharpened. Make sure to zoom into your image and look for artifacting around areas with lots of edges, specifically the eyes.
**Remember: Sharpening should be subtle. There should be a very slight change. Once it looks obvious, you have gone too far.
Should you sharpen on export?
I usually apply one or the other. If I have aleady sharpened my image in Lightroom, I don't sharpen my image on export. This could over-sharpen the photo which is not generally a good thing for an image.
When sharpening on export, the amount of sharpening I apply will depend on whether the image is being exported for printing/handing off to clients or for use on the web.
In general, I use much less sharpening on images that are being exported for the web and just a little more sharpening for images that will be printed.
Day 1. Getting Sharper Photos In Camera (4 Days to Sharper Photos)
Day 2. Understanding Depth of Field & Shutter Speed (4 Days to Sharper Photos)
Day 3. Find Good Light & Use a Good Lens (4 Days to Sharper Photos)
Do you have any questions or comments about How to Lightroom Sharpening? Leave us a comment below - we would LOVE to hear from you! And PLEASE SHARE this post using the social sharing buttons (we really appreciate it)!


Comments