- Lightroom Presets
- Mobile Presets
-
Photoshop
-
Learn
-
Support
-
Install
- Best Sellers
- Blog

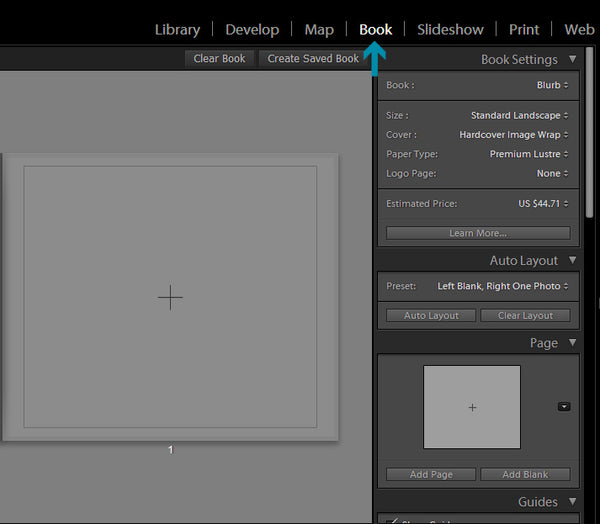
The Lightroom Book Module is a super-user-friendly feature you can use to create photo books quickly in Lightroom. After you create your photo book, you can export it to the web, to print through photo book printers like Blurb, or download the PDF to print on your own.
Here are some tips and trick for using the Lightroom Book Module to create a great photo book in Lightroom!

You will see the Book Module tab here:
Before we get too involved in this tutorial, I want to stress that photo books are not only a matter of personal preference, but the style of your photo book also depends on your style of photography. Keep your own style in mind as you read this tutorial, and use the following presets/advice in a way that matches your style.
I shoot fine art photography and I specialize in complete fiction/storytelling, so my photo books tend to be quirky, but with an overall clean and simple layout. If you are a wedding photographer, consider using something clean, classic and simple. Or, if your photos are documentary, you may want to add more text – this is totally up to you, and we will look at ways of doing this later on in this tutorial.
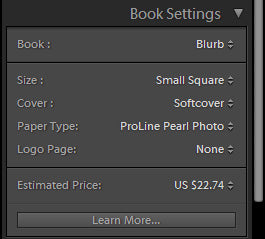
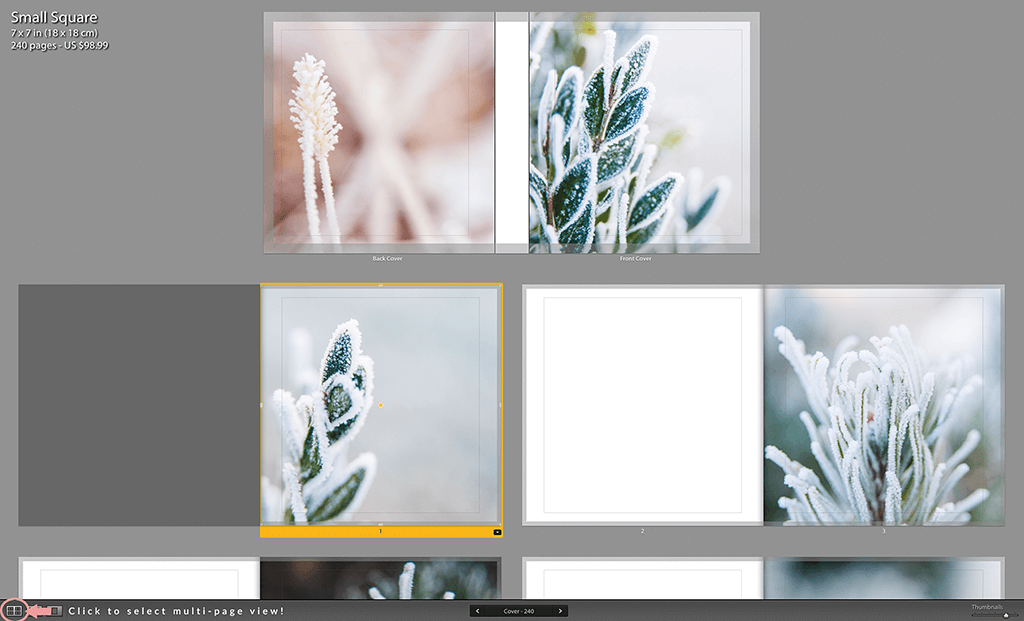
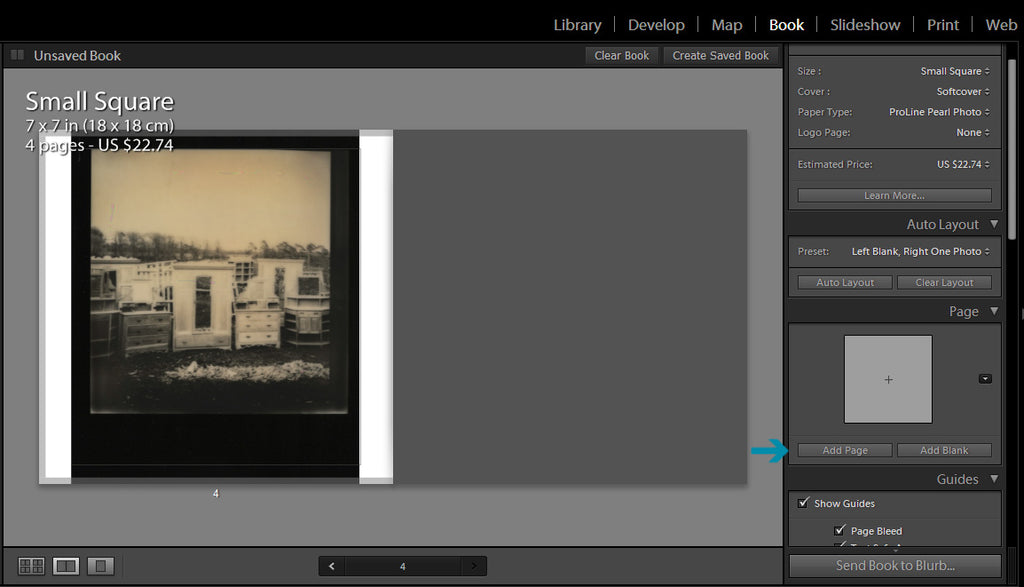
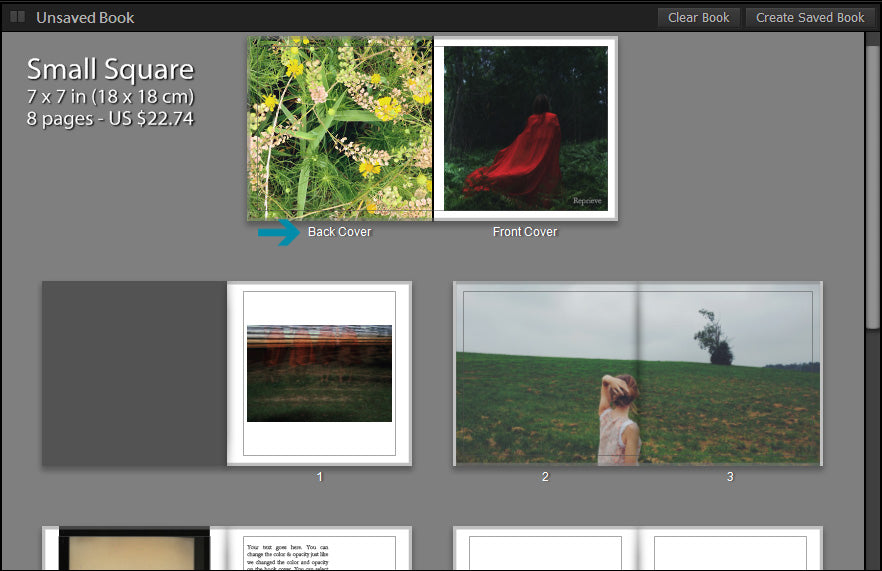
With that said, under Book Settings, you will choose the shape and size of your book. Personally, I love small, square books because they are casual and modern, which is what I have chosen here.
You can choose from various sizes of portrait and landscape layouts, as well the type of paper you wish to have your book printed on:
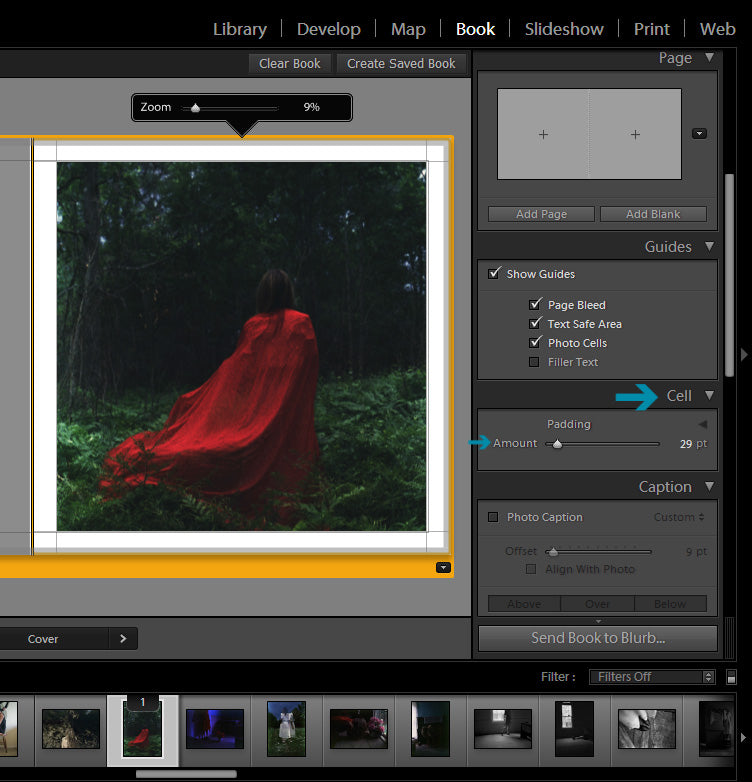
To create a cover using a photo, simply drag the image from your Lightroom catalog onto the cell labeled "cover". You can choose to use a full bleed (which means your image will cover the entire front cover), or you can create a border around your image. In order to add a border, under the Cell module, increase the Padding Amount until you are happy with the size of the border.
Under the Guides panel, be sure that Page Bleed, Text Safe Area, and Photo Cells are checked. This will ensure that you do not place any important information outside of these boundaries, which can result in those areas not being printed on the book, both on the cover and within the pages of the book.
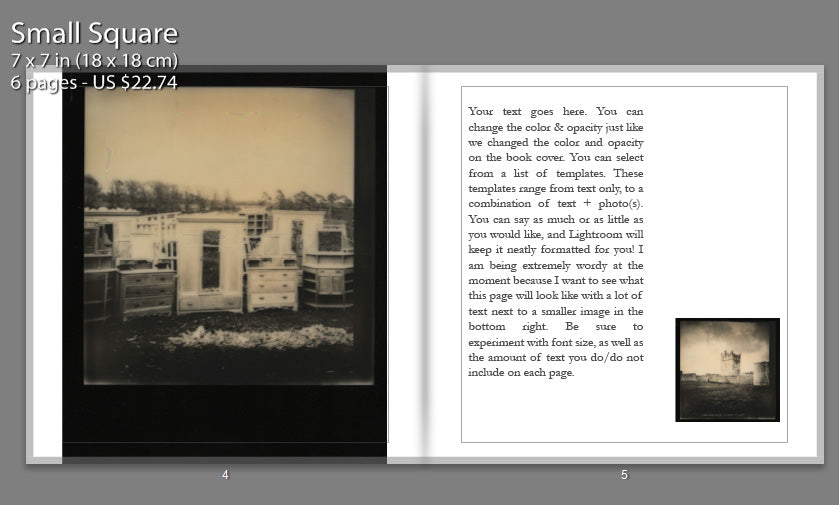
I generally like to add a title to my photobooks, but again, this is personal preference and is completely optional depending on the situation. To add a title, under the Caption panel, check Photo Caption.
Offset will determine where on the image your caption will fall, so move the slider around to experiment with your caption placement. You can also use your spacebar to move the text around:
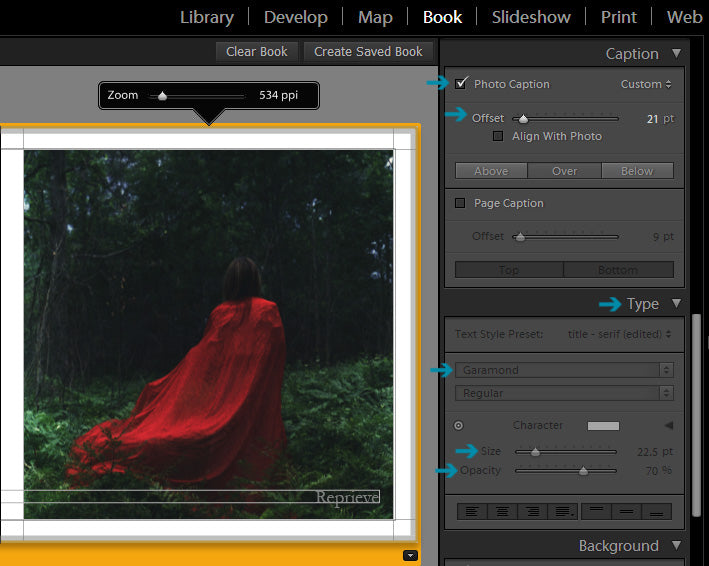
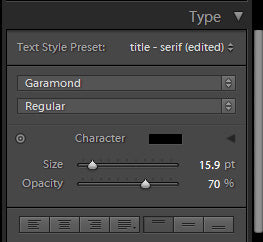
To change the font, color, size and opacity of your caption, scroll down to the Type panel and select from the dropdown menus. I chose to go with a fairly small font size, and reduced the opacity to 70% to make the text blend with the image. I also used a gray color for my font, as opposed to stark white which stands out way too much.
When it comes to details like font size, color, etc., a good rule of thumb is to always err on the side of subtlety.
Now, you are ready to start adding the pages of your book. I like to look at my book overall while I am in the process of editing, and you can do so by selecting Multi Page View, highlighted below. This helps me keep my train of thought organized while putting my book together:
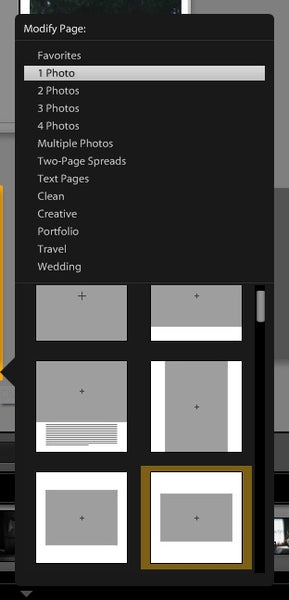
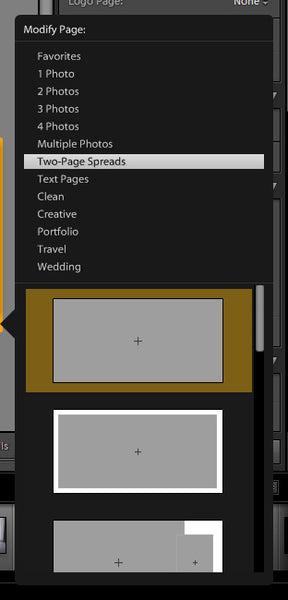
To add your image, click on the cell/page where you want to place the image. Then, click on the dropdown arrow to select from a list of layout presets:
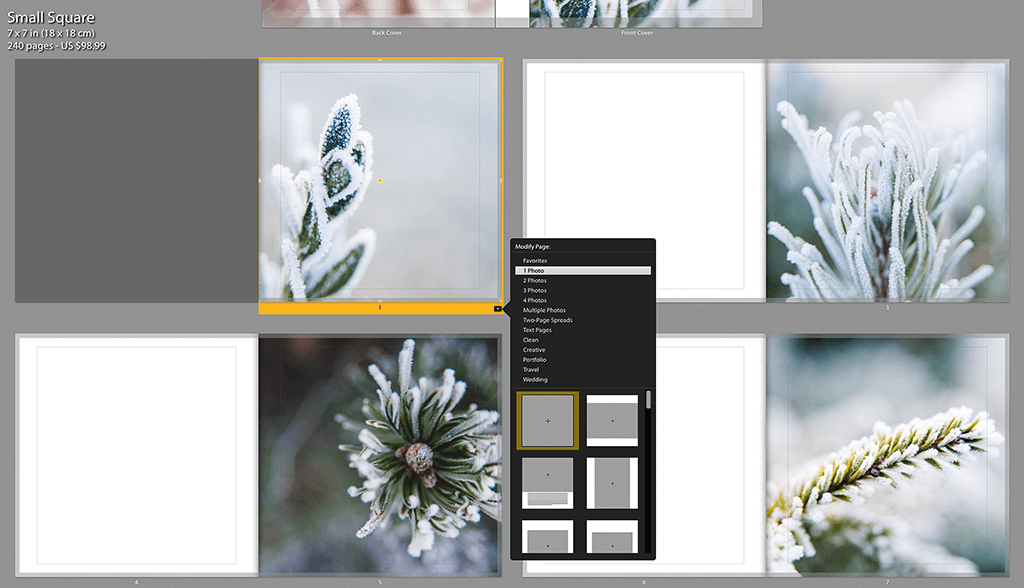
I am starting out with one photo on my first page, but as you can see, Lightroom will give you layouts for 4+ photos per page! There are so many possibilities for layouts, so be sure to look through all the layout presets. For now, I am selecting 1 Photo, and using the landscape orientation preset:
A subtle way to really express your personal style with photo books is to vary the image sizes from page to page. For my 2nd and 3rd pages, I am using a two page spread:

Lightroom automatically generated the page layout below for me to add my next image, but it isn’t exactly the layout I would like to use, because I want two pages of information at this point. To add another photo page, just click Add Page:
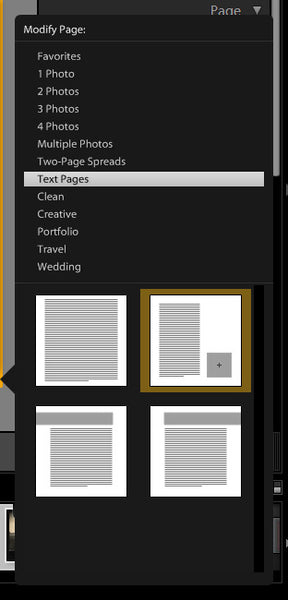
For this page, I want to add an image plus text, and Lightroom has a variety of presets to do this:
Just as I customized the font, size, opacity, and color of the title of the book, I can also customize the text within the book:
If at any time you decide you would like to make further changes to a page, you can return to that page by reverting to Multi Page View, and clicking on the page you would like to edit.
On the page shown below, I decided that I decided to add a back cover, so I dragged and dropped an image to the cell labeled Back Cover. Here, I am using a full bleed for the back cover:
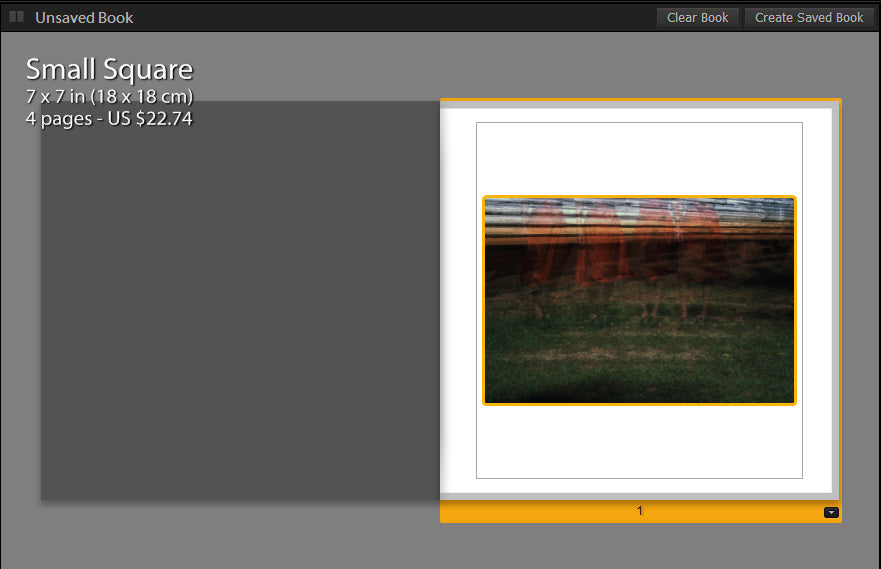
If you are unable to finish your book in one sitting, make sure to click "Create Saved Book" in the top right of your screen.
If you are ready to upload your book to Blurb, you can do so by clicking Send Book to Blurb, and follow the login/signup instructions:

If you are unsure of how you would like your book to look, you can get some ideas and inspiration from the Blurb website – they feature a variety of photo books! For further inspiration, I like to go to the photography section of my local bookstore and library for a hands experience with photo books!
Here is a list of pages you may want to consider including in your photo book:
Do you have any questions or comments about using the Lightroom Book Module? Just leave us a comment below - we would LOVE to hear from you. And PLEASE SHARE this post using the social sharing buttons (we really appreciate it)!


Comments