- Lightroom Presets
- Mobile Presets
-
Photoshop
-
Learn
-
Support
-
Install
- Best Sellers
- Blog

Sometimes, you just are not going to have perfectly blue skies and big, billowy clouds in your photos. Don’t worry, though – there are a few ways to give your skies some zing and add the blue back in, without having to open Photoshop and do a full-on sky replacement.

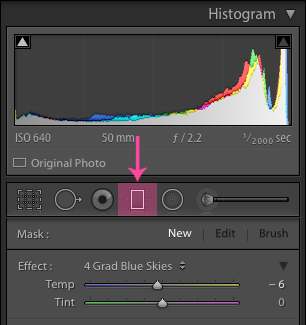
One of the most popular ways of editing skies in Lightroom is using the Graduated Filter tool. It can be found in the Develop Module.
In the image below, we have a typical snow sky – completely white, and, when printed, will have no ink on that section of the print for that very reason: completely white = no ink will be put down by the printer. Plus, blown out skies can be distracting when viewed on a computer monitor.

To apply the Graduated Filter on this image, we are starting at the top, and drag the filter down towards the horizon. You can drag in any direction including diagonally, horizontally or vertically, depending on where the sky is in your image.

This is a Custom Graduated Filter, with the Exposure reduced to -1.88 to darken the sky quite a bit, with the Contrast upped to 22. I decreased the Highlights to -8 and increased the Saturation to +13.
I also added a blue color by clicking the color box down at the bottom of the Graduated Filter panel. This is a fairly drastic adjustment, and you will need to adjust the amount of Exposure and Contrast based on your image.
REMINDER: Any of your brushes can be used as a graduated filter. Some of my favorite brushes that work great on skies include: PRETTY | Blues Bluer from the Clean Edit Portrait Workflow Preset Collection (best on skies that are a little blue but that I want to be more blue), Enchanted Garden | Add Drama from the Enchanted Garden Preset Collection, and Sugar Spice | Add Dark & Detail from the Sugar and Spice Preset Collection.
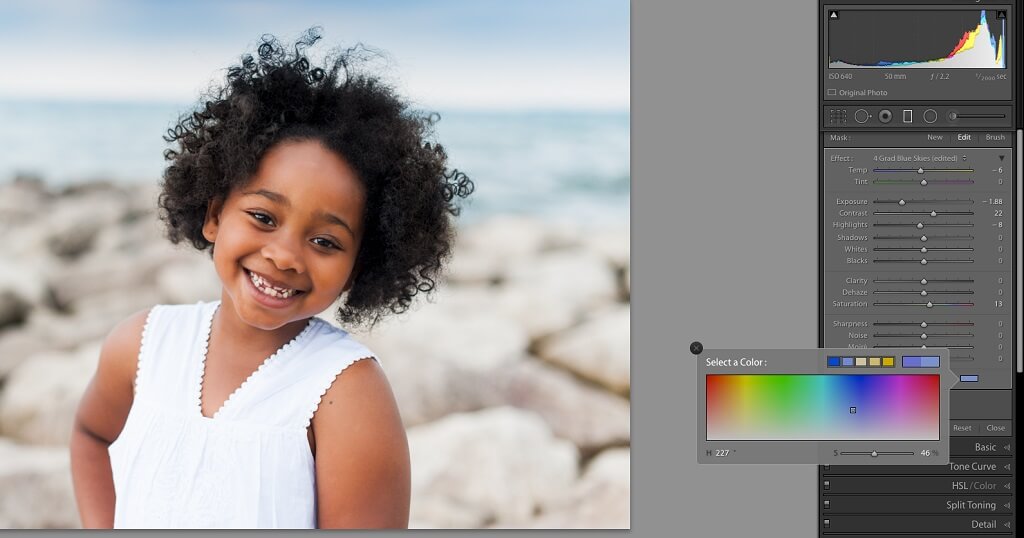
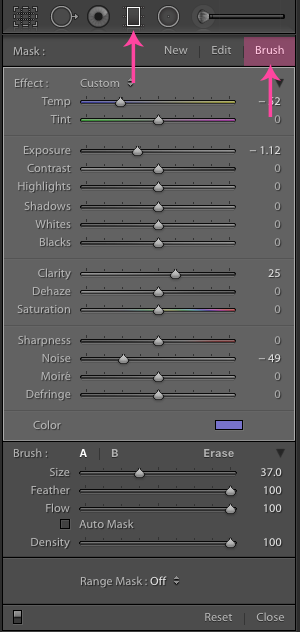
You may be wondering, "If I use a Graduated Filter, how do I keep the adjustment off my subject?" That is a great question. Starting with Lightroom 6, Adobe gave us a brush tool INSIDE the graduated filter that allows us to remove some of the effect from our subject or add more of the effect to other areas of our image.
You can access this tool by clicking on the word "Brush" just to the right of "Edit". It defaults to a brush to add the effect to other areas of your image. You will know this because there is a "+" in the center of the brush.
To access the brush to remove some of the effect from my subject, I simply held down the "alt" key and brushed over the top of her hair with a large brush. Using this too, I removed a bit of this effect from my subjects hair.

An alternative to the Graduated Filter is to add a vignette, which will darken the outer edges of your image, rather than just one section. Under the Effects tab, you will find the Post-Crop Vignetting sliders:
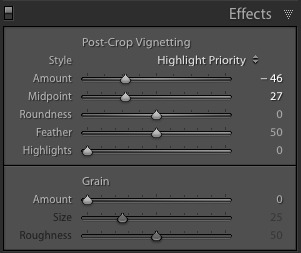
The vignette will add darkness and detail to all the corners/sides of your image while also darkening the sky. Just like the Graduated Filter, vignettes will need to be tailored to fit the image, so be sure to tinker with the amount of Feather, as well as the Midpoint and Amount.
For this example, I went with an intense vignette to illustrate the point, so it would be possible to lighten the vignette just a bit more than I have for this example.

Now, if you are shooting on a day when the skies look great, but your image comes out overexposed, there is still a chance that there is a great sky in your image, you will just need to reduce the Exposure to find the information within the image.

After reducing the Exposure, I was able to recover detail in most of the sky. However, that left my subject much too dark. I used some brushes to brighten her up and adjusted a few other sliders. Unfortunately, this combination leaves her white top with some blown highlights.

Many Lightroom presets contain Graduated Filters, Exposure adjustments, and Vignettes which will enhance the sky in your photos. The sky in the image below is actually not half bad, but we could still give it a little more punch! To do so, I am using a preset from Pretty Presets.
Here is the before:
I chose the Bomb Pop Preset from the Bomb Pop Collection, which added just enough contrast in the sky and the rest of the image.
Here is the after:
These are four great ways to help you enhance and make your skies more blue in Lightroom while also saving you time in the process. My favorite way to enhance the sky (and probably the best option) is #1 above. It gives the most flexibility and options for creating a natural-looking sky.
Like I mentioned above, be sure to play around with the values for each of the adjustments to ensure the right amounts for your image.
Do you have any questions or comments about How to Make the Sky Blue in Lightroom? Leave us a comment below - we would LOVE to hear from you! And PLEASE SHARE this post using the social sharing buttons (we really appreciate it)!


Comments