- Lightroom Presets
- Best Sellers
- Mobile Presets
-
Photoshop
-
Learn
-
Support
-
Install
- Blog
By Jessica Gwozdz on | No Comments

Is studio lighting using a softbox better than an umbrella or a beauty dish? Today I would like to talk about these 3 different studio light modifiers and share some example photos.
So what are some of the main differences between softboxes, umbrellas and beauty dishes?
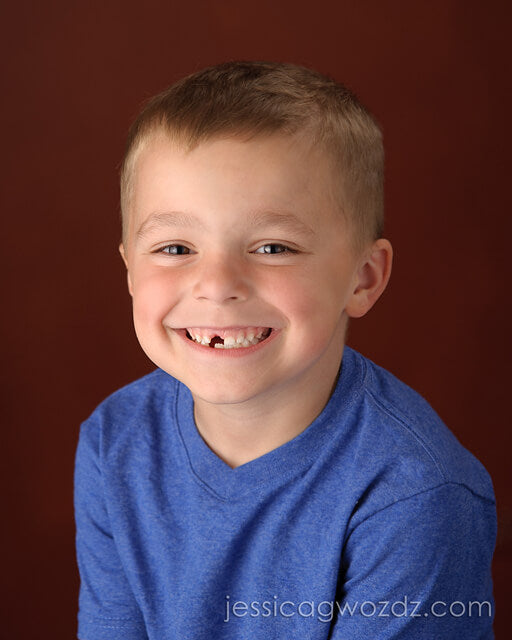
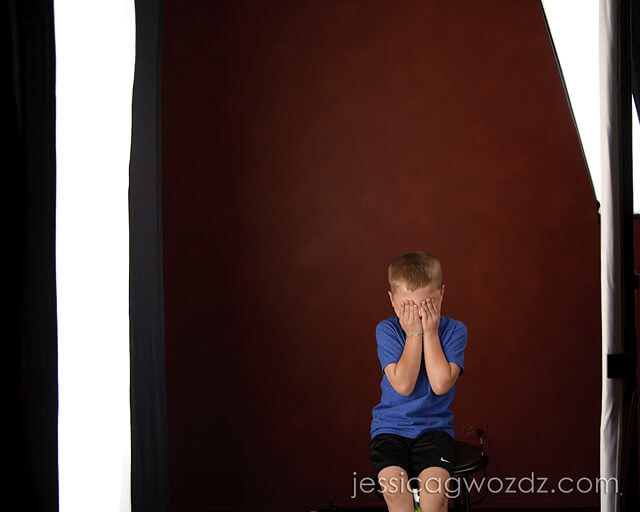
For each studio light setup I will include both a portrait and a pullback. For all cases but one I used the light modifier (ie: softbox, umbrella, or beauty dish) camera left and a giant free-standing reflector camera right.
An important thing to notice is the variation in the amount of spill on the background. Unless otherwise specified, a background light was not used so any light you see on the background is only spill. I used a kicker behind the subject and camera right to help provide separation in the situations where the background became very dark. All images were shot with a Nikon D700, 24-120 f4 lens at ISO 200, 1/200, f 4.5.
I started with a Calumet 60 inch white-interior bounce umbrella.
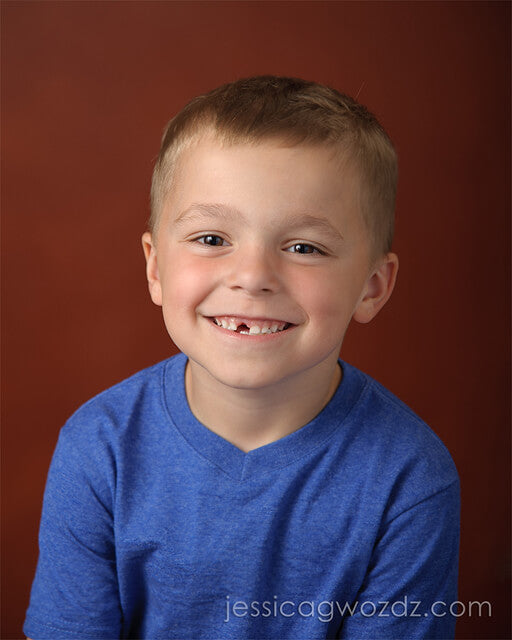
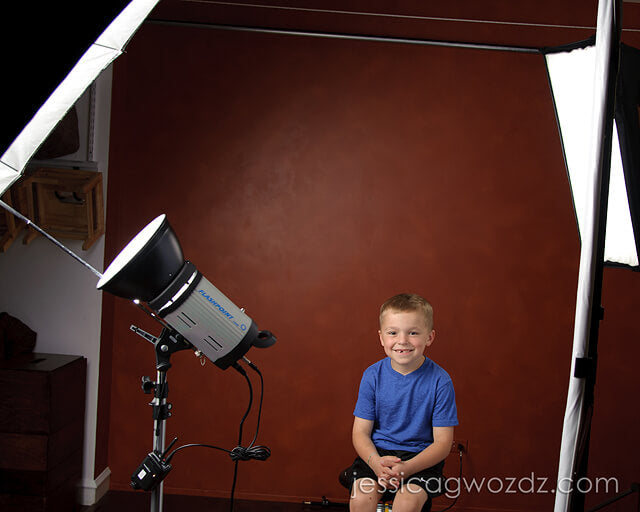
Next I used a shoot thru umbrella. This is the same exact umbrella I used above, however, here I removed the black cover and turned the light around to face my son. This position gives a much cleaner catchlight because you can no longer see the light unit itself reflected in his eyes. You can see what I am talking about later in this tutorial when I share closeups of my son's eyes.
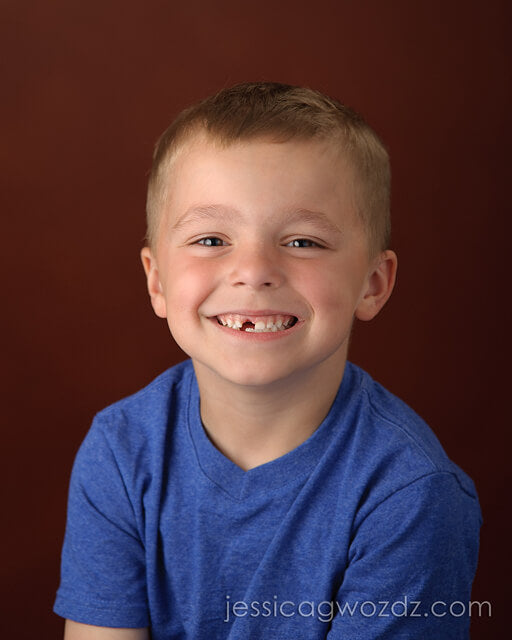
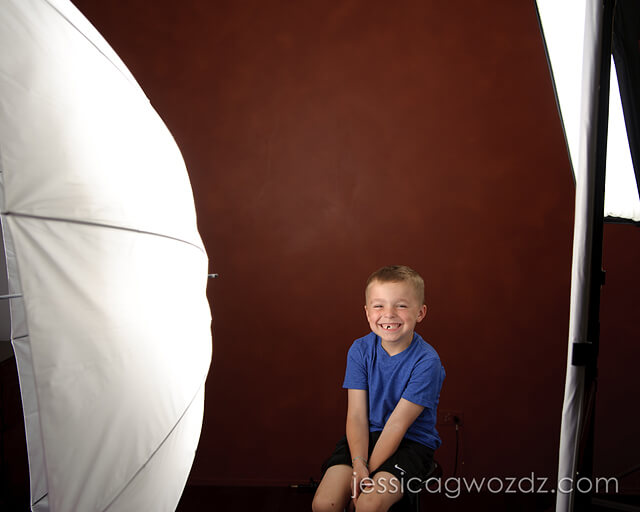
Next I pulled out my Flashpoint 16 inch beauty dish. First I positioned it feathered to the side as I would with a larger modifier like an umbrella or softbox.
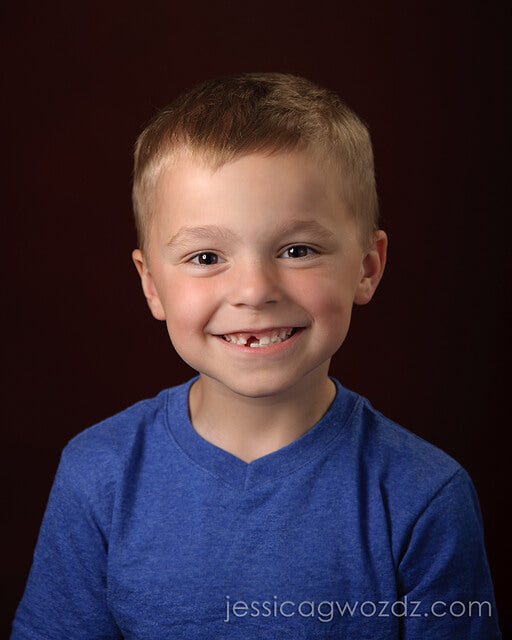
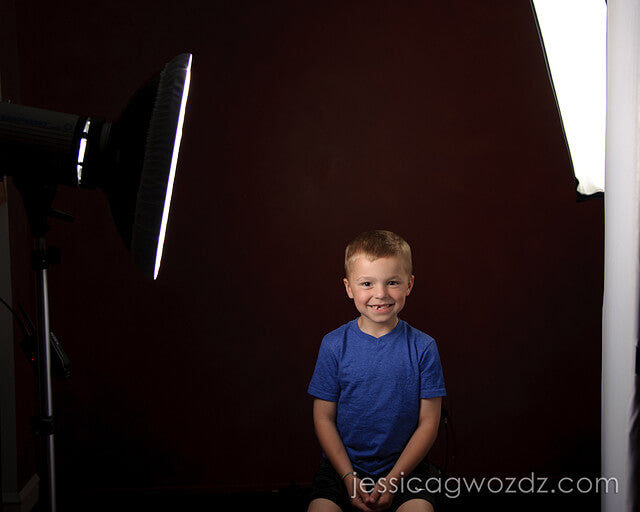
Then I moved it into a more typical glamour position that is used with a beauty dish - high and frontal - just above the camera position.
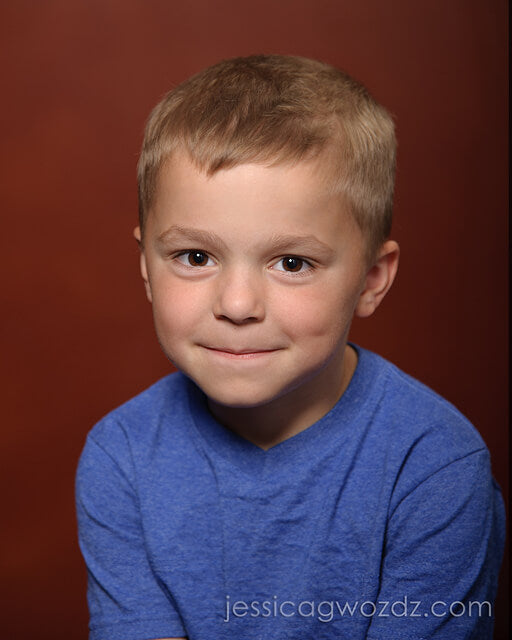
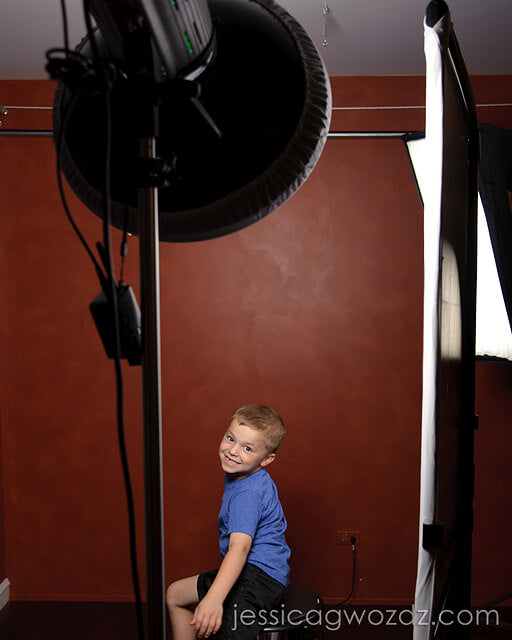
Look at the difference in the background spill when I skim the beauty dish at the subject from the side versus hitting him with the light head-on. Also notice the difference in the shadow pattern on his face.
Finally let's look at a large softbox, my FAVORITE modifier to work with. These were shot with the Larson 4x6 foot softbox.
Now let's look at the difference in the catchlights in the eyes for each scenario.
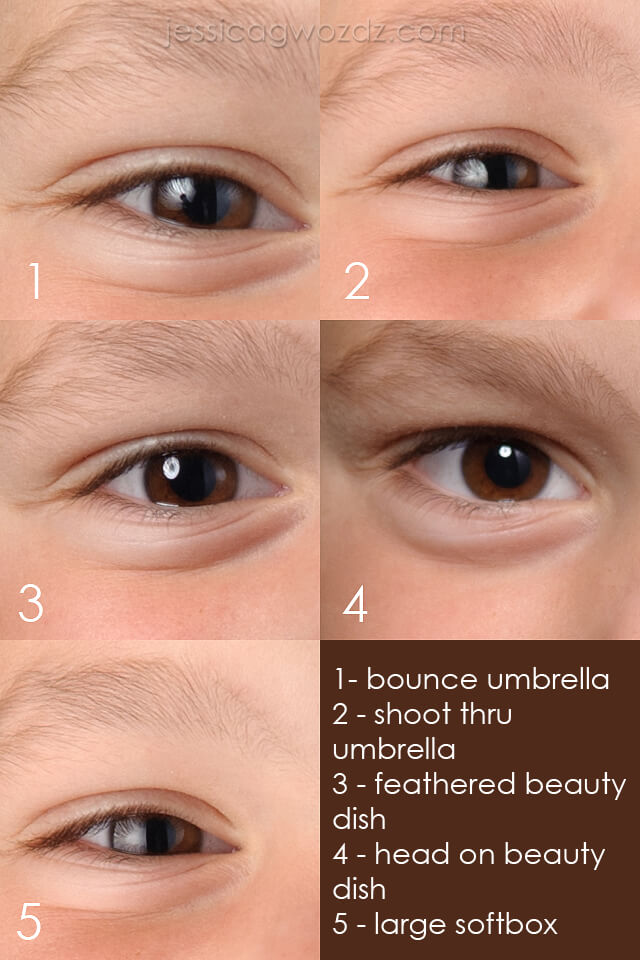
So is any one of these modifiers really "better" than another?
No, I don't think so. They are all tools that can be used effectively to provide different results based on the photographer's creative vision. These modifiers also have different convenience features to consider. I photograph mainly kids and families and I prefer to work with a softbox as my main light. I don't often use a light for fill but when I do, I would choose an umbrella for fill.
I also like having directional control of my main light because I like to light my background separately from my subject. This allows me to do things like underexpose or overexpose for various effects, or even add a colored gel to the background light to completely change the color of the background. If I have too much spill from my main onto my background, it becomes very challenging to vary the look of my background.
I can actually share some example shots of this concept below. The following examples were all shot on the same background as the ones above using the softbox as my main - but I have now added an additional light into the setup: a dedicated light onto the background.




I hope this tutorial has given you some insight into various studio lighting modifiers. Thanks for reading!
If you're looking for some fantastic and easy to use Photoshop Actions for "Clean Editing" of your portrait studio images I highly recommend Pretty Actions Pure Color Workflow. Its an AMAZING collection!
Do you have any questions or comments about Softboxes, Umbrellas or Beauty Dishes? Leave us a comment below - we would LOVE to hear from you! And PLEASE SHARE this tutorial using the social sharing buttons (we really appreciate it)!


Comments