MOTHER'S DAY SALE! UP TO 35% OFF - DISCOUNT APPLIES IN CART.

  • Log in
  • Cart (0)
  • Checkout
Pretty Presets and Pretty Photoshop Actions
  • Lightroom Presets
  • Mobile Presets
  • Photoshop 
    • Photoshop Actions
    • Photoshop Overlays
    • Limited Edition Holiday Collections
  • Learn 
    • Free Lightroom Training
    • Free Photoshop Training
    • Lightroom 101 Workshop
    • Photoshop 101 Workshop
    • Your Pretty Edits
  • Support 
    • About Us
    • Contact Us
    • Order Lookup
    • Lightroom FAQ
    • Photoshop FAQ
  • Install 
    • How to Install Lightroom Presets
    • How to Install Lightroom Brushes
    • How to Install Presets in the Free Lightroom Mobile App
    • How to Sync Lightroom Presets from CC to Mobile
    • How to Install Photoshop Actions
    • How to Install Photoshop Overlays
  • Best Sellers
  • Blog

How to Develop Film at Home

By Anna Gay on August 22, 2018 | No Comments

How to Develop Film at Home

How to Develop Film at Home

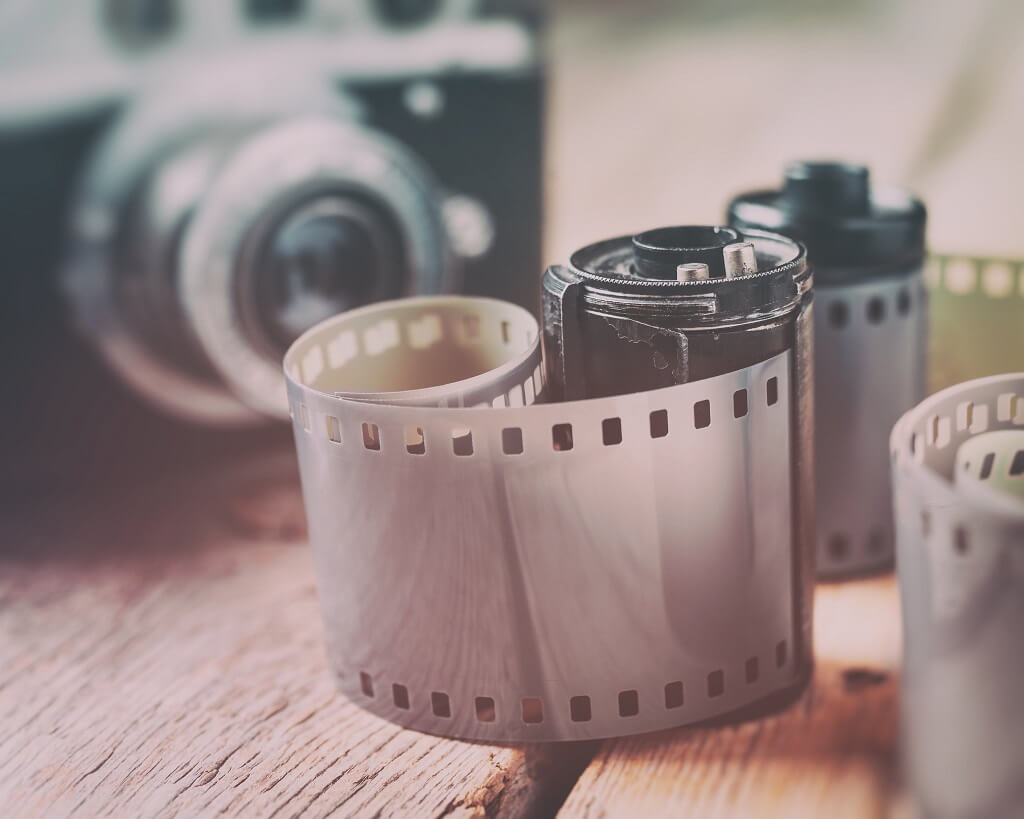
Several months ago, I wrote a post about the benefits of shooting film.  As much as I love shooting real film, one of the major drawbacks in addition to the cost is the increasing rarity of professional labs that have the ability to develop film.

I didn't want to give up on shooting film, so I decided the best option for me was to learn how to develop my film at home.  Besides the lower cost, I was able to achieve much better results than most labs provide. Mission accomplished!

I was so excited with my results, I wanted to put together this post to show you how easy, inexpensive (and extremely fun!) developing film really is!

Film Photoshop Actions

Let me start off by telling you - you do not need a darkroom, and you do not need a bunch of expensive equipment.  For years, I was under the impression that developing film was an expensive, complicated process, akin to rocket science.  Not so!  Developing film is ridiculously easy, and a rewarding experiment that will help you become an even better photographer.

Like I said, developing your film at home is so much easier than you realize.  If you can cook an easy dinner, you can develop film!  For this post, we will work exclusively with developing 35mm black and white film.  Color film is a more complicated process, so let's start with with classic, beautiful, black and white film developing!

Developing Black & White Film at Home

First, let’s talk about what supplies you will need:

Tools You Will Need for Your Home Film Developing Kit

Household Items

  • 1 Can opener
  • Scissors
  • 1 Clean sponge, cut in half
  • 1 Hanger
  • 2 Clothespins, or clothes clips
  • 1 Measuring Cup (2 cups)
  • Dosing syringe, in milliliters
  • White vinegar
  • At least 2 gallons of filtered (I repeat, filtered) room temperature water

Developing Supplies

  • R09 Developer
  • Ilford Rapid Fixer
  • Kodak Photo Flo
  • Paterson Developing Tank, with Reel (these can be purchased new, or used for a great price on eBay).

35mm Film Developing at Home

Important Point: Make Sure You Read This

Before we go any further, I need to stress to you an extremely important point.  So important, that it requires bold and all caps: YOU MUST HAVE A LIGHT TIGHT ROOM!

I do not have an official “darkroom” in my house, so I use the one room that does NOT have a window – the upstairs bathroom (so glamorous, I know).  I also seal the door by stuffing dark towels around the edges of the door frame.

This may sound extreme, but any light at all can, and will, destroy your undeveloped film.  If you do not have a light tight room, you will want to invest in a changing bag, which is a completely safe, light tight alternative.  Now that we are clear on the importance of a light tight room, let’s get started.

Step 1: Loading Your Film into Your Developing Tank

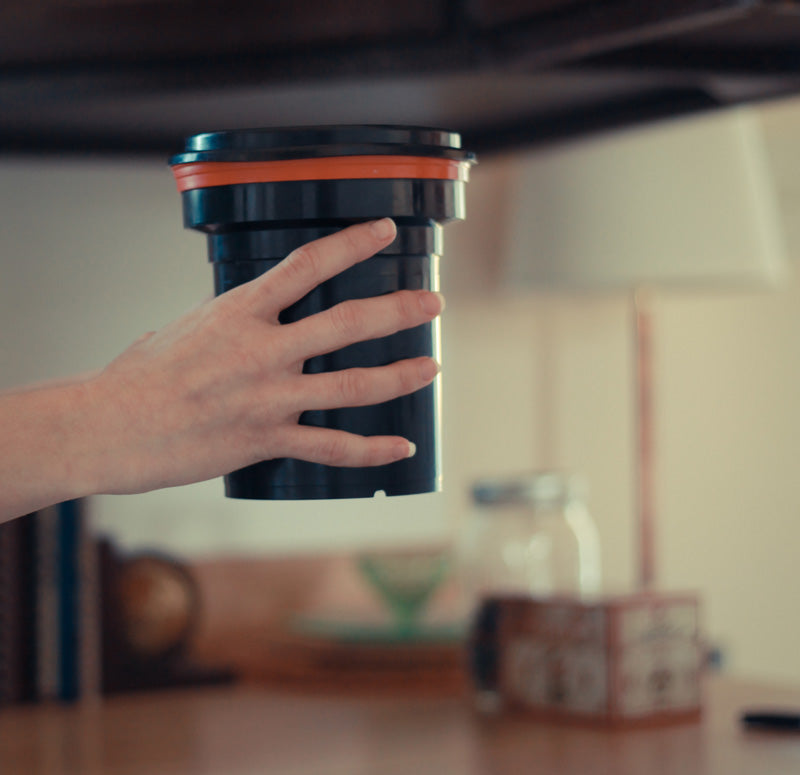
You will be happy to know that this is the only tricky part of developing your film at home, and honestly, it just takes a little bit of practice.  You need to be able to focus, relax, and do this in the dark.  Here is a video that demonstrates how to load your film onto the reel, and then install it in the developing tank.

Using a Film Developing Tank Video Demonstration

This is the only step that you must do in your light tight room.  Once you get the film onto the reel and in your developing tank, you can do everything else in the light, because your developing tank will be light tight.

Again, Step 1 has to be done in total darkness!

Step 2: Mixing the Chemicals

Here are the measurements for each of your chemicals, in the order in which you will use them:

  1. Presoak – 500ml (2 cups) water
  2. Rodinal (developer) – 5ml (use dosing syringe) developer, 500ml water
  3. Stop – 1 capful white vinegar, 500ml water
  4. Ilford (fixer) – 100ml fixer, 400ml water
  5. Rinse – 1500ml water
  6. Photo Flo (wetting agent) – 500ml water, 2-3 drops wetting agent

How to Develop Film at Home

Step 3: Applying the Chemicals, Cook Times

You are now ready to rock and roll! Here is the process:

  • Pour presoak into the developing tank.  Leave presoak in for 5 minutes, gently agitating for the first 30 seconds.  When you agitate, gently rock the tank back-and-forth (see demonstration photos below).  When 5 minutes have elapsed, pour out the presoak.

How to Develop Your Film at Home_agitate the film

How to Develop Film at Home_agitate film

  • While your presoak is working, mix your developer (5ml Rodinal, 500ml of water).  It is important to wait as long as possible before mixing the developer, as it begins working the minute it comes in contact with water.
  • Pour in developer.  Leave developer in for 15 minutes, agitating 10 seconds for the first 2 minutes.  It will go like this: Pour in developer, agitate 10 seconds, let stand for 50 seconds, agitate 10 seconds, let stand for 13:50 minutes.
  • When the first 15 minutes have elapsed, repeat the above process, for a total development time of 30 minutes.  Pour out the developer.
  • Pour in stop (vinegar).  Agitate constantly for 1 minute.  Pour out the stop.
  • Pour in fixer (Ilford).  Agitate constantly for 2 minutes.  Pour out the fixer.
  • Rinse – Pour in 500ml water, agitate for 5 seconds, pour out the water.  Do this two more times, agitating 10 seconds, and then 20.
  • Remove film from tank.
  • Wetting Agent (Photo Flo) – Leaving film on reel, gently bob and circle film in wetting agent for 30 seconds.
  • Gently unwind film from reel.  Using your clothes clips and hanger, clip one end of the film to the hanger, and add one clip to the bottom of your film in order to anchor it.  You want your film to dry straight.
  • Using your clean sponge, (very) gently dry each side of the film.  You may want to dampen the sponge a tiny bit so as to not scratch the film.
  • Let film dry for several hours.

How to Develop Your Own Film at Home

Step 4: Dispose of Chemicals

Let’s talk about how to dispose of your chemicals.  There is a lot of debate out there about how to dispose of the chemicals, mainly the fixer, because of the silver content.  Most fixers nowadays are ammonium thiosulphate based, so they are fairly benign compared to the fixers used in the past.  Your best bet will be to save your used fixer, and either take it to a landfill, or a photo lab so they can run it through their filters.  Sure, people pour much worse down their drains (ammonia, for example) but playing it safe when disposing of heavy metals is always a good habit.

Step 5: Scan or Print Your Film

Now that your film has been developed, you have a couple of options:

  1. You can make your own prints, which is a separate post entirely!

  2. You can have your film scanned to a disc at either your local photo lab, or, if your scanner is capable of scanning negatives, you can scan your own.

You are done!!  I hope this tutorial has been of assistance to you in developing your film and that you were able to learn something (or a few things) along the way!

Do you have any questions or comments Developing Film at Home>?  Leave us a comment below - we would LOVE to hear from you!  And PLEASE SHARE this post using the social sharing buttons (we really appreciate it)!

Portrait Photoshop Actions

Related Articles

Beginners Guide to Photoshop's Generative Fill Tool
Discover how to use Photoshop's Generative Fill Tool to effortlessly expand and enhance your images.  This step-by-step
Read More
Pretty Presets & Actions 2024 Photoshop Scholarship Winner
Pretty Presets & Actions congratulates our 2024 Photoshop Scholarship Winner!  See who won and find out how to apply
Read More
How to Start a Boudoir Photography Business
Ready to start your boudoir photography business?  Learn key tips for building a portfolio, hosting mini sessions, choos
Read More
Pretty Presets for Lightroom author Anna Gay

Anna Gay

Portrait Photographer

Anna Gay is a portrait photographer based in Athens, GA and the author of the dPS ebook The Art of Self-Portraiture. She also designs actions and textures for Photoshop. When she is not shooting or writing, she enjoys spending time with her husband, and their two cats, Elphie and Fat Cat.

August 22, 2018

Comments

INFO & SUPPORT
  • Lightroom FAQ
  • Photoshop FAQ
  • Contact Us
  • Order Lookup
  • Log Into Account
Sign up for great freebies and tutorials

Get notified about promotions, giveaways and webinars before they happen!

Join the pretty Community

Come join the #1 Lightroom & Photoshop Facebook Group to help you learn how to edit your photos more confidently today!


  • About Us
  • Testimonials
  • Policies
  • Terms of Service
  • Write for Pretty
  • Lightroom Scholarship
  • Photoshop Scholarship

© 2025 Pretty Presets for Lightroom | support@prettypresets.com (406) 298-3006

  •  
  •  
  •  
One or more of the items in your cart is a recurring or deferred purchase. By continuing, I agree to the cancellation policy and authorize you to charge my payment method at the prices, frequency and dates listed on this page until my order is fulfilled or I cancel, if permitted.